Editor.js
Integrate Editor.js with Strapi

Why Use Editor JS?
Editor JS or Editor.js is a modern block-based content editor that, when combined with Strapi, revolutionizes your content management system. Unlike traditional WYSIWYG editors, Editor JS breaks content into individual blocks—paragraphs, headings, lists, etc.—that you can easily manipulate, rearrange, and customize within Strapi.
Here's why integrating Editor JS with Strapi deserves your attention—and staying up-to-date with the latest updates to Strapi ensures you're leveraging all its features:
- Block-based editing approach that provides an intuitive and flexible content creation experience within Strapi
- Clean, JSON-structured data output that's easy to parse and use across different platforms when managed through Strapi. If you're interested in understanding JSON and how it works with Strapi, this resource can be helpful.
- Visual WYSIWYG experience that remains accessible to non-technical users while producing structured content in Strapi. Strapi's recent updates introduce drag-and-drop functionality within the new Rich-Text Field called Content Blocks, enhancing the ease of rearranging and managing content blocks for more intuitive content creation.
- High customizability and extensibility through a rich ecosystem of tools and plugins compatible with Strapi. For instance, incorporating Strapi security plugins can enhance your application's safety.
For all the nitty-gritty details about features, implementation, and customization options, check out the official Editor JS documentation.
Why Use Strapi?
Strapi is the leading open-source headless CMS offering features, like customizable APIs, role-based permissions, multilingual support, etc. It simplifies content management and integrates effortlessly with modern frontend frameworks.
Explore the Strapi documentation for more details.
Strapi 5 Highlights
The out-of-the-box Strapi features allow you to get up and running in no time:
- Single types: Create one-off pages that have a unique content structure.
- Draft and Publish: Reduce the risk of publishing errors and streamline collaboration.
- 100% TypeScript Support: Enjoy type safety & easy maintainability
- Customizable API: With Strapi, you can just hop in your code editor and edit the code to fit your API to your needs.
- Integrations: Strapi supports integrations with Cloudinary, SendGrid, Algolia, and others.
- Editor interface: The editor allows you to pull in dynamic blocks of content.
- Authentication: Secure and authorize access to your API with JWT or providers.
- RBAC: Help maximize operational efficiency, reduce dev team support work, and safeguard against unauthorized access or configuration modifications.
- i18n: Manage content in multiple languages. Easily query the different locales through the API.
- Plugins: Customize and extend Strapi using plugins.
Learn more about Strapi 5 feature.
Setup Strapi 5 Headless CMS
We are going to start by setting up our Strapi 5 project with the following command:
🖐️ Note: make sure that you have created a new directory for your project.
You can find the full documentation for Strapi 5 here.
Install Strapi
npx create-strapi-app@latest serverYou will be asked to choose if you would like to use Strapi Cloud we will choose to skip for now.
 Strapi   v5.6.0 🚀 Let's create your new project

To deploy your project, create a new project on the Strapi Cloud dashboard.

? Please log in or sign up.
  Login/Sign up
❯ Skip
After that, you will be asked how you would like to set up your project. We will choose the following options:
? Do you want to use the default database (sqlite) ? Yes
? Start with an example structure & data? Yes <-- make sure you say yes
? Start with Typescript? Yes
? Install dependencies with npm? Yes
? Initialize a git repository? Yes
Once everything is set up and all the dependencies are installed, you can start your Strapi server with the following command:
cd server
npm run develop
You will be greeted with the Admin Create Account screen.
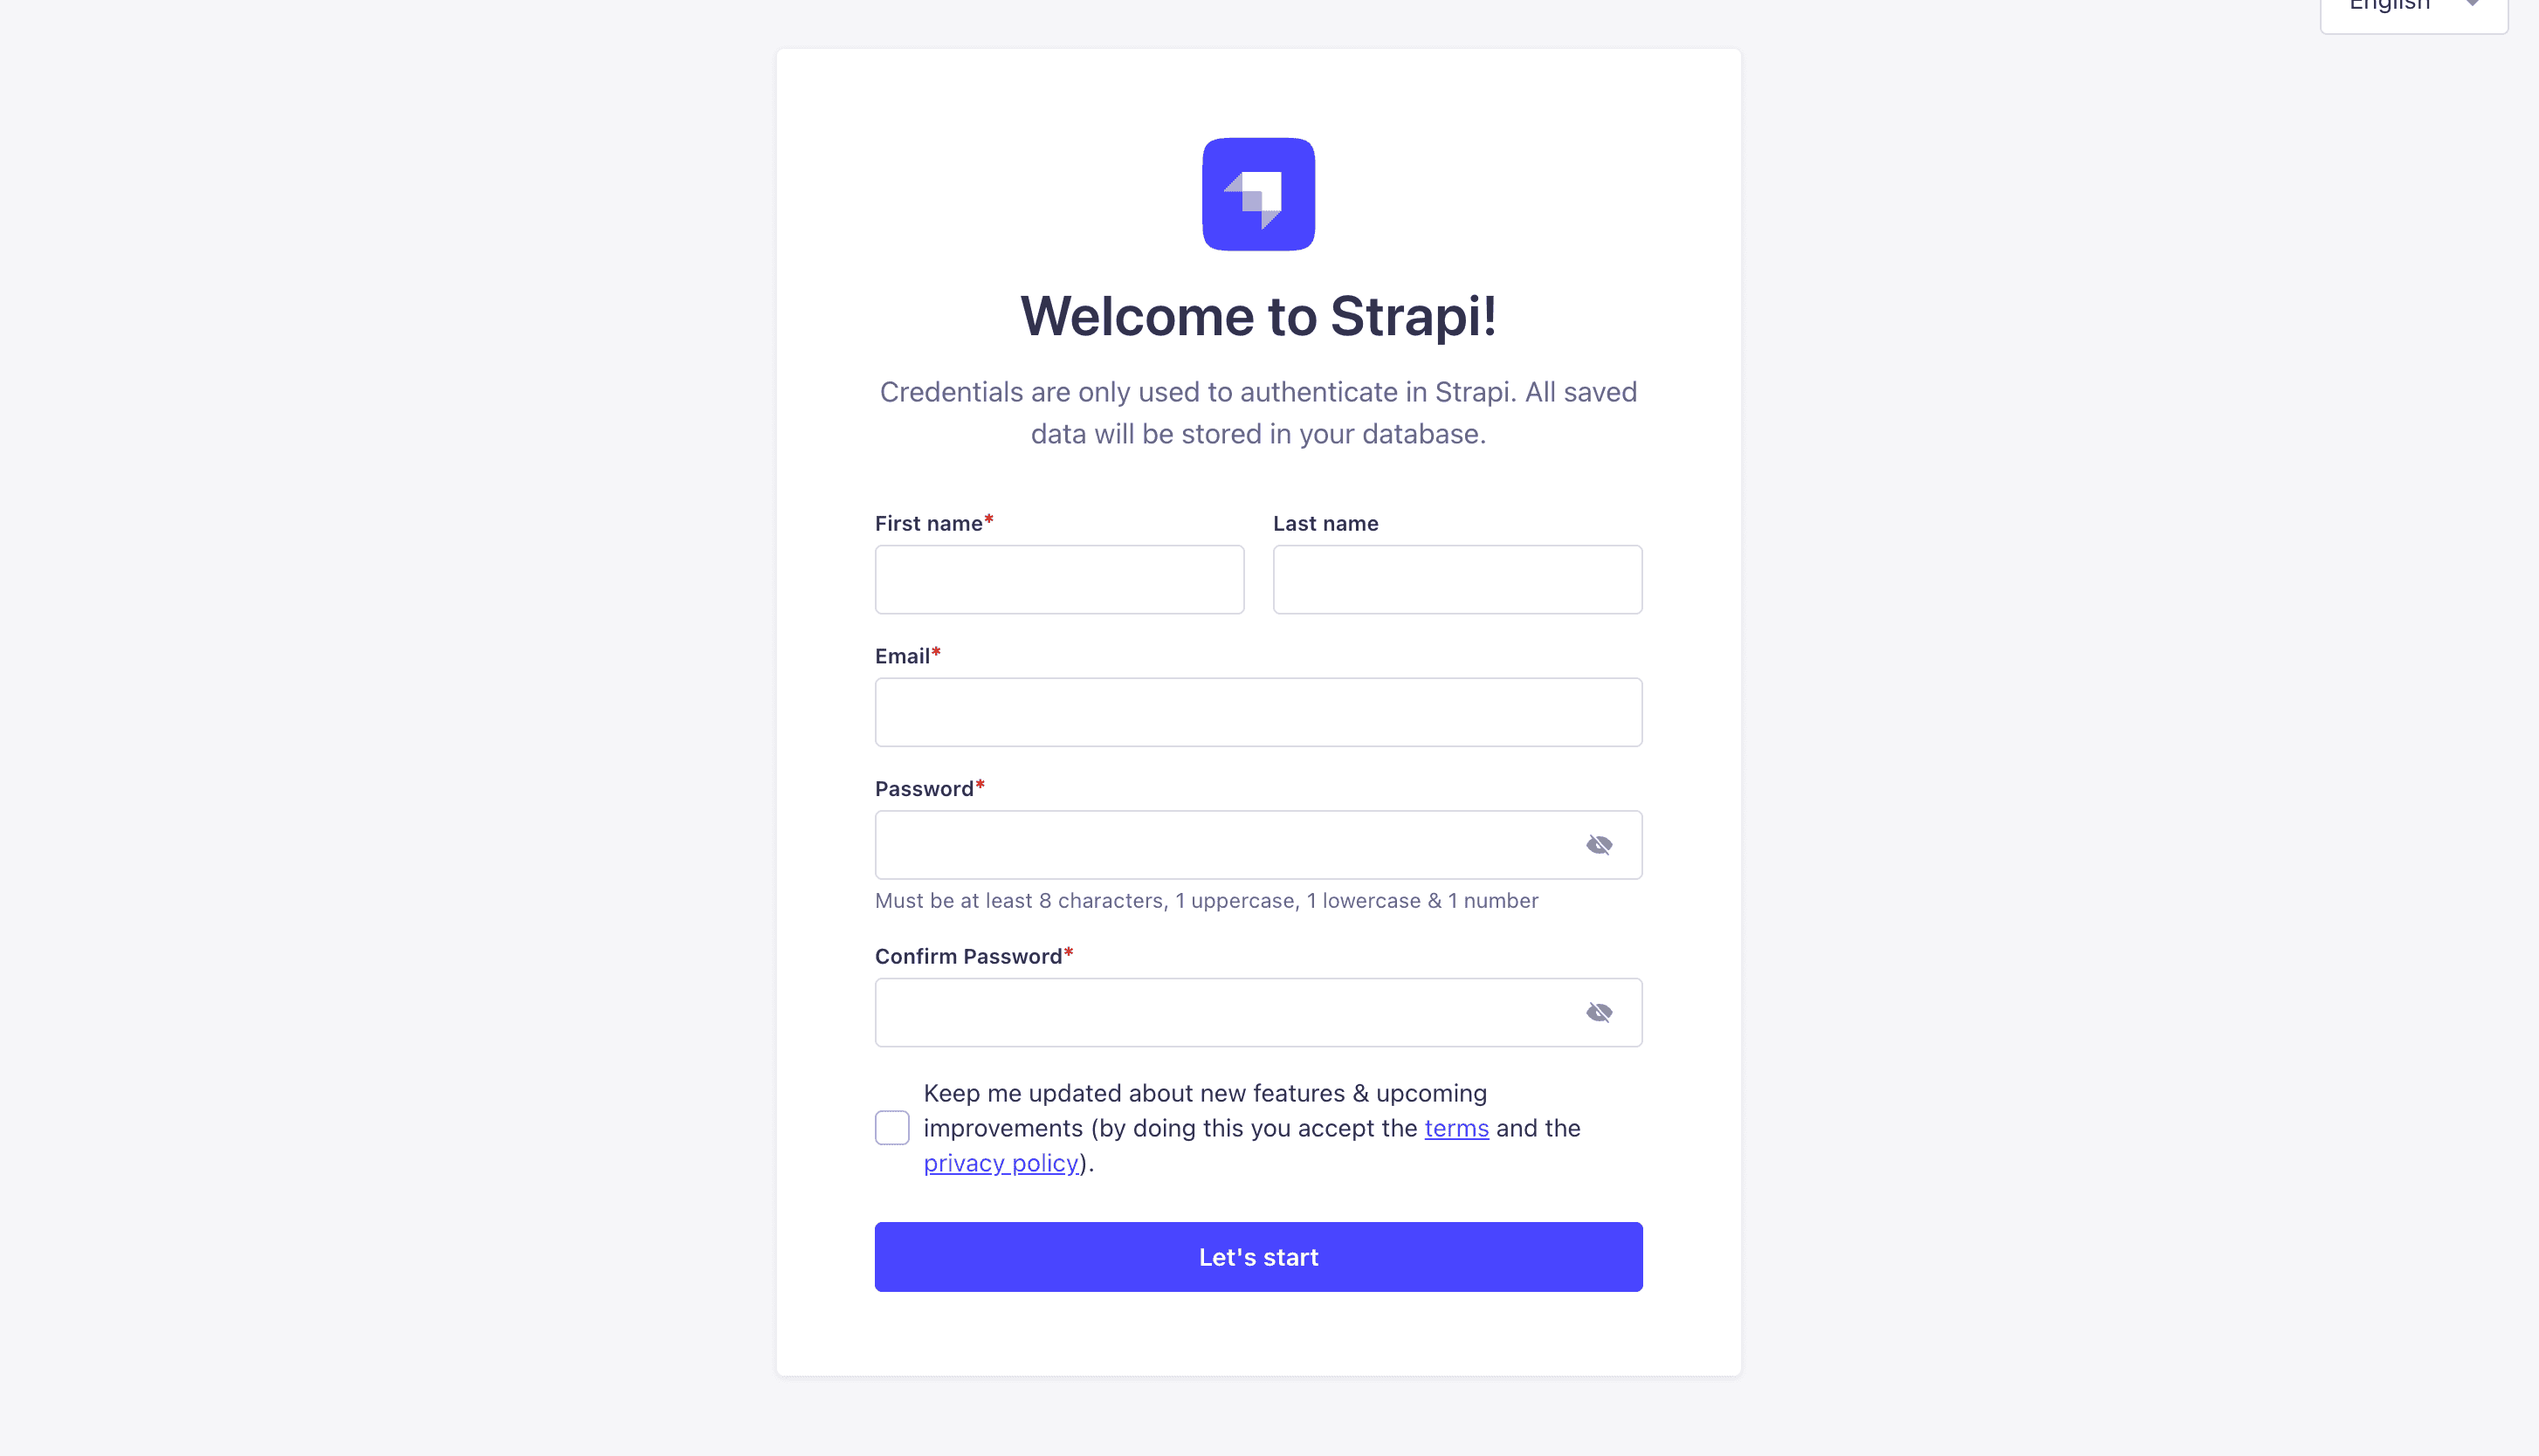
Go ahead and create your first Strapi user. All of this is local so you can use whatever you want.
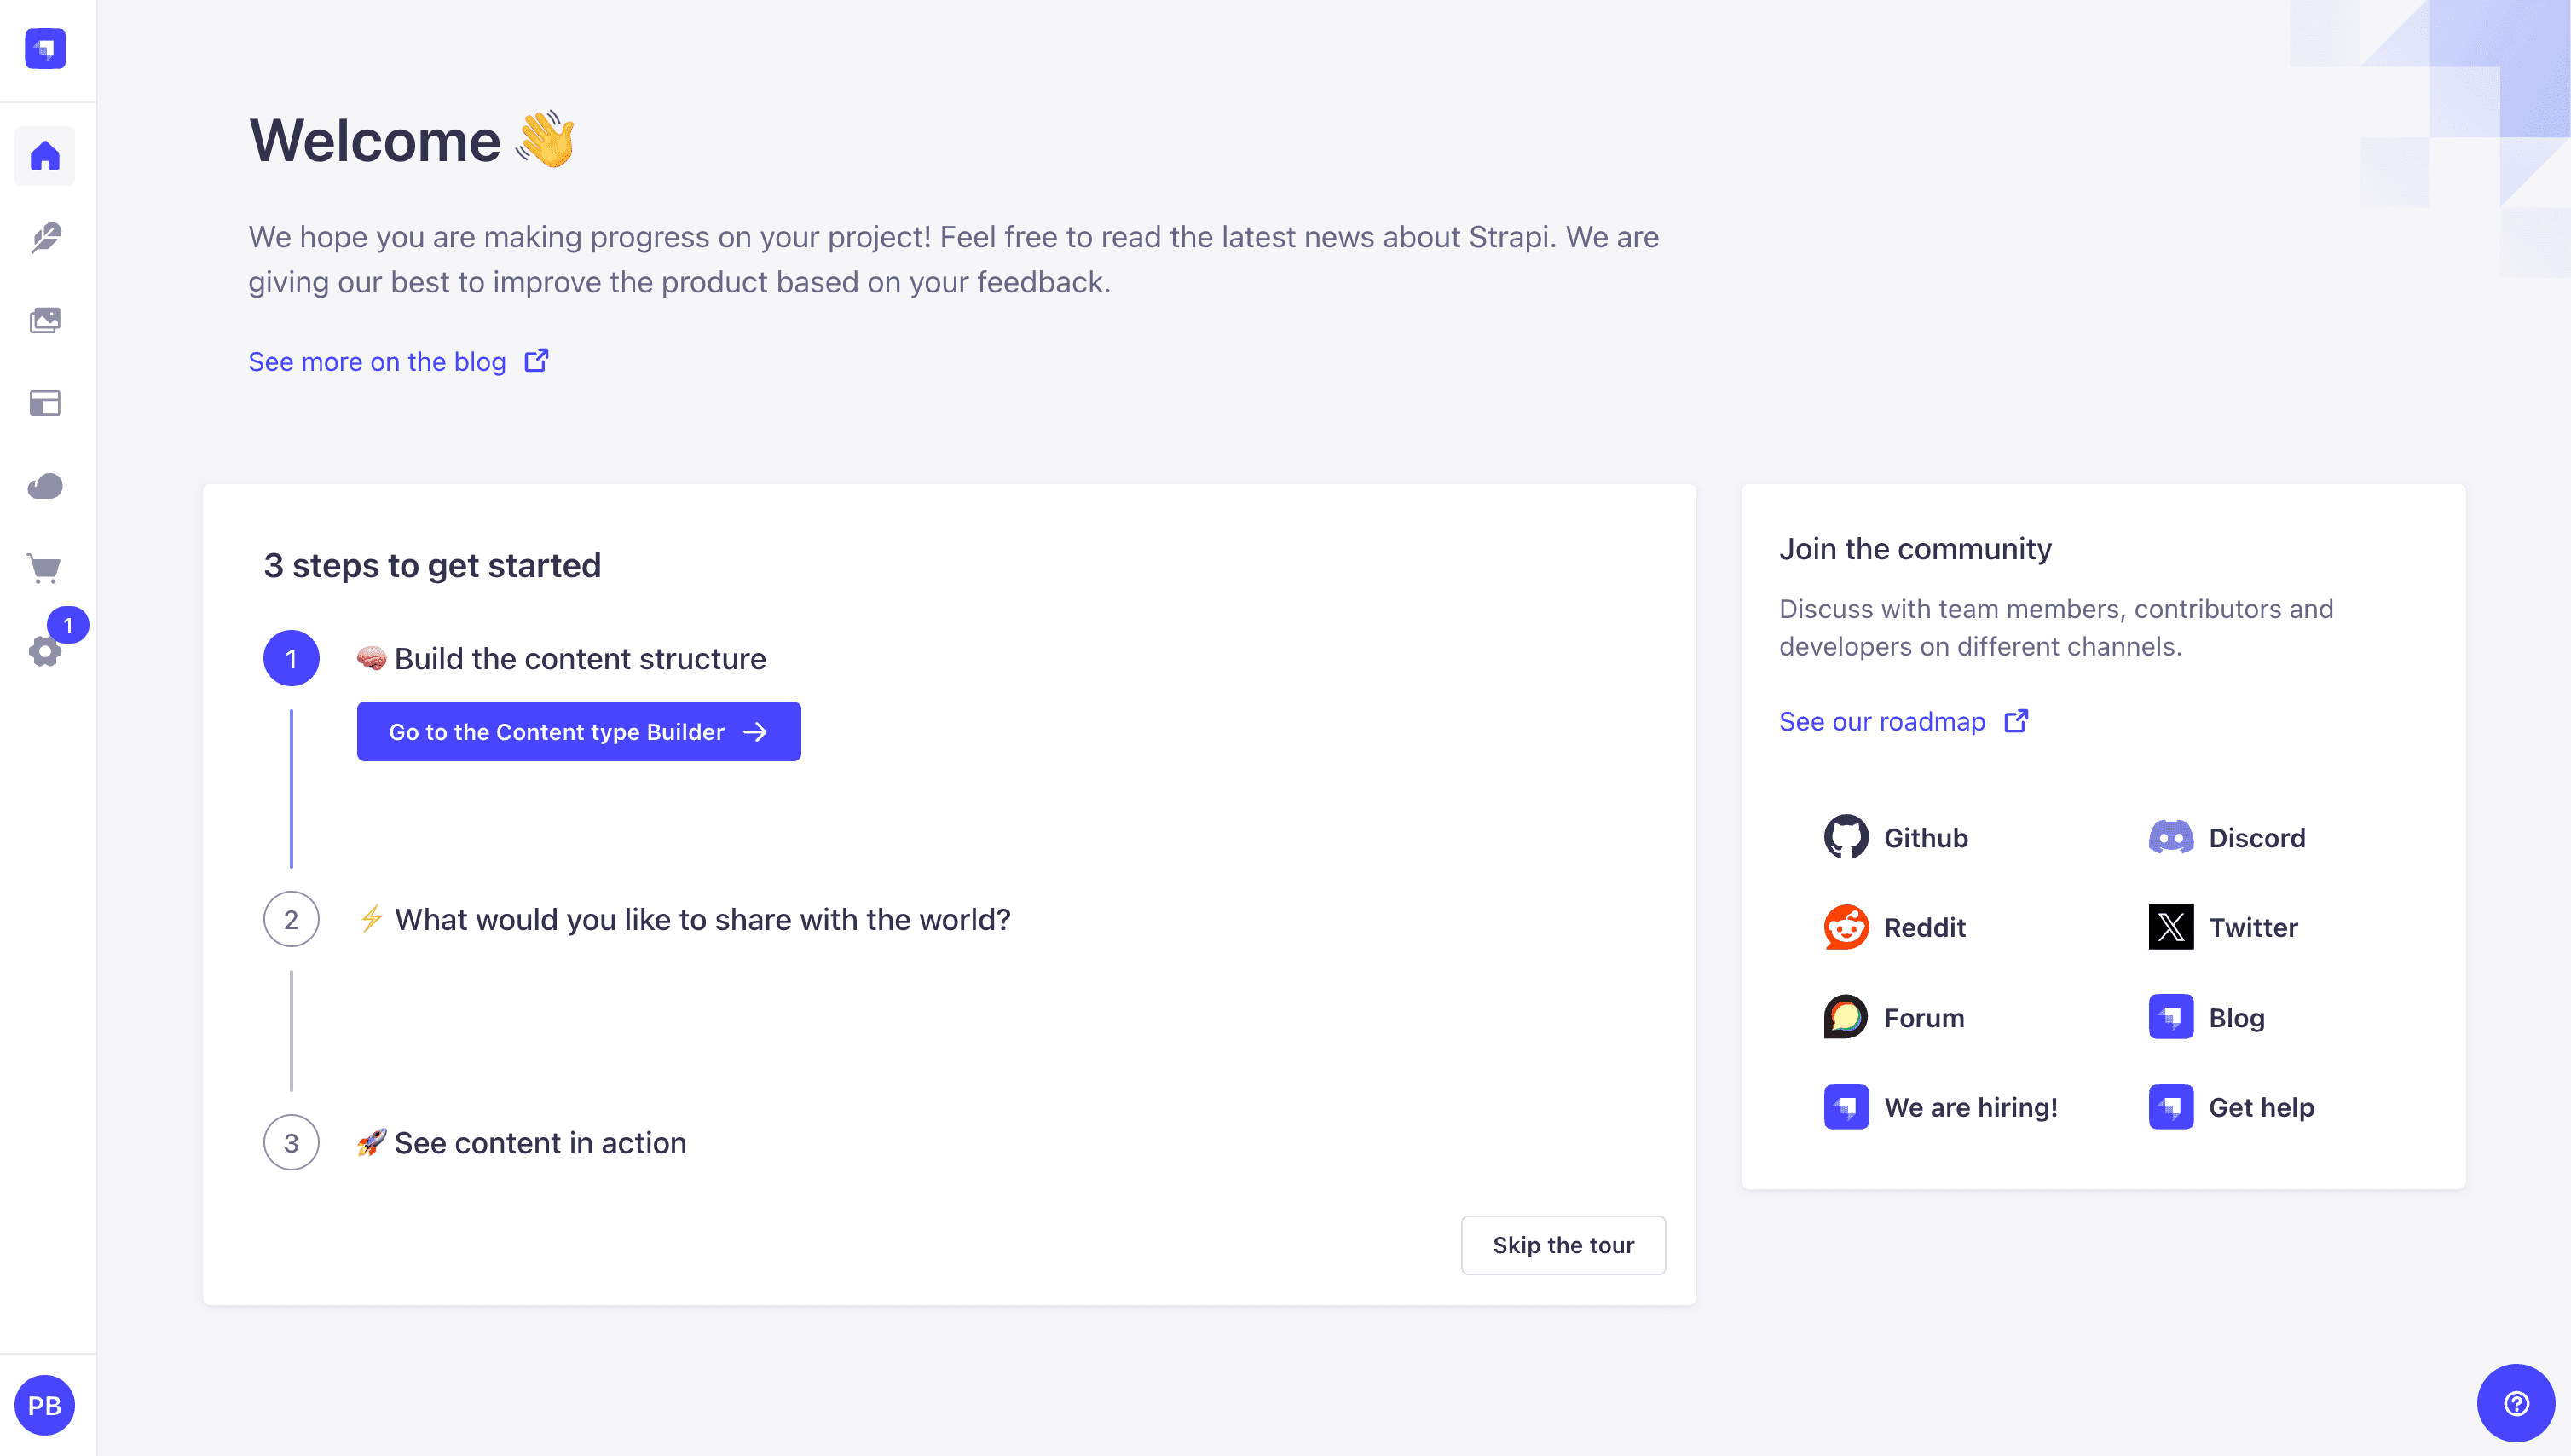
Once you have created your user, you will be redirected to the Strapi Dashboard screen.
Publish Article Entries
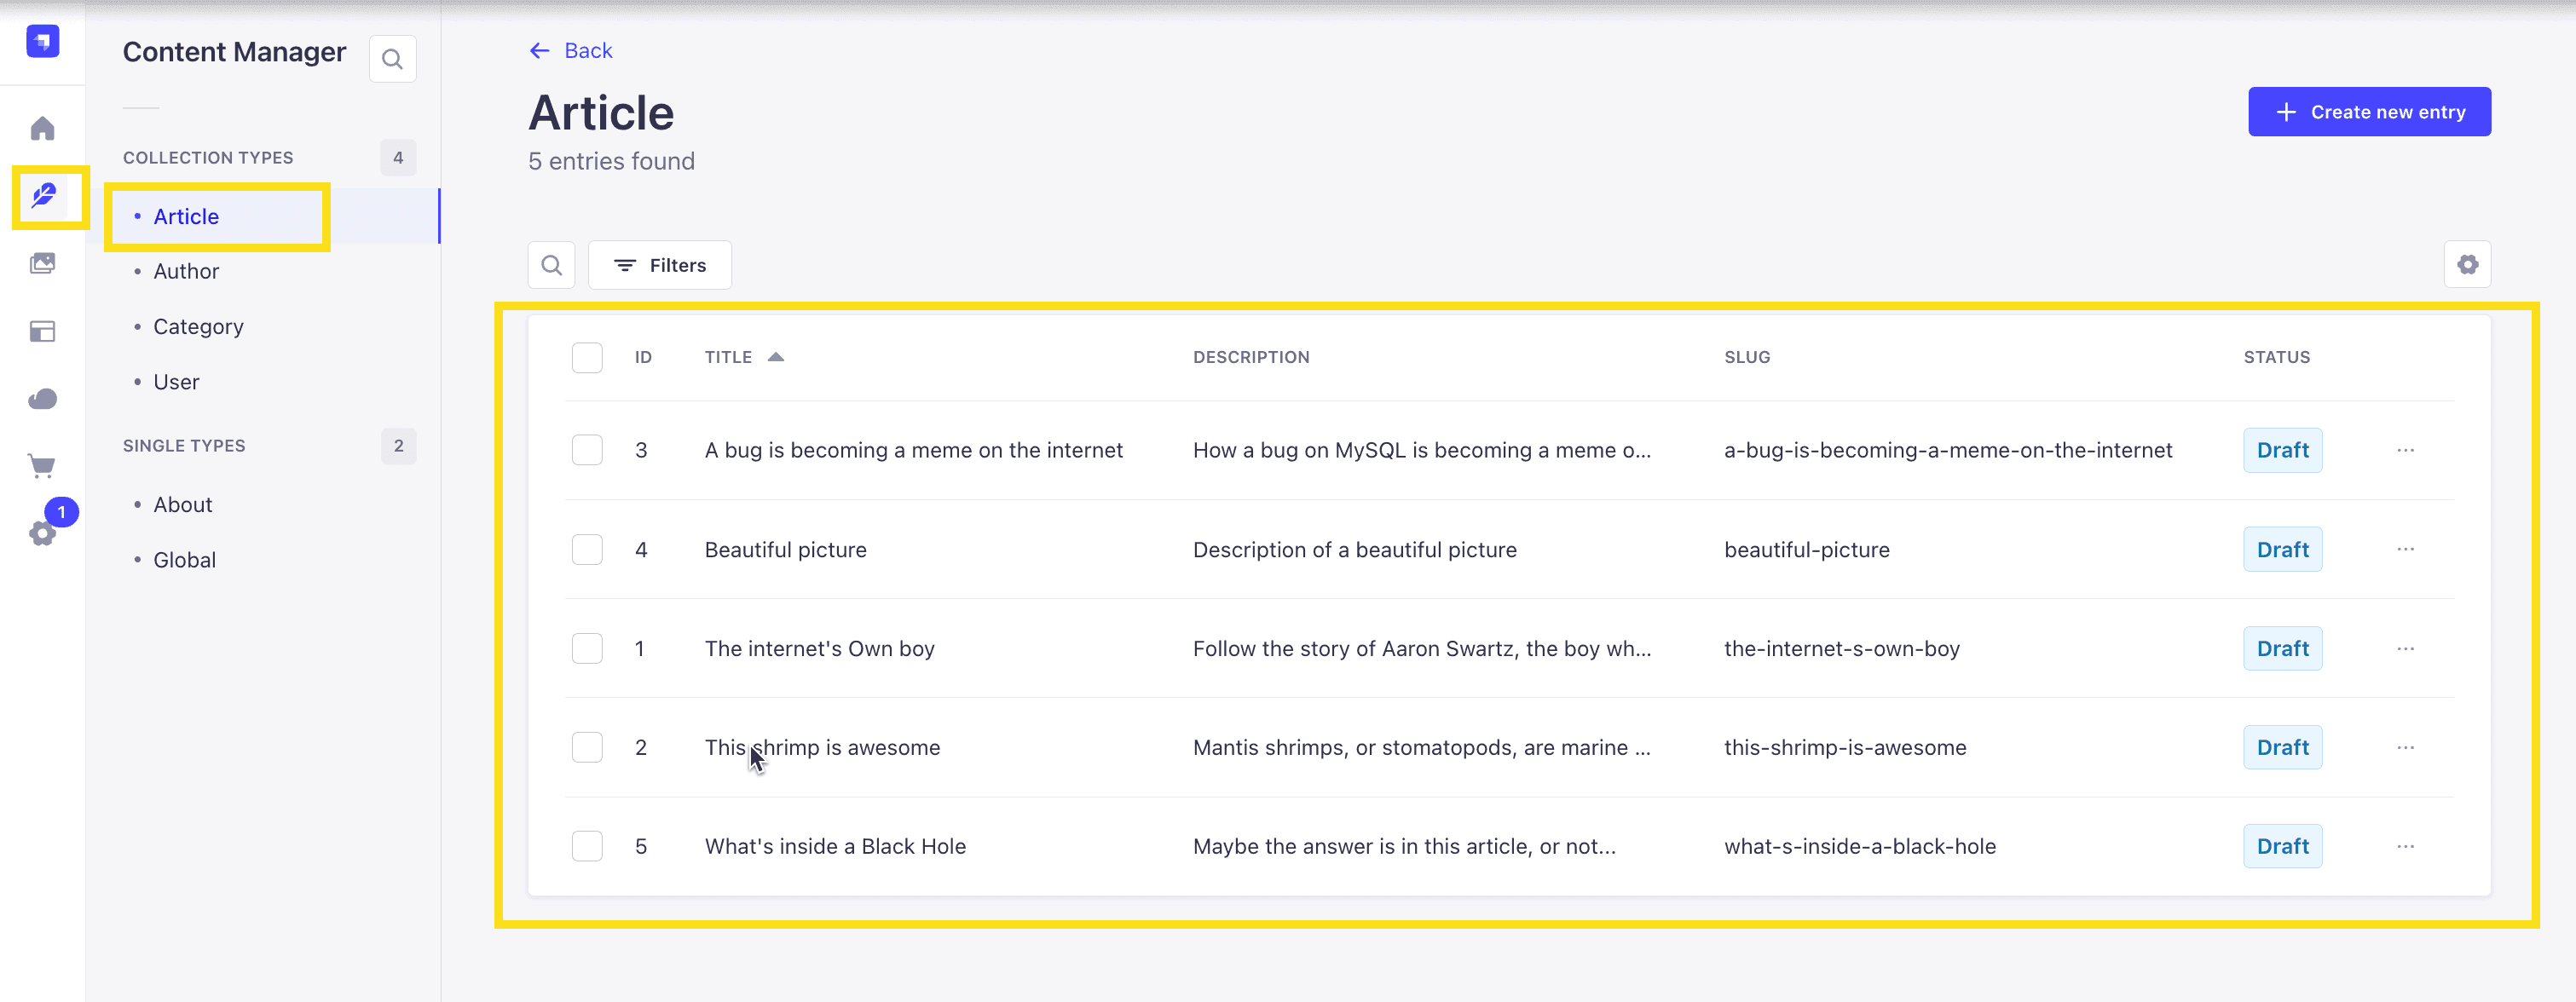
Since we created our app with the example data, you should be able to navigate to your Article collection and see the data that was created for us.
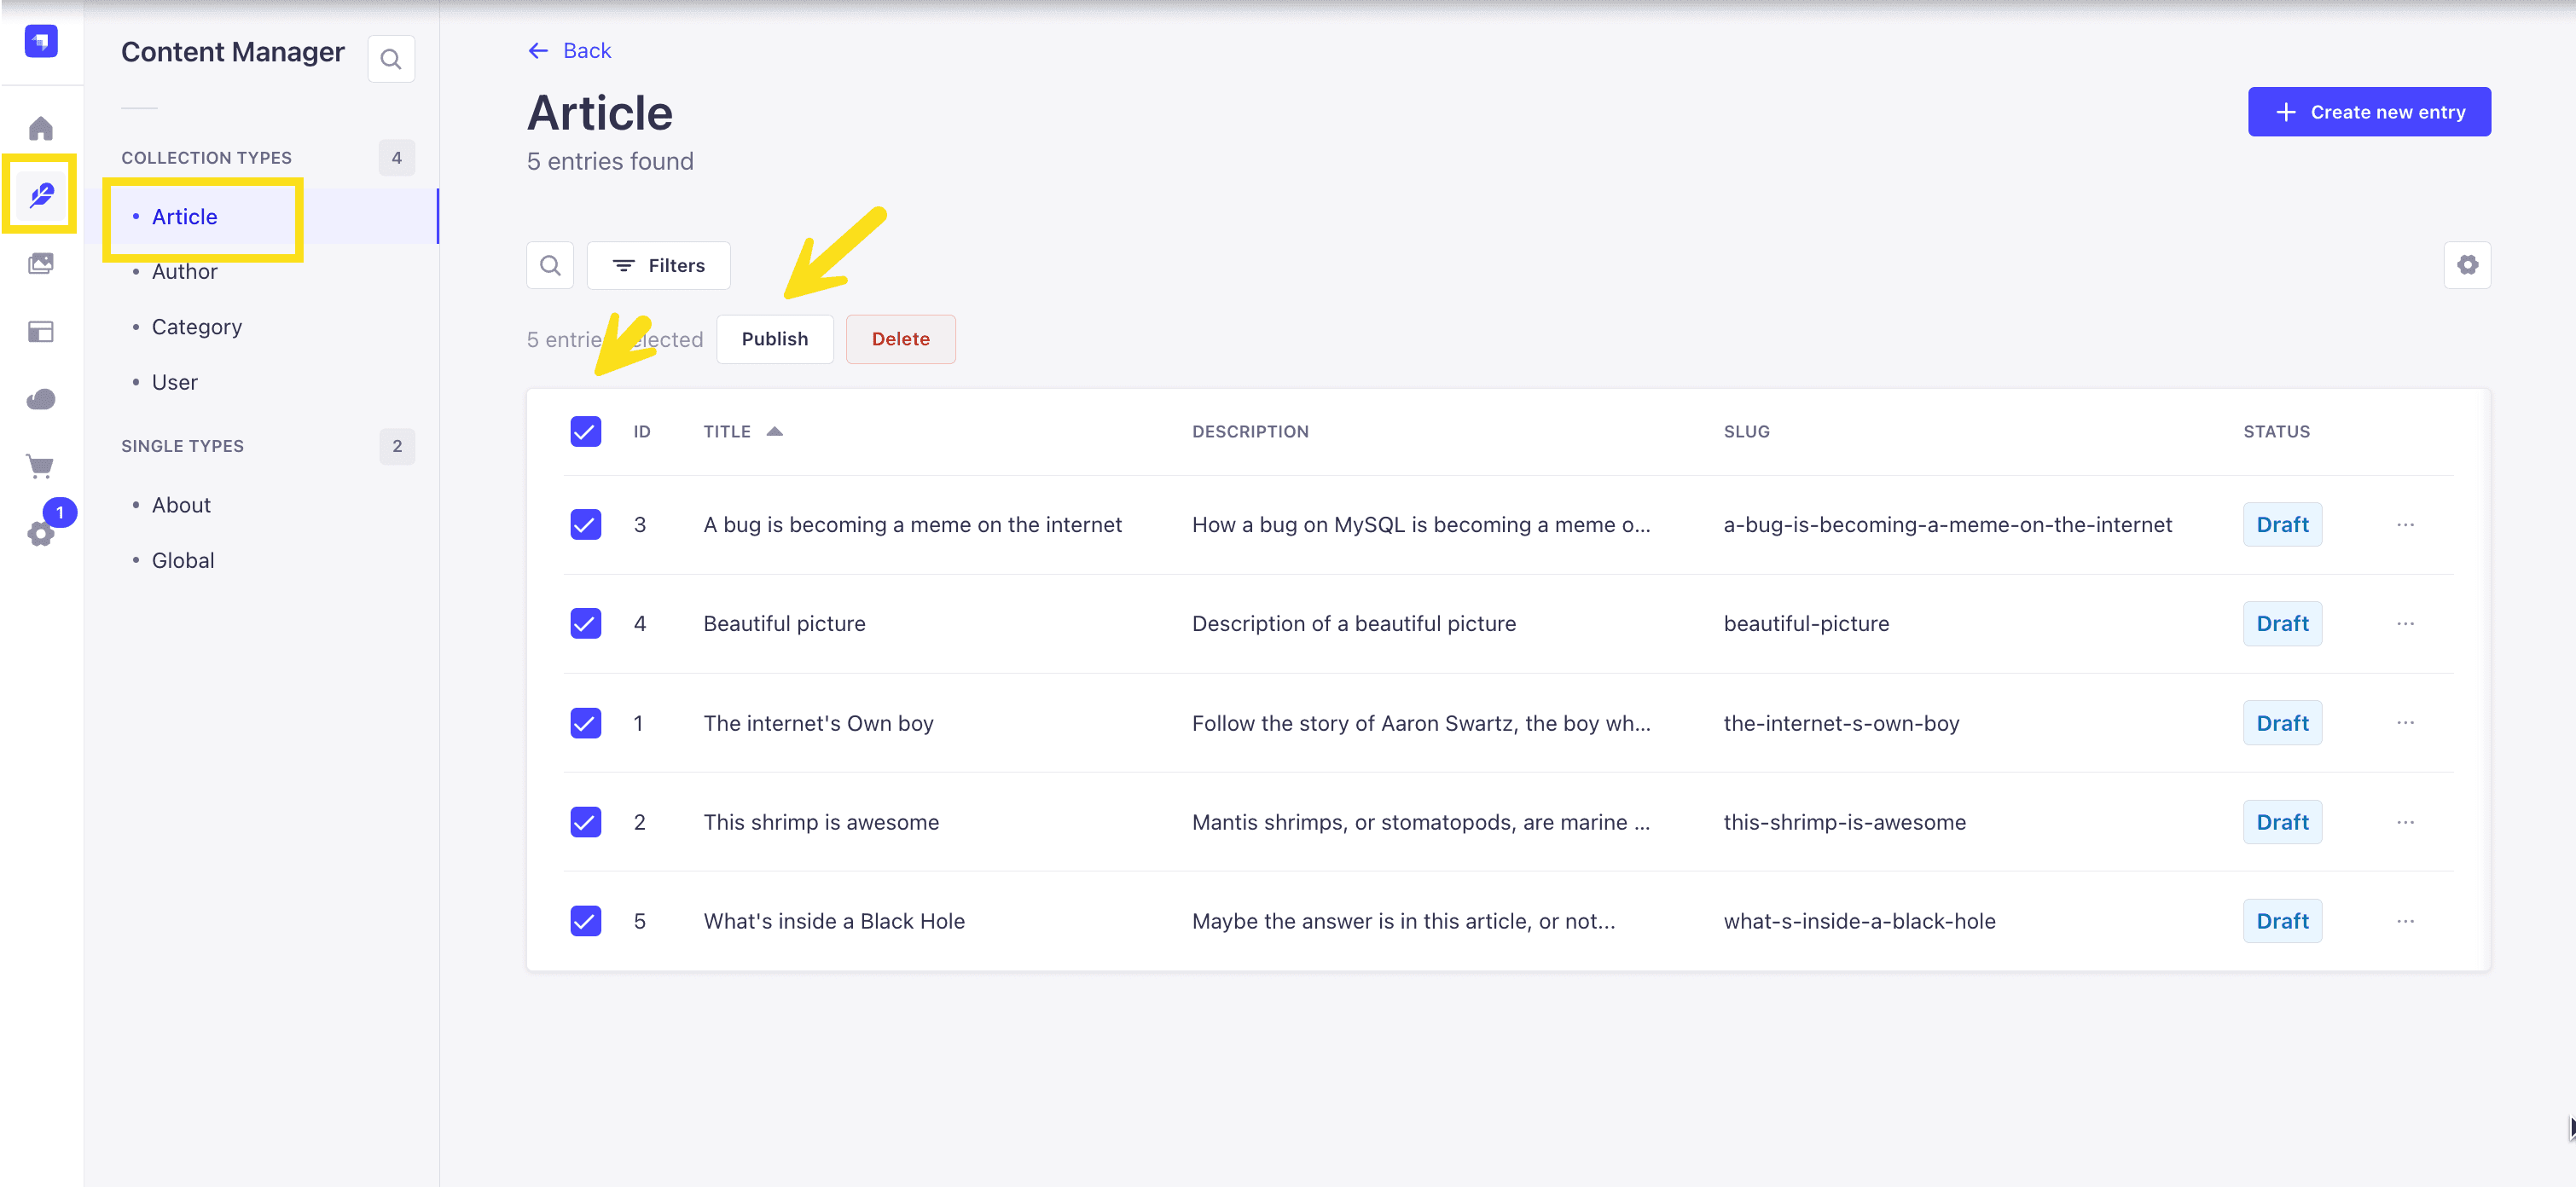
Now, let's make sure that all of the data is published. If not, you can select all items via the checkbox and then click the Publish button.
Enable API Access
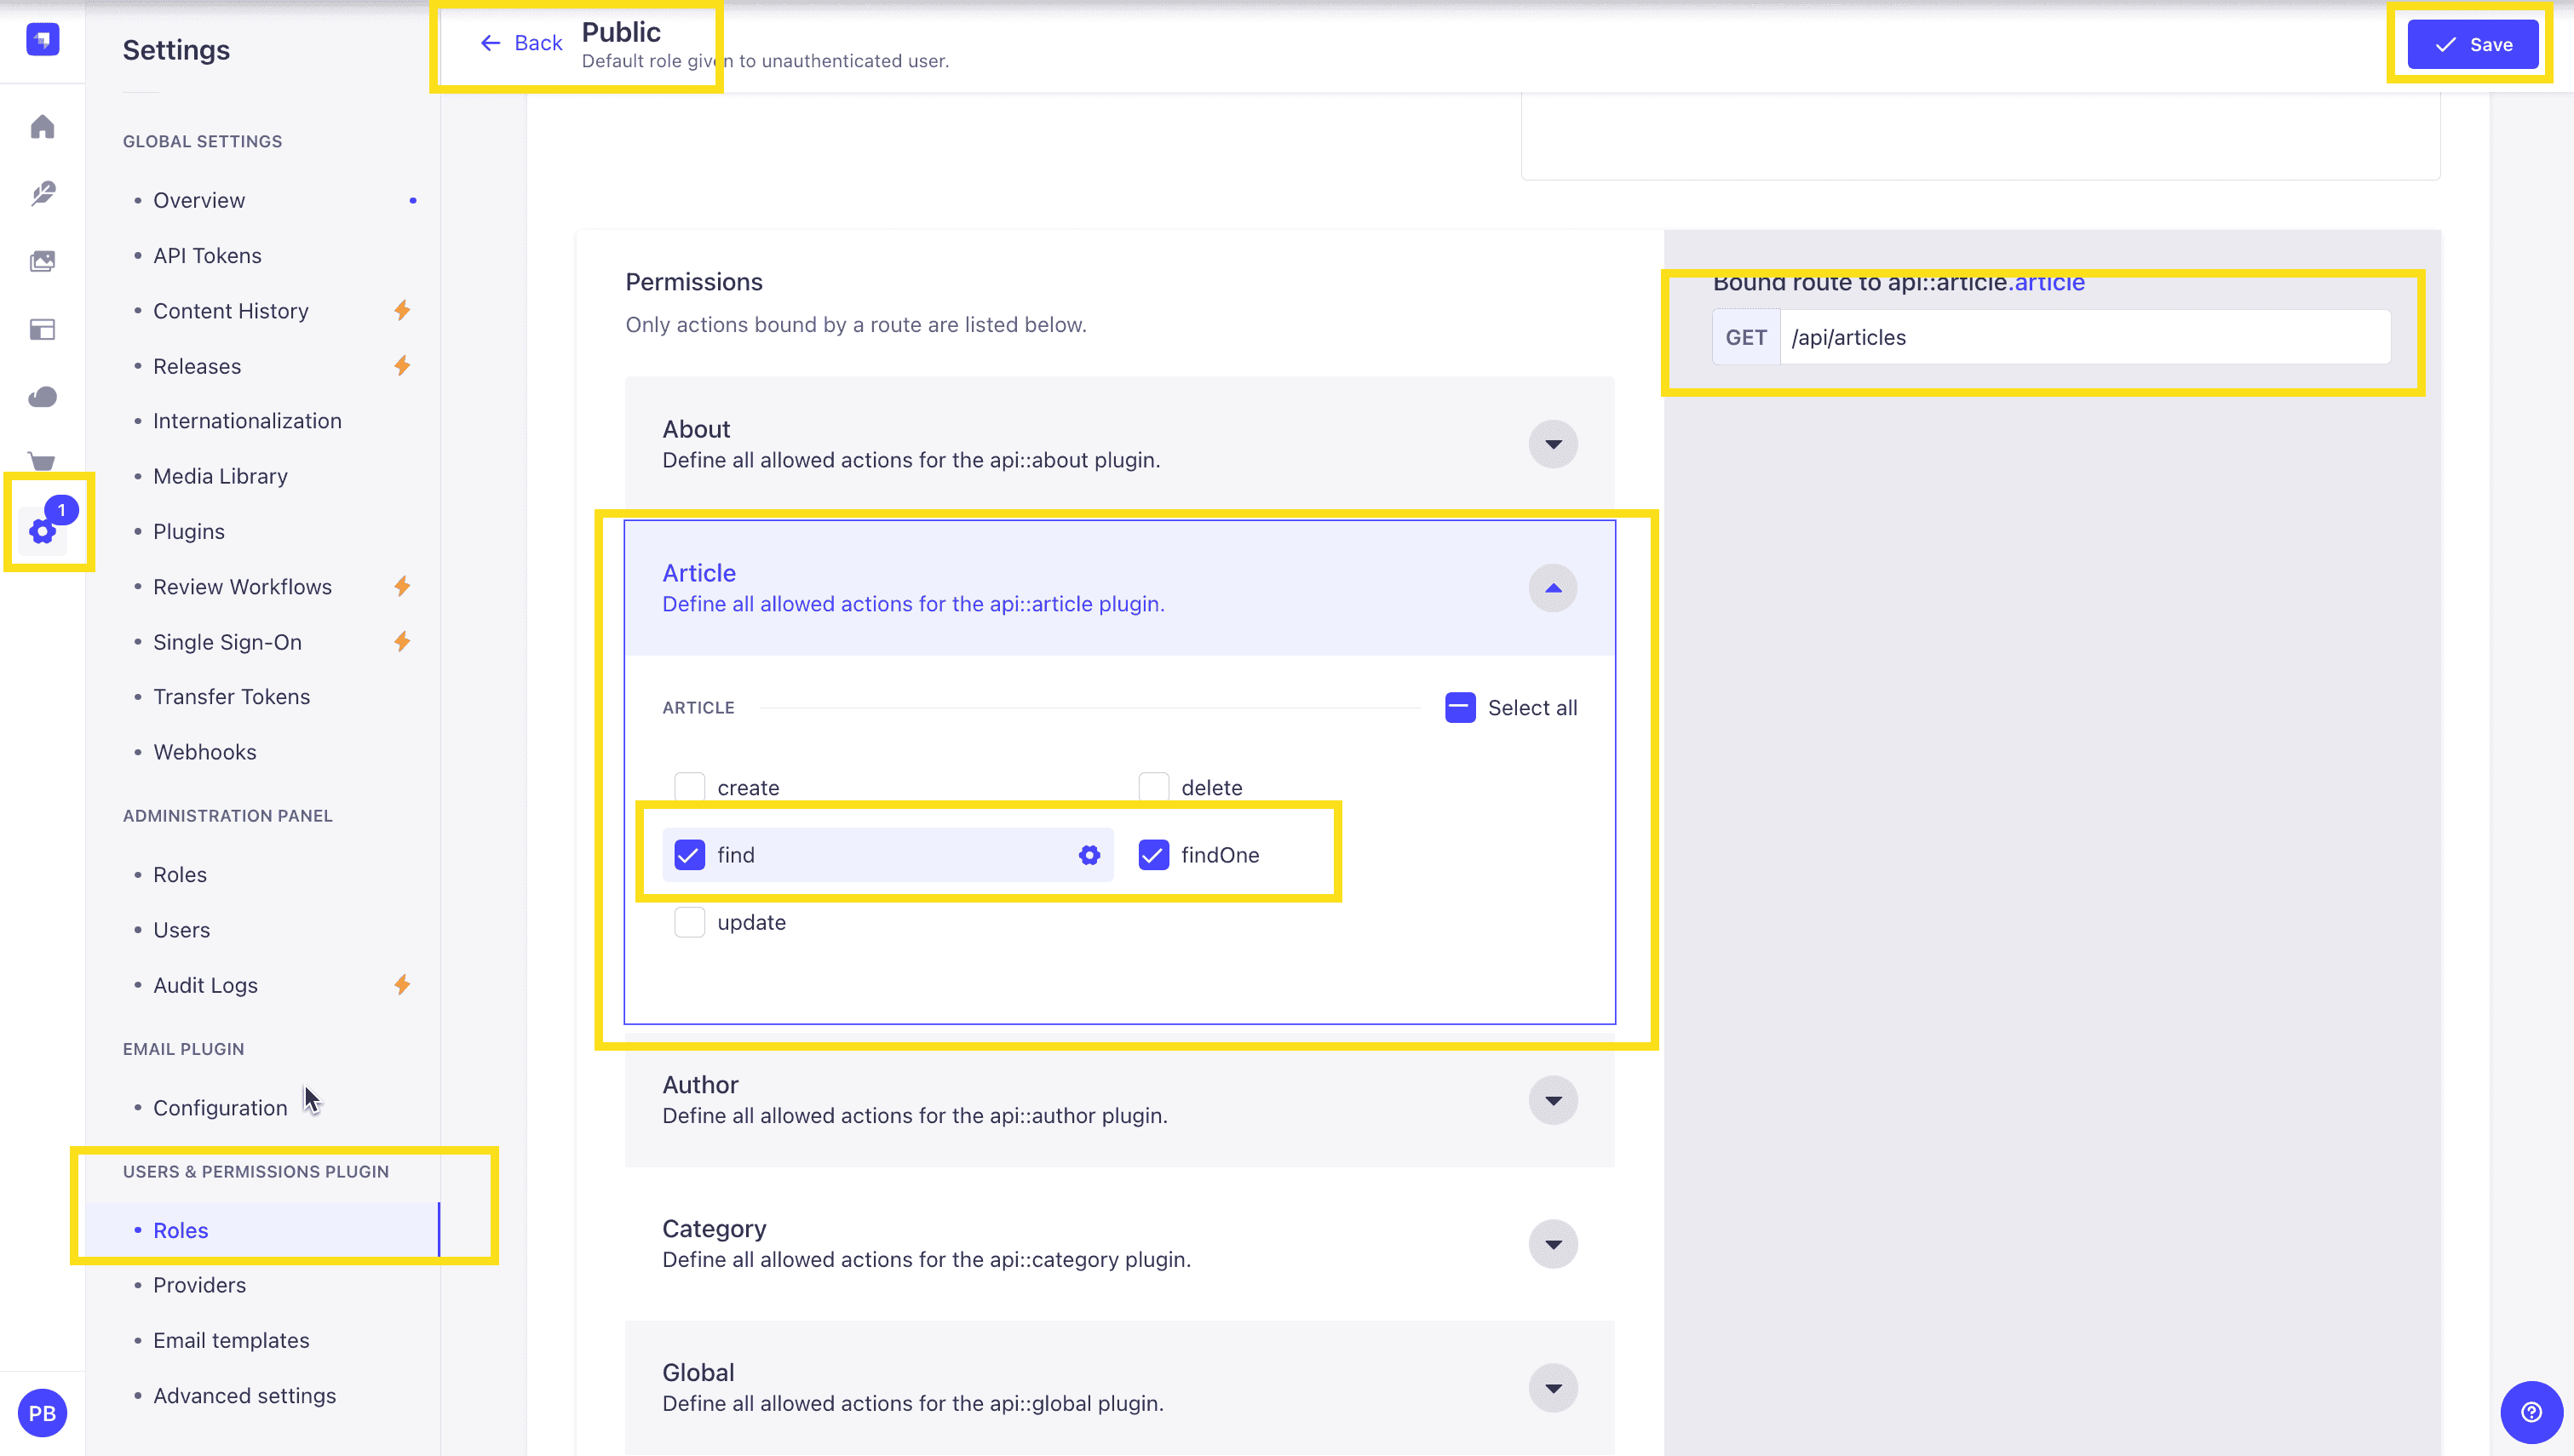
Once all your articles are published, we will expose our Strapi API for the Articles Collection. This can be done in Settings -> Users & Permissions plugin -> Roles -> Public -> Article.
You should have find and findOne selected. If not, go ahead and select them.
Test API
Now, if we make a GET request to http://localhost:1337/api/articles, we should see the following data for our articles.
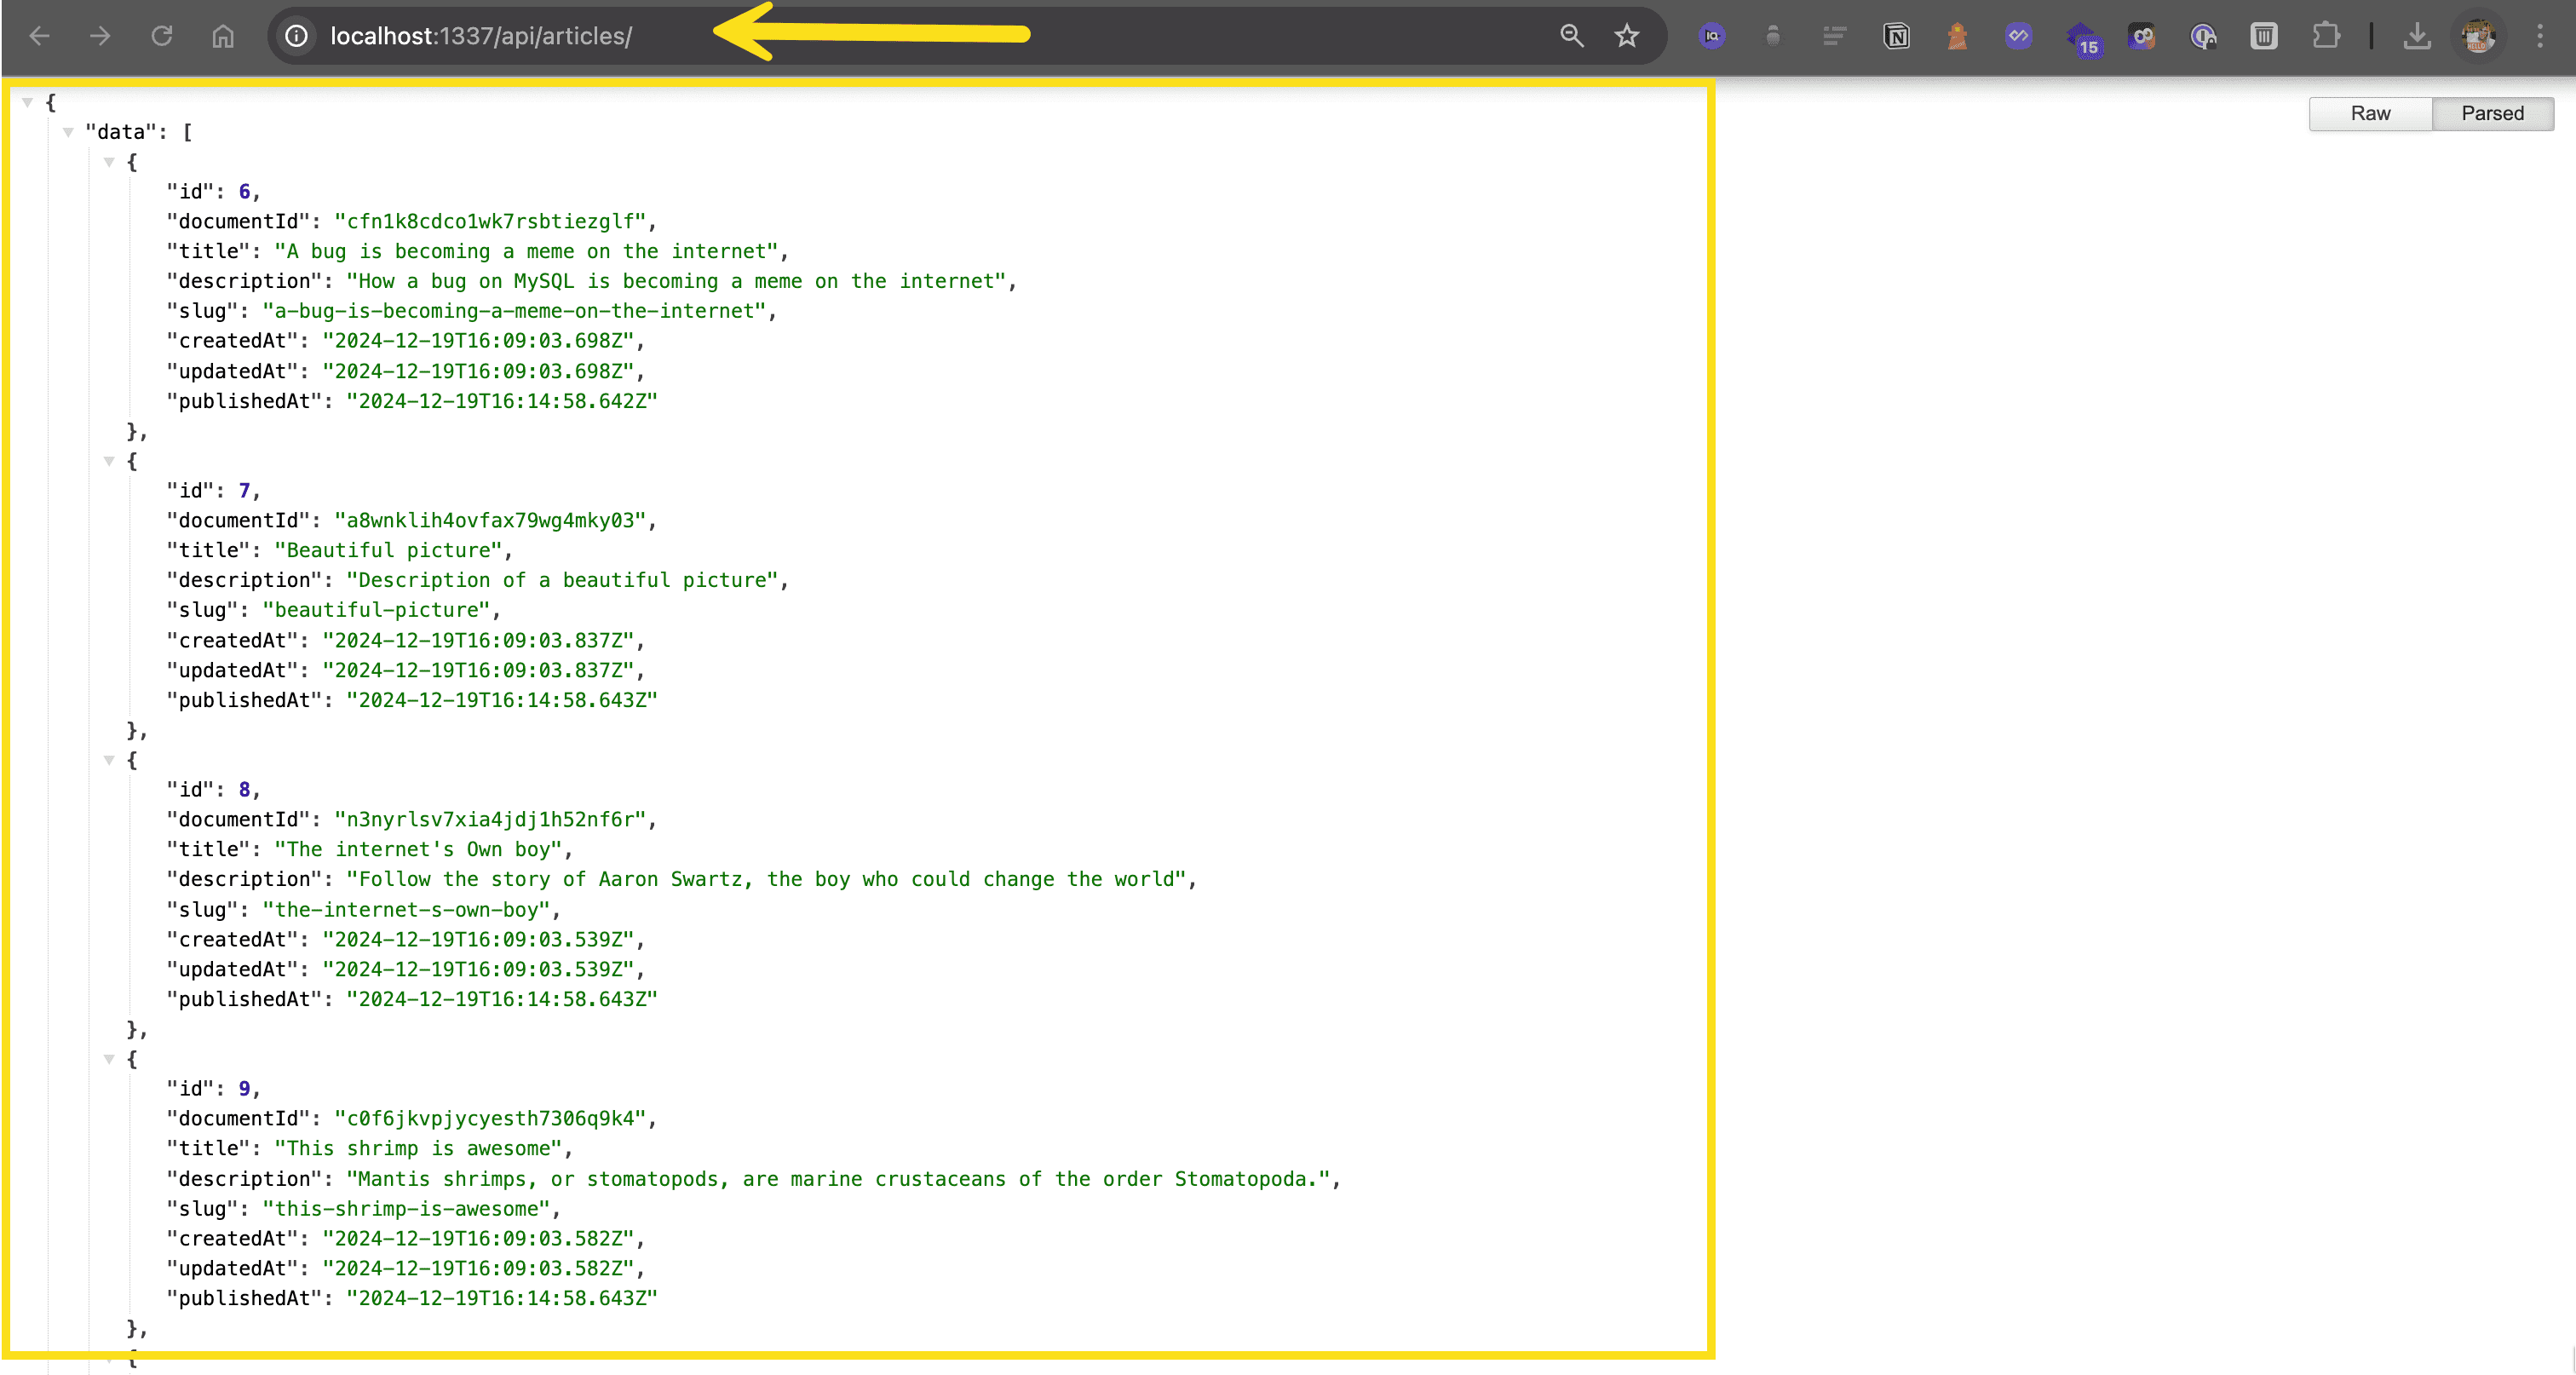
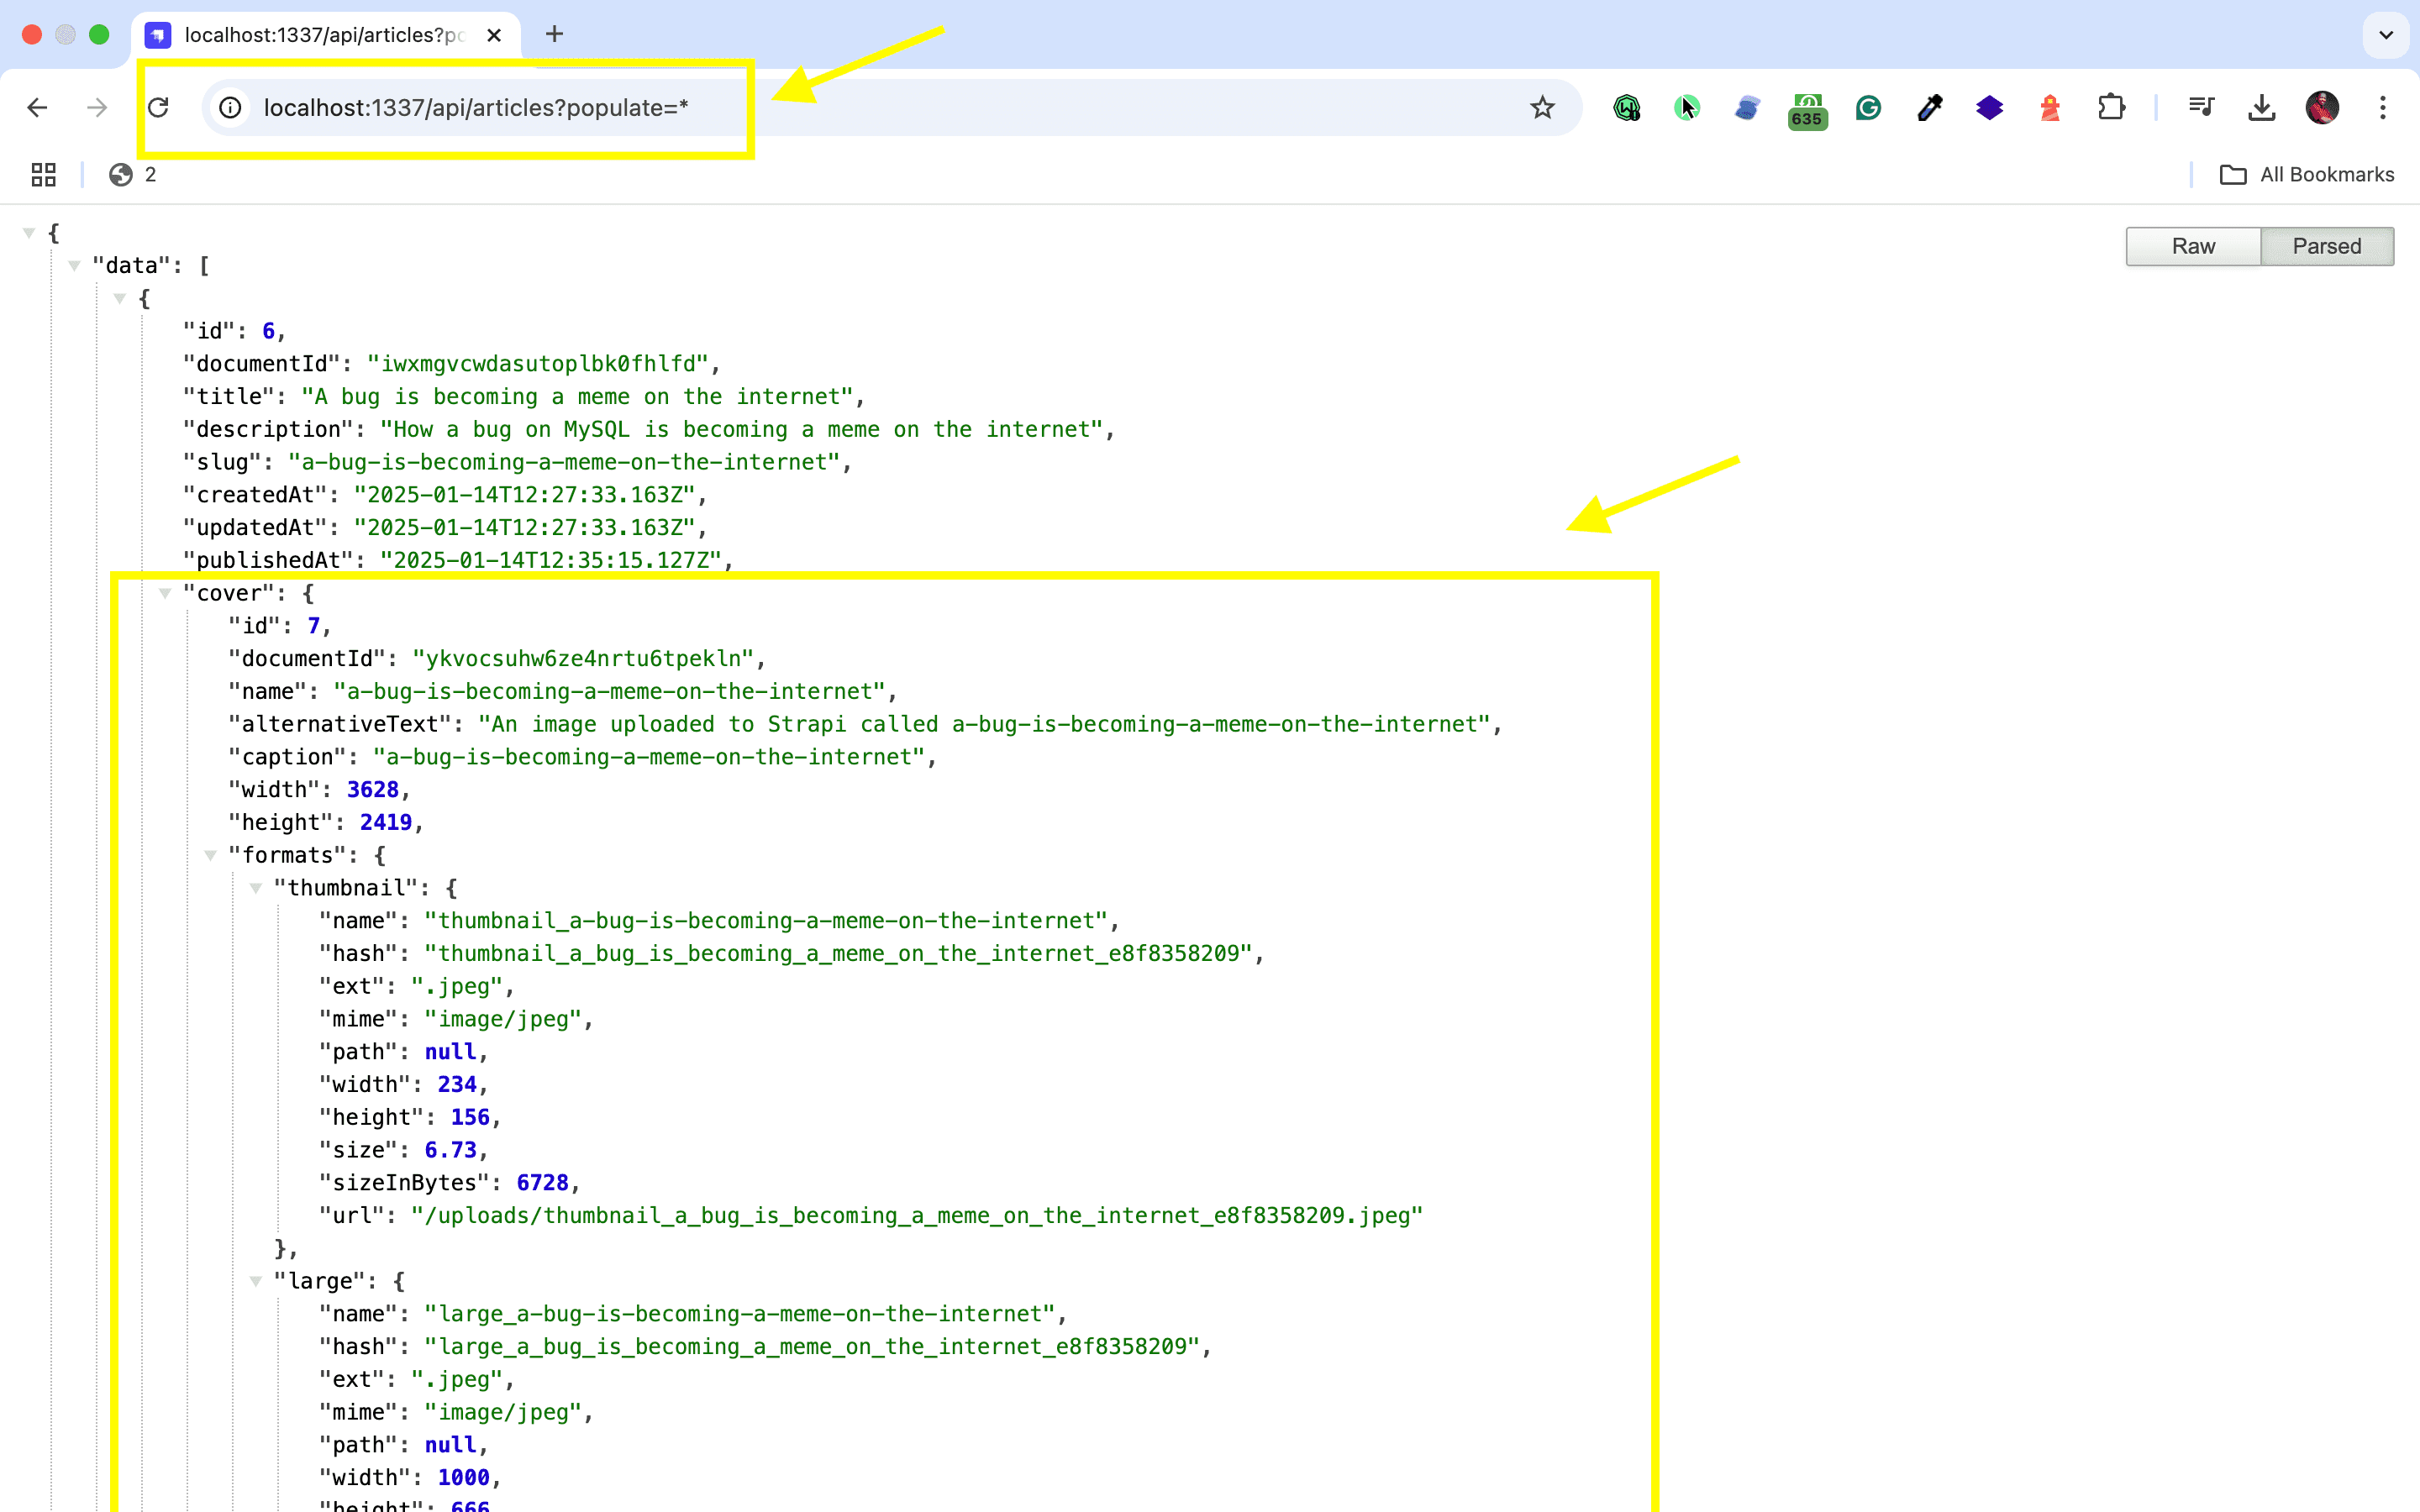
🖐️ Note: The article covers (images) are not returned. This is because the REST API by default does not populate any relations, media fields, components, or dynamic zones.. Learn more about REST API: Population & Field Selection.
So, let's get the article covers by using the populate=* parameter: http://localhost:1337/api/articles?populate=*
Getting Started With Editor.js
If you're looking to enhance your Strapi content editing experience, integrating Editor JS offers a powerful alternative to the default editor. Here's how to set it up in your Strapi environment.
Installing and Adjusting Settings for Editor JS in Strapi
Ready to bring Editor JS into your Strapi world? Let's do it:
- Install Editor JS and its dependencies: To install the @editorjs/editorjs package and its associated plugins, use the following npm commands:
npm install @editorjs/editorjs
npm install @editorjs/header
npm install @editorjs/image
npm install @editorjs/paragraph
npm install @editorjs/list
- Use a plugin for easier integration: The fastest route to integrate Editor JS with Strapi is to use a plugin. To install a Strapi plugin, ensure you have the correct plugin name and refer to the official documentation or repository for the accurate installation command.
- Configure the plugin in your Strapi project:
Create or modify the
config/plugins.jsfile with the following configuration:
module.exports = {
 'react-editorjs': {
   enabled: true,
   config: {
     autofocus: false,
     defaultBlock: 'paragraph',
     tools: {
       header: {
         config: {
           levels: [2, 3, 4],
           defaultLevel: 2
         }
       }
     }
   }
 }
};
Code Implementation to Integrate Editor JS With Strapi
Let's build a custom field using Editor JS in your Strapi application:
- Create a custom field component (if not using the plugin): To boost productivity with Strapi, consider utilizing plugins that simplify custom field creation.
import React, { useEffect, useRef } from 'react';
import EditorJS from '@editorjs/editorjs';
import Header from '@editorjs/header';
import List from '@editorjs/list';
import Paragraph from '@editorjs/paragraph';

const EditorJSField = ({ onChange, name, value }) => {
 const editorRef = useRef(null);
 const instance = useRef(null);

 useEffect(() => {
   if (!instance.current && editorRef.current) {
     instance.current = new EditorJS({
       holder: editorRef.current,
       data: value || {},
       onChange: async () => {
         const content = await instance.current.save();
         onChange({ target: { name, value: content } });
       },
       tools: {
         header: Header,
         list: List,
         paragraph: Paragraph
       }
     });
   }

   return () => {
     if (instance.current) {
       instance.current.destroy();
       instance.current = null;
     }
   };
 }, []);

 return <div ref={editorRef} />;
};

export default EditorJSField;
- Register the custom field in Strapi's admin panel: You'll need to register your custom field component with Strapi. This typically involves creating a plugin that registers a new field type for both the server and admin panel parts of your Strapi application. The specifics may vary slightly depending on the Strapi version.
- Testing your implementation: After installing and configuring Editor JS, navigate to the admin panel. Create or edit a content type that uses your new Editor JS field. Strapi's admin panel auto-reloads in watch-admin mode, simplifying the development process. With this setup, you're ready to enjoy all the benefits of Editor JS's block-based editing in your Strapi CMS. The structured JSON output makes it super easy to render your content across different platforms and formats.
Strapi Open Office Hours
If you have any questions about Strapi 5 or just would like to stop by and say hi, you can join us at Strapi's Discord Open Office Hours Monday through Friday at 12:30 pm - 1:30 pm CST: Strapi Discord Open Office Hours
For more details, visit the Strapi documentation and Editor.js documentation.
Frequently Asked Questions
Editor.js is a block-based editor that outputs clean JSON data instead of HTML. Each content block (paragraph, header, list, image) is stored as a separate JSON object, making content highly portable and easy to render across platforms.
Create a custom field plugin that wraps the Editor.js React component. Store the JSON output in a Strapi JSON field, and configure the available block tools based on your content editing needs.
Yes, Editor.js supports custom block tools that you can develop and register. Create tools for specific content types like embedded videos, code snippets, or custom callouts to extend the editor's capabilities.
Parse the JSON output and render each block according to its type. Libraries like editorjs-html can convert blocks to HTML, or write custom renderers for more control over the output.
JSON output enables consistent rendering across platforms (web, mobile, email), easy content migration, selective block rendering, and simplified content analysis without parsing HTML markup.