GitHub
Integrate GitHub with Strapi

Why Use GitHub?
GitHub is the industry-standard platform where developers track, manage, and collaborate on code changes. By integrating GitHub with your projects built on Strapi, an open-source headless CMS, you unlock several key advantages. You get a complete history of your codebase, making it easy to track changes, roll back when needed, and maintain project integrity. Teams can work in parallel on different features without interference through branching, review code via pull requests, and safely merge changes.
With GitHub Actions, you can automate testing and deployment workflows, ensuring your Strapi applications maintain quality across environments. The built-in issue tracking system centralizes bugs, feature requests, and tasks in one place.
Whether you're a solo developer or part of a team, GitHub supports development workflows that keep Strapi projects organized and deployments efficient.
Visit the GitHub docs for more.
Why Use Strapi?
Strapi is the leading open-source headless CMS offering features, like customizable APIs, role-based permissions, multilingual support, etc. It simplifies content management and integrates effortlessly with modern frontend frameworks.
Explore the Strapi documentation for more details.
Strapi 5 Highlights
The out-of-the-box Strapi features allow you to get up and running in no time:
- Single types: Create one-off pages that have a unique content structure.
- Draft and Publish: Reduce the risk of publishing errors and streamline collaboration.
- 100% TypeScript Support: Enjoy type safety & easy maintainability
- Customizable API: With Strapi, you can just hop in your code editor and edit the code to fit your API to your needs.
- Integrations: Strapi supports integrations with Cloudinary, SendGrid, Algolia, and others.
- Editor interface: The editor allows you to pull in dynamic blocks of content.
- Authentication: Secure and authorize access to your API with JWT or providers.
- RBAC: Help maximize operational efficiency, reduce dev team support work, and safeguard against unauthorized access or configuration modifications.
- i18n: Manage content in multiple languages. Easily query the different locales through the API.
- Plugins: Customize and extend Strapi using plugins.
Learn more about Strapi 5 feature.
Setup Strapi 5 Headless CMS
We are going to start by setting up our Strapi 5 project with the following command:
🖐️ Note: make sure that you have created a new directory for your project.
You can find the full documentation for Strapi 5 here.
Install Strapi
npx create-strapi-app@latest serverYou will be asked to choose if you would like to use Strapi Cloud we will choose to skip for now.
 Strapi   v5.6.0 🚀 Let's create your new project


We can't find any auth credentials in your Strapi config.

Create a free account on Strapi Cloud and benefit from:

- ✦ Blazing-fast ✦ deployment for your projects
- ✦ Exclusive ✦ access to resources to make your project successful
- An ✦ Awesome ✦ community and full enjoyment of Strapi's ecosystem

Start your 14-day free trial now!


? Please log in or sign up.
  Login/Sign up
❯ Skip
After that, you will be asked how you would like to set up your project. We will choose the following options:
? Do you want to use the default database (sqlite) ? Yes
? Start with an example structure & data? Yes <-- make sure you say yes
? Start with Typescript? Yes
? Install dependencies with npm? Yes
? Initialize a git repository? Yes
Once everything is set up and all the dependencies are installed, you can start your Strapi server with the following command:
cd server
npm run develop
You will be greeted with the Admin Create Account screen.
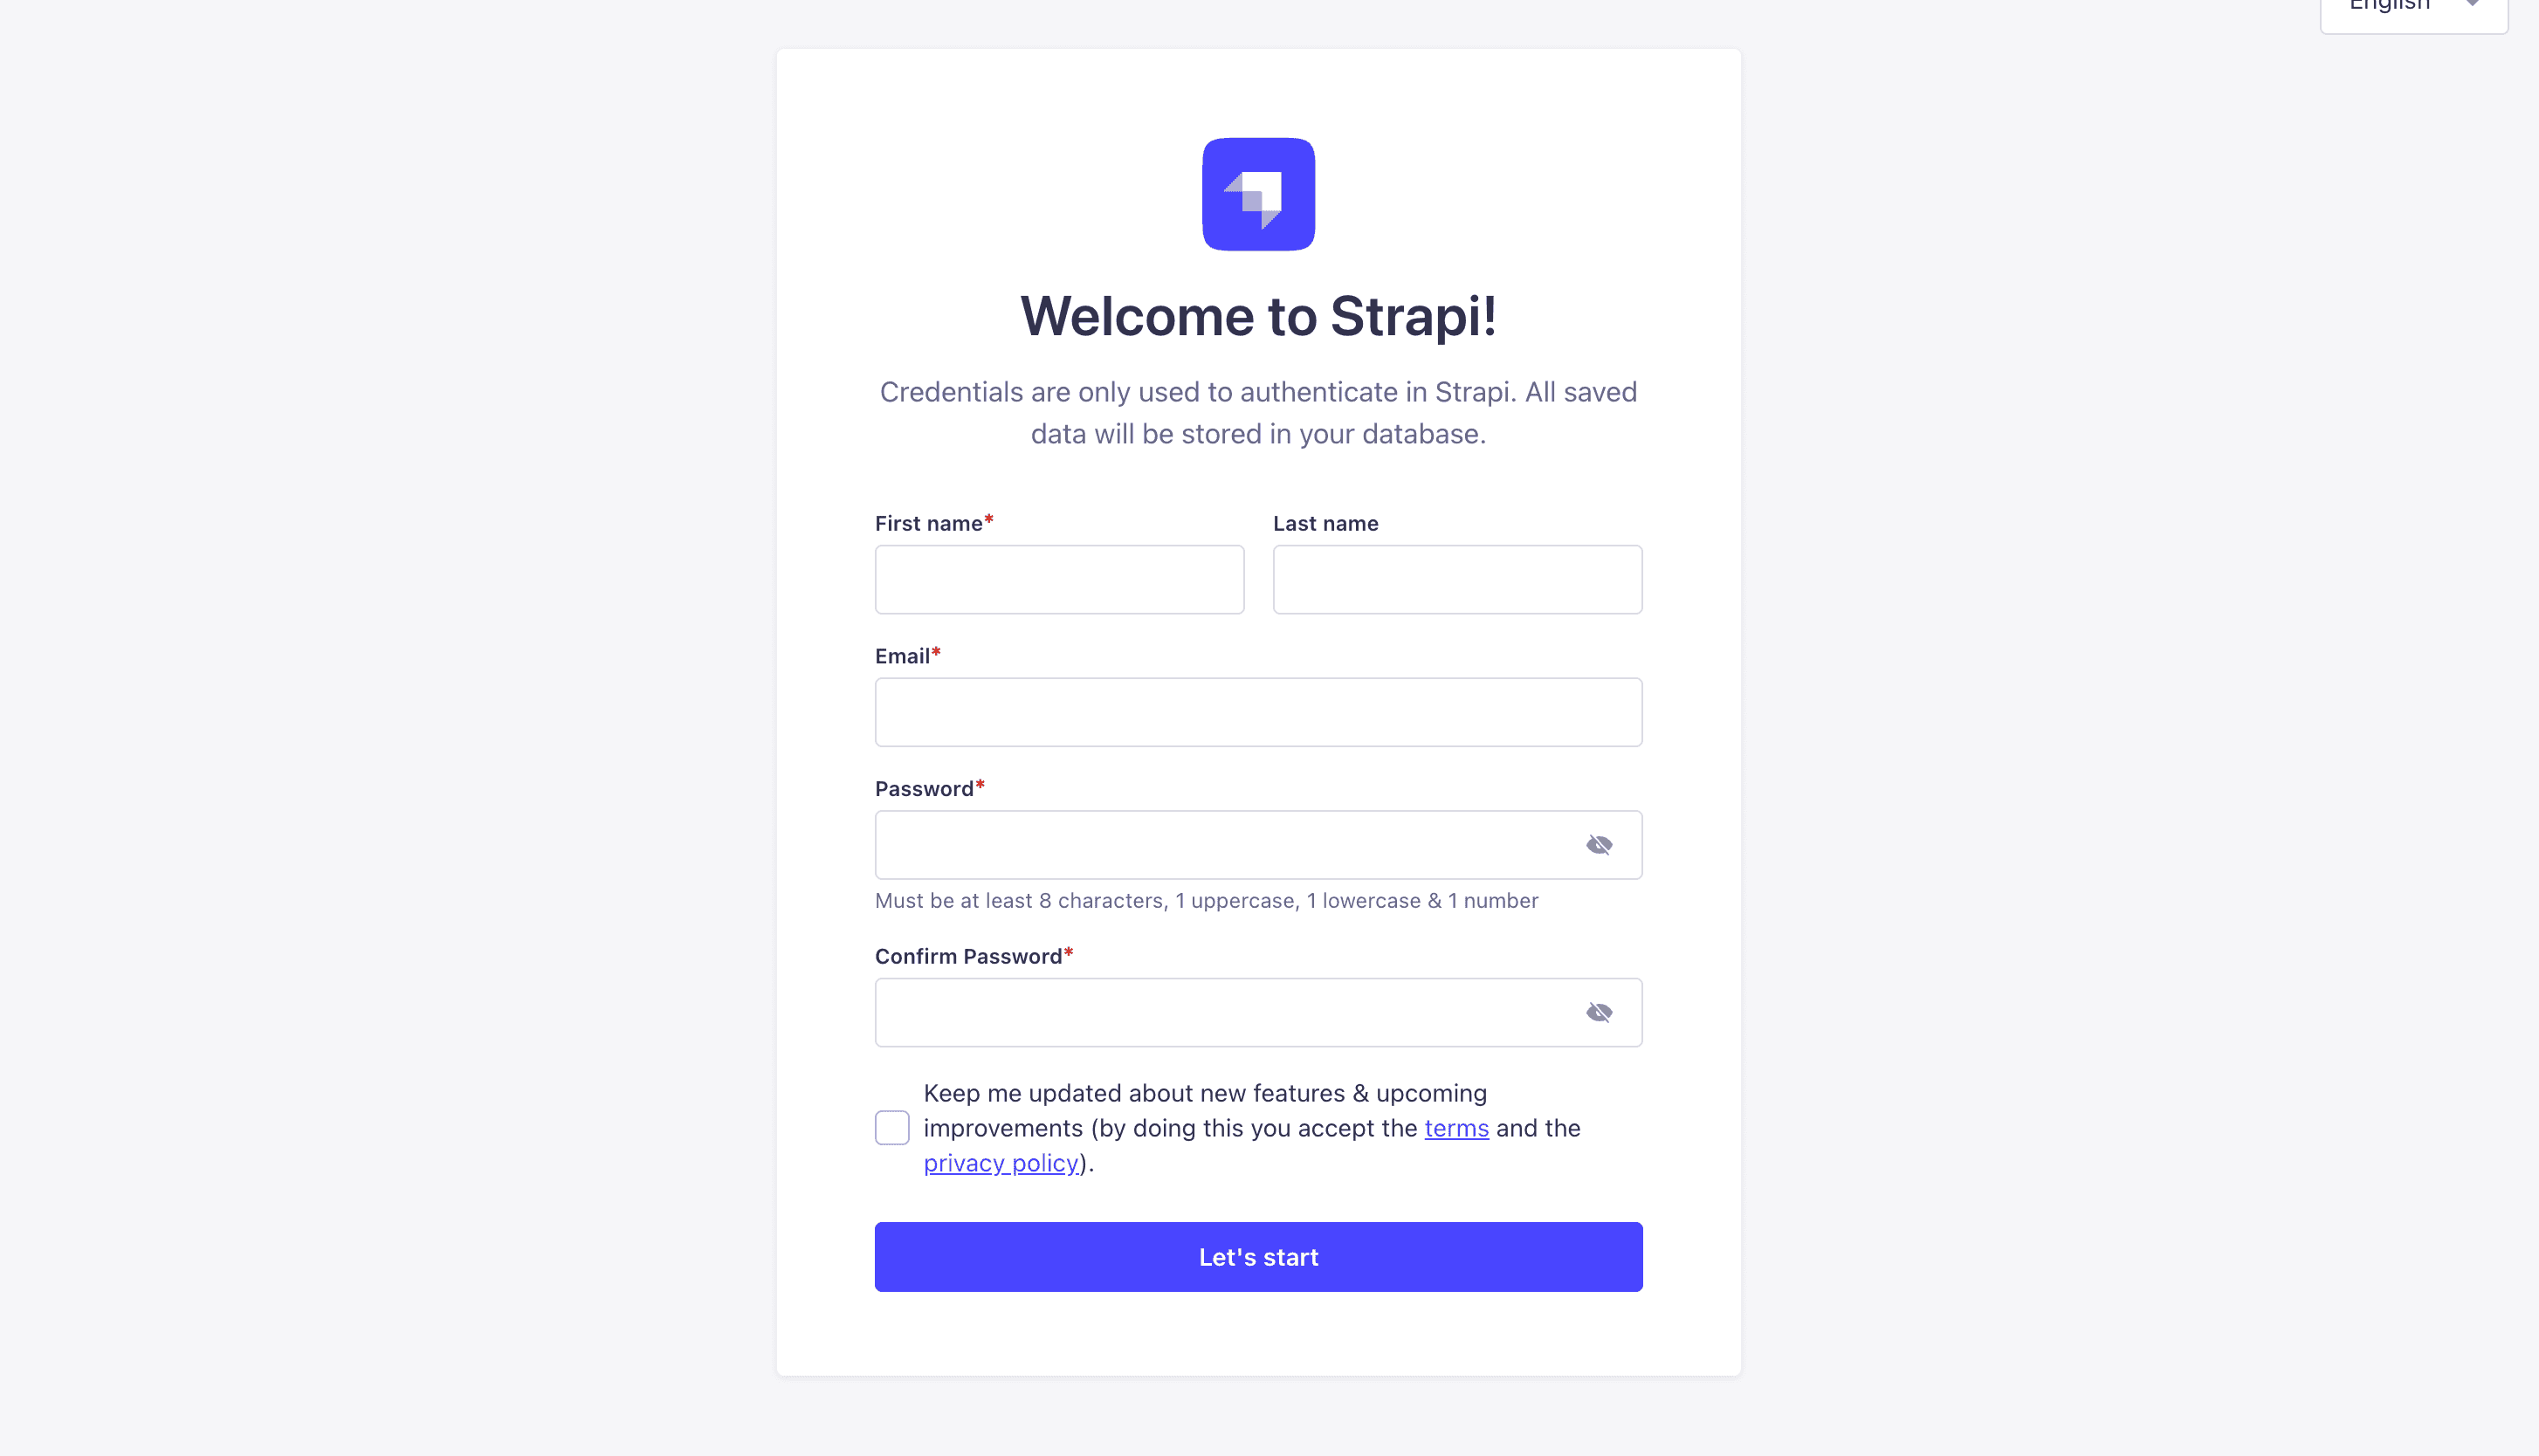
Go ahead and create your first Strapi user. All of this is local so you can use whatever you want.
Once you have created your user, you will be redirected to the Strapi Dashboard screen.
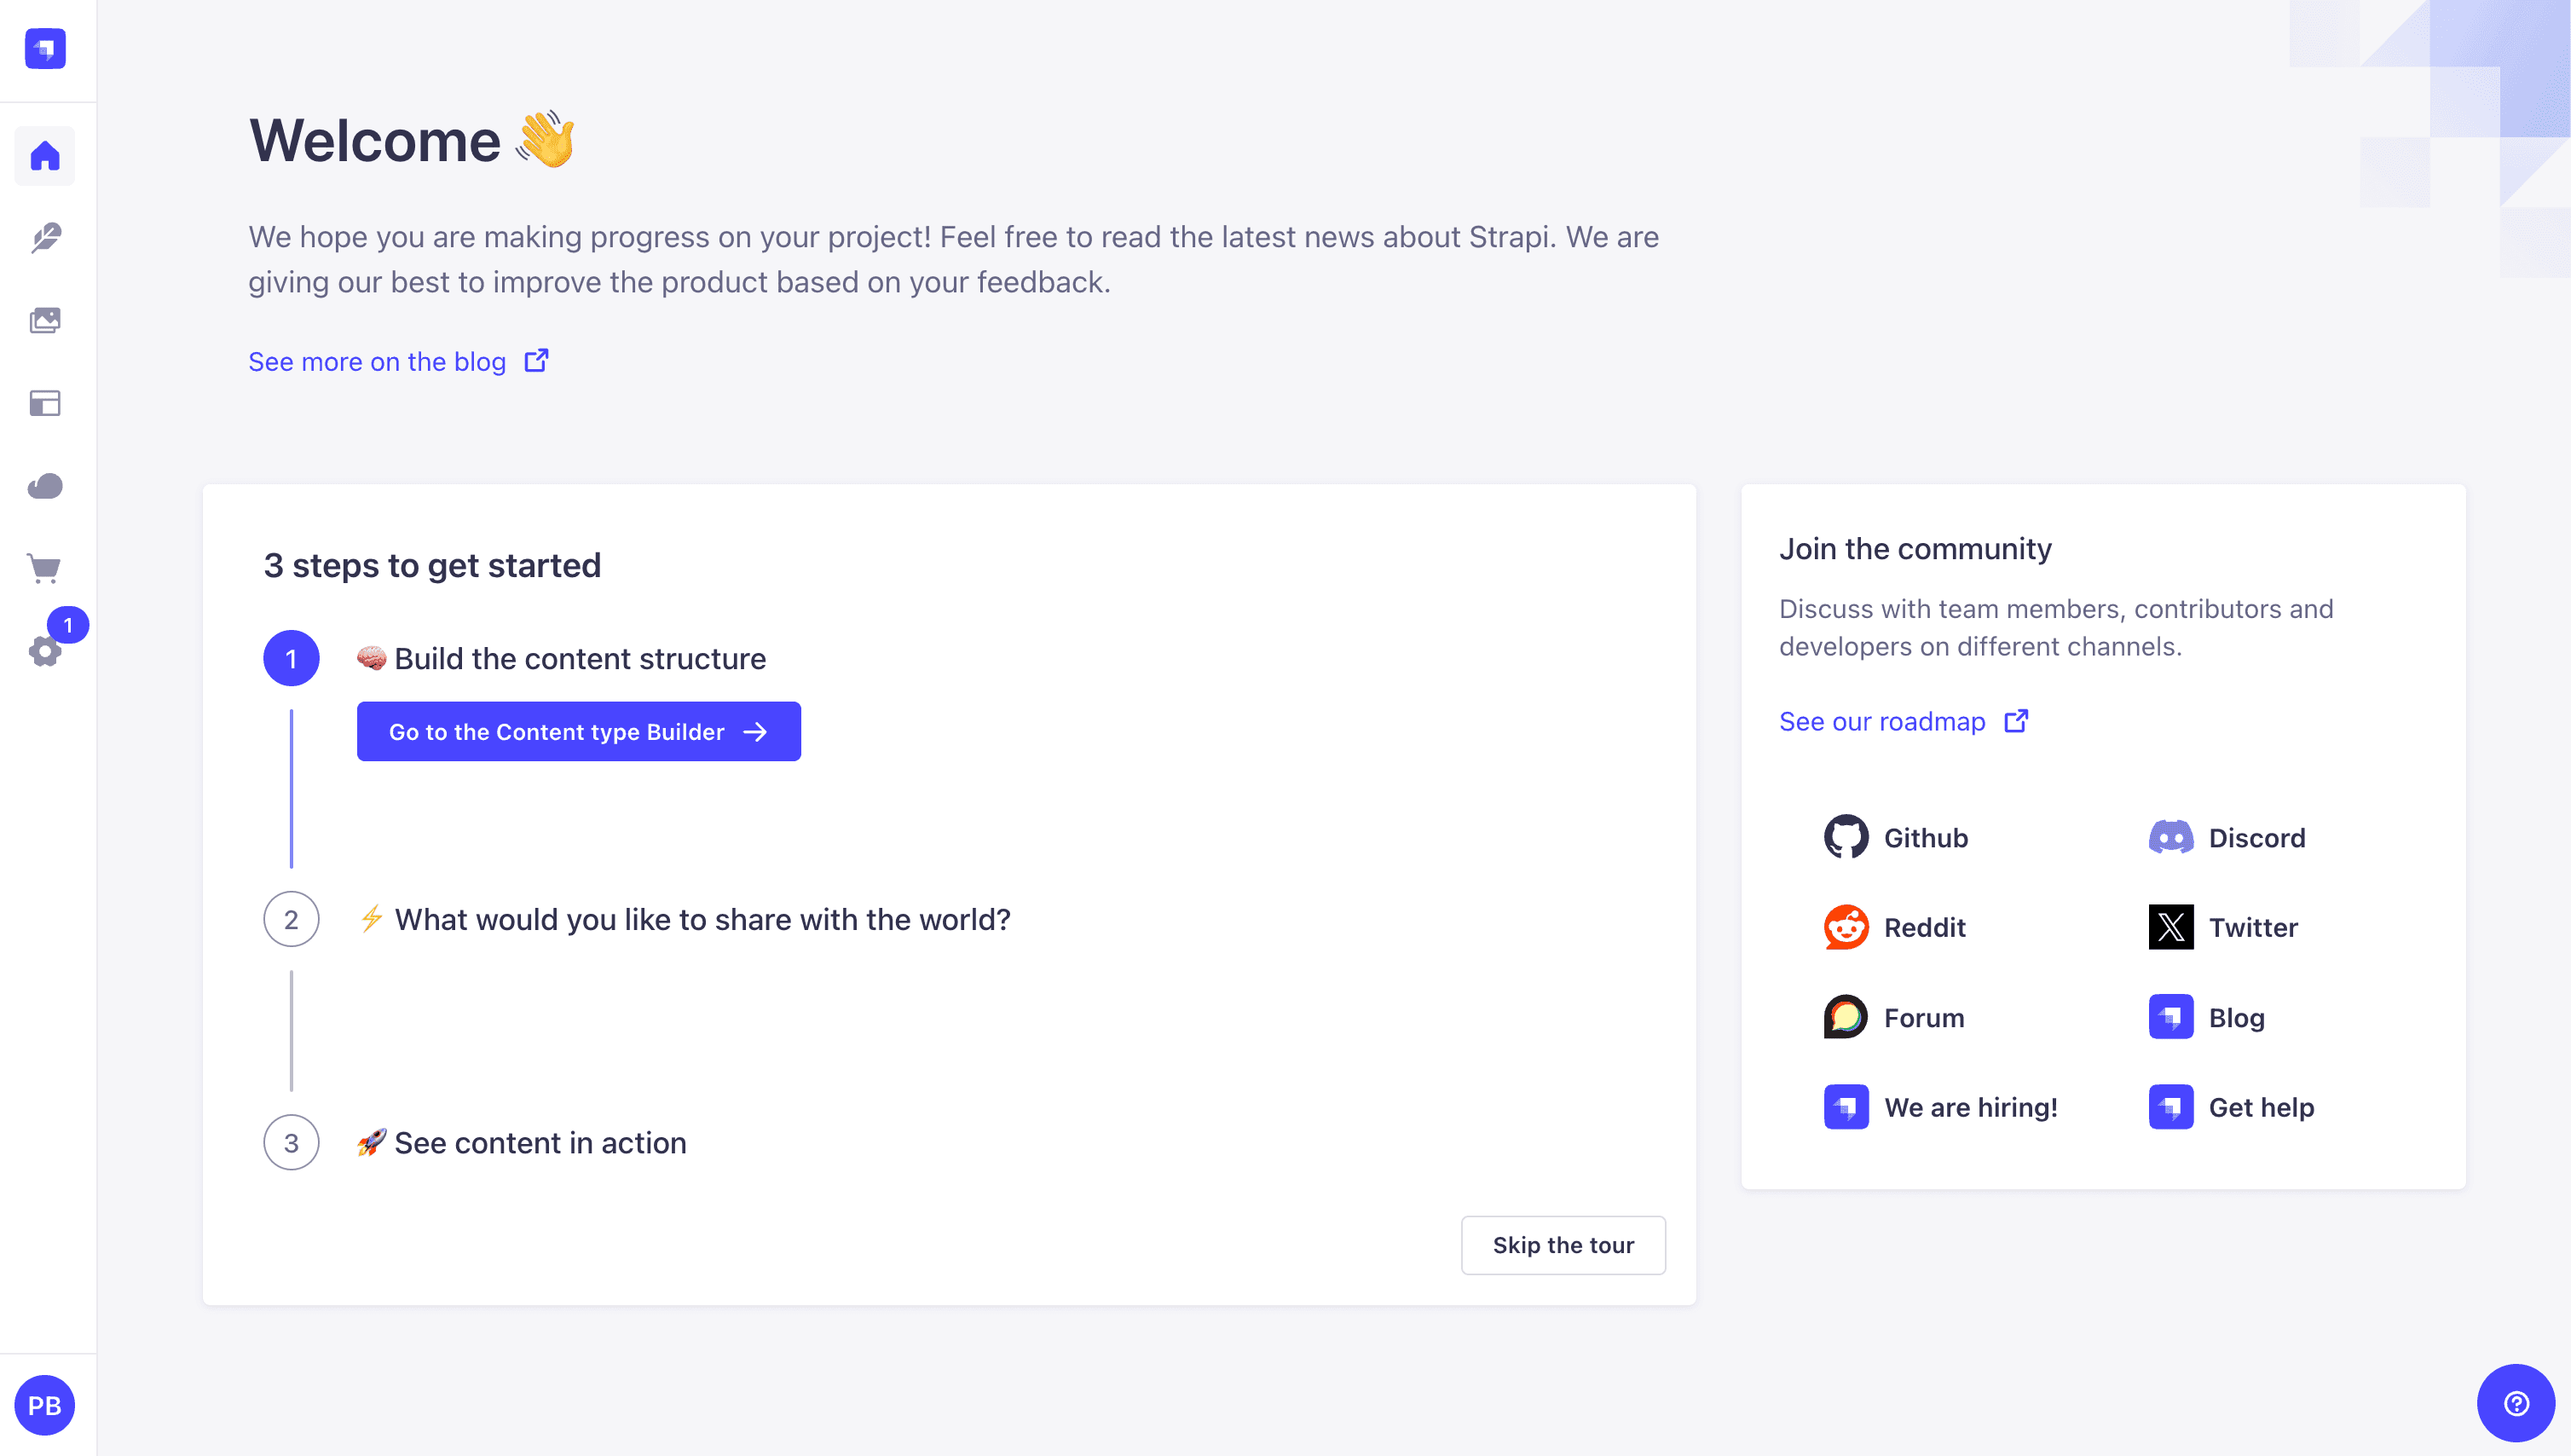
Publish Article Entries
Since we created our app with the example data, you should be able to navigate to your Article collection and see the data that was created for us.
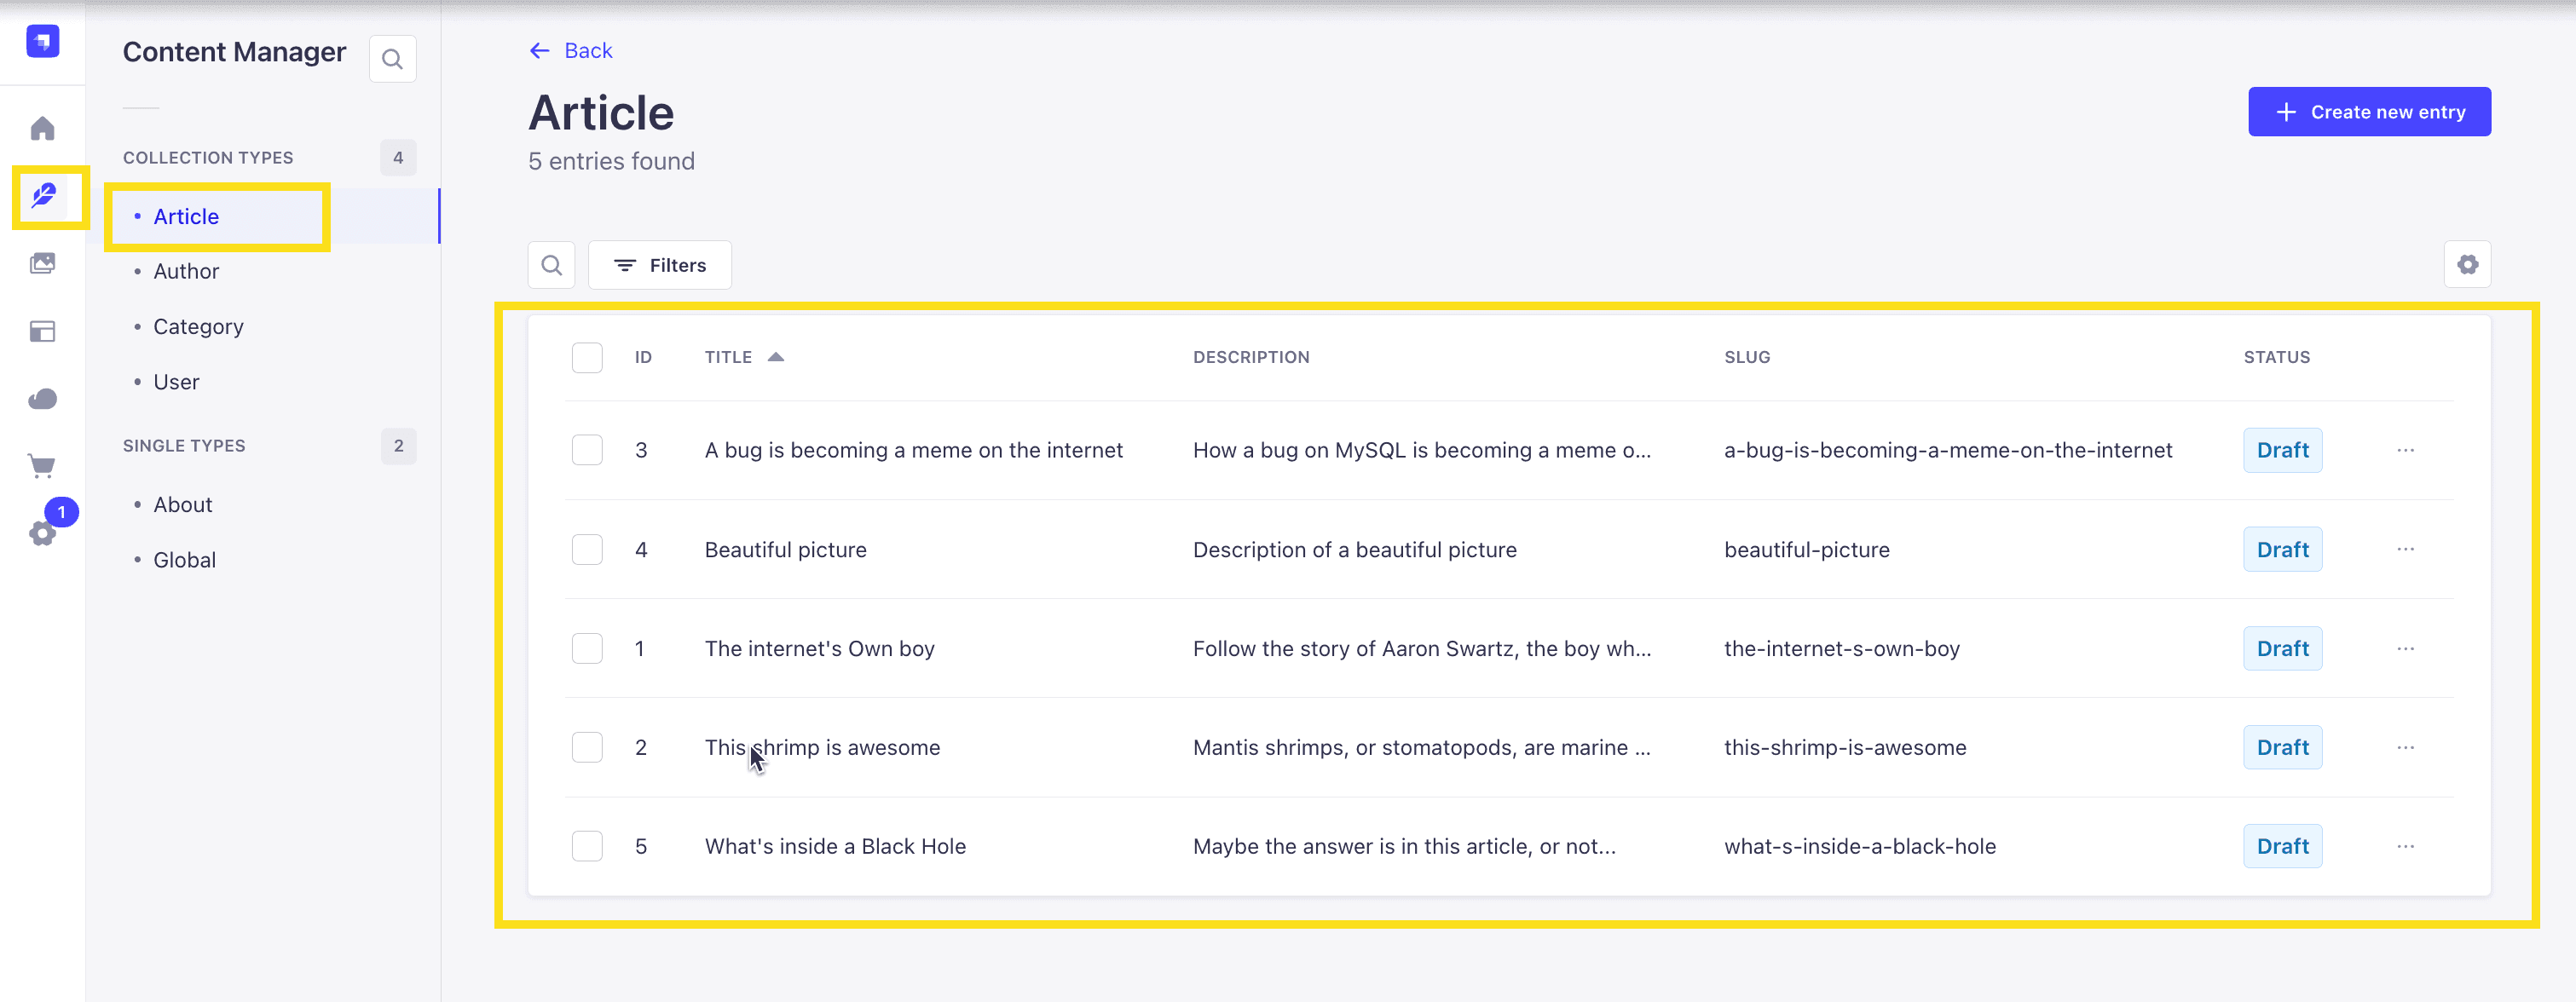
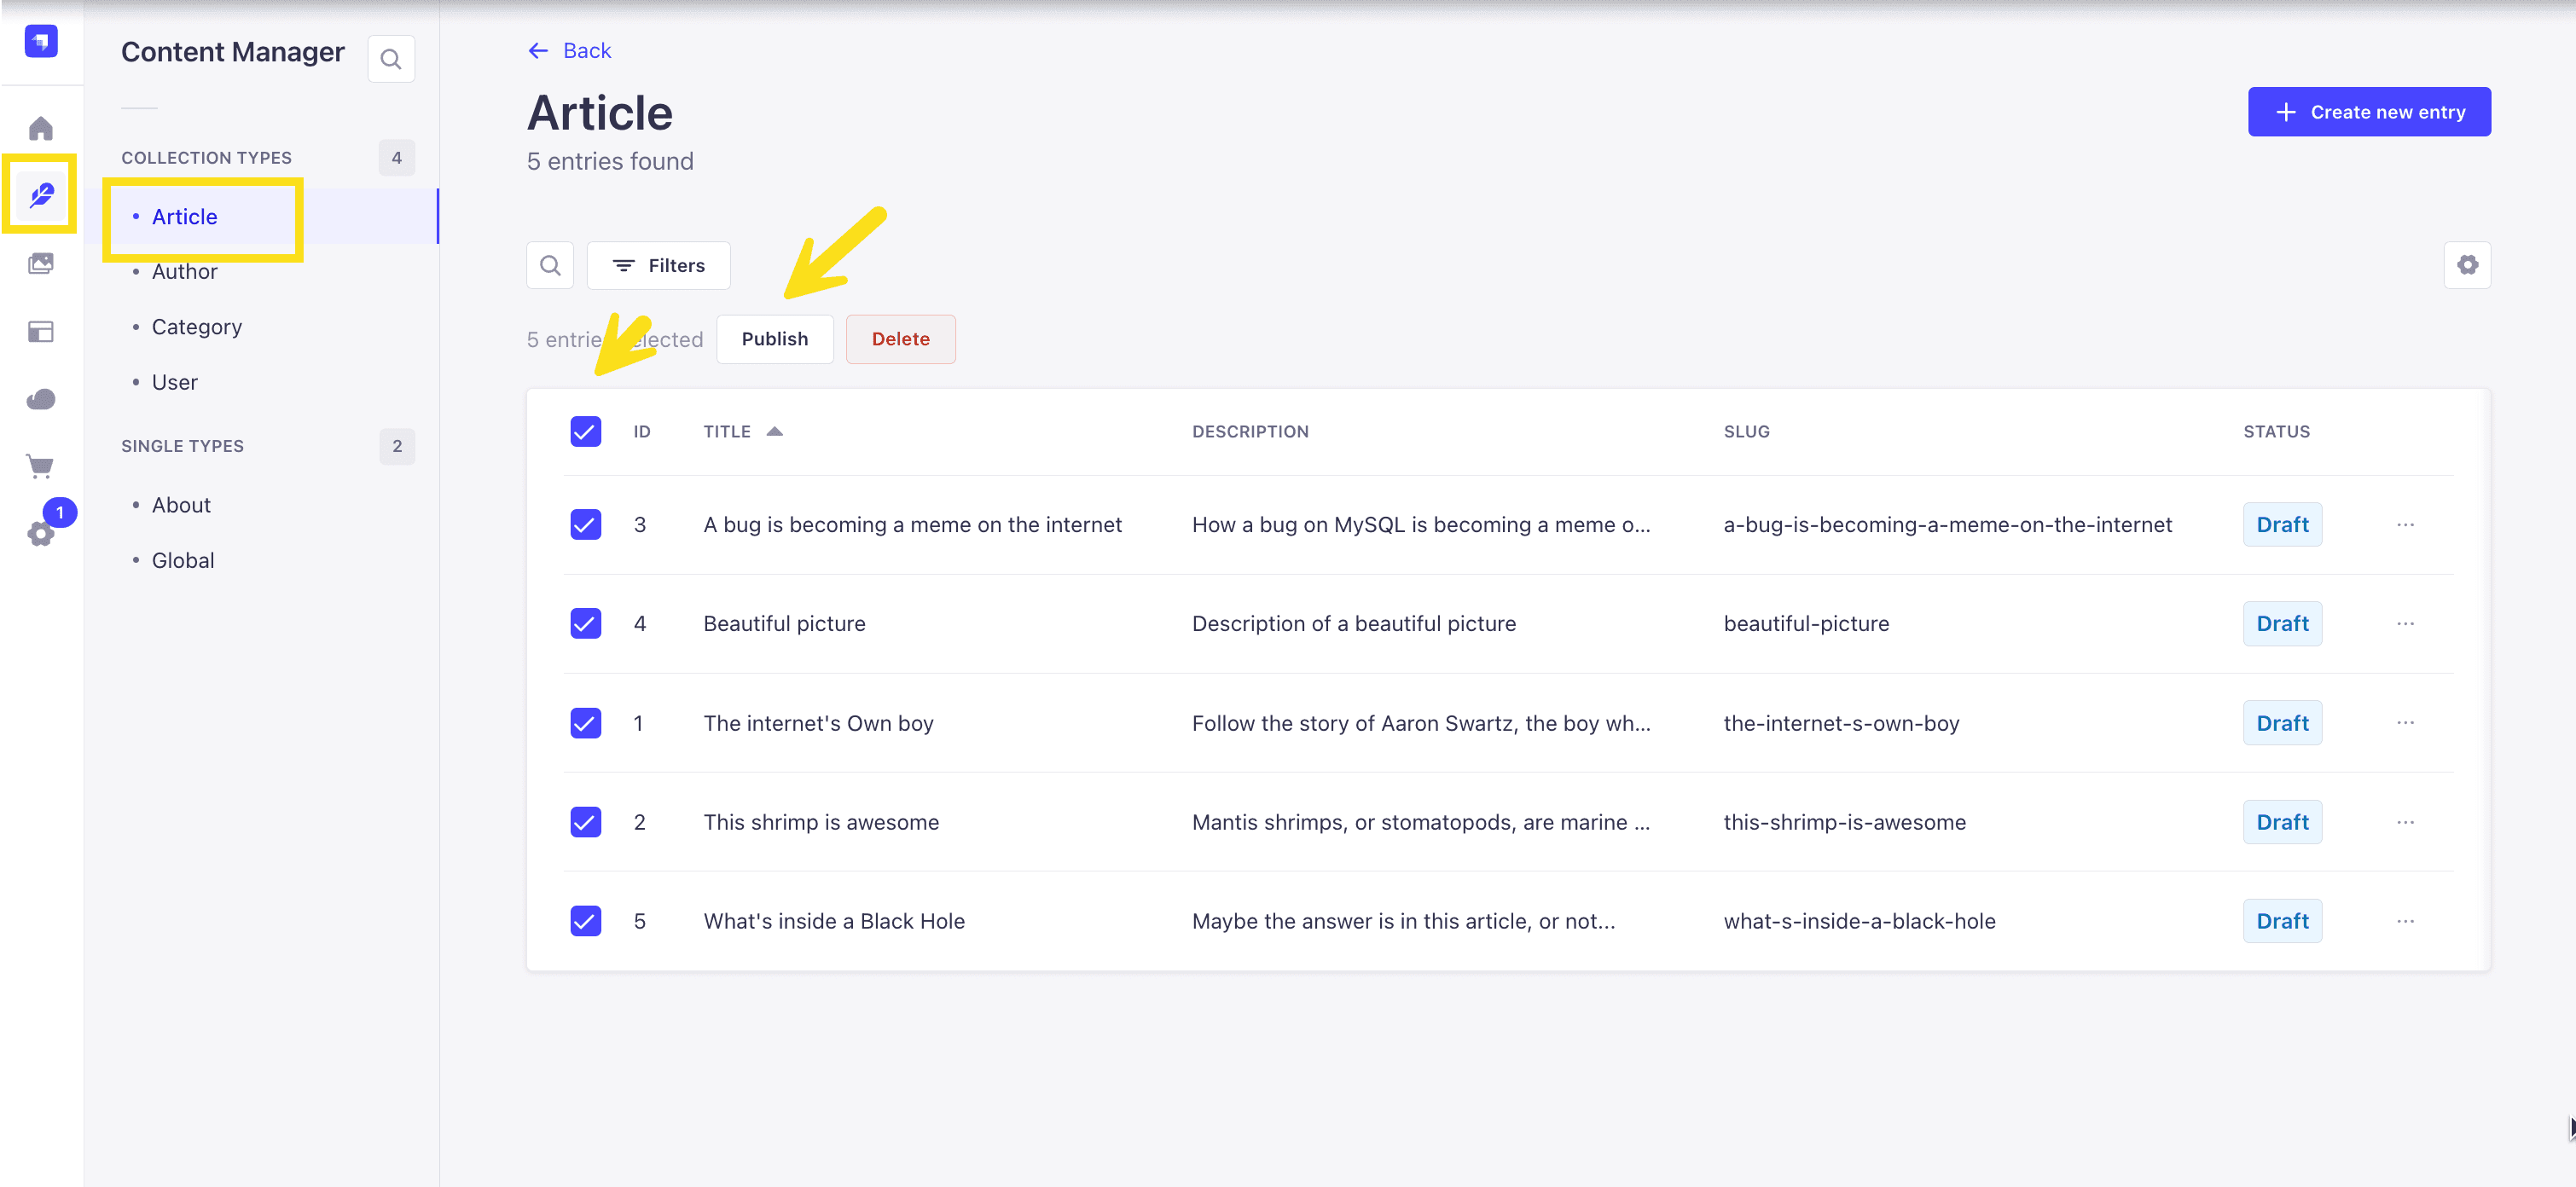
Now, let's make sure that all of the data is published. If not, you can select all items via the checkbox and then click the Publish button.
Enable API Access
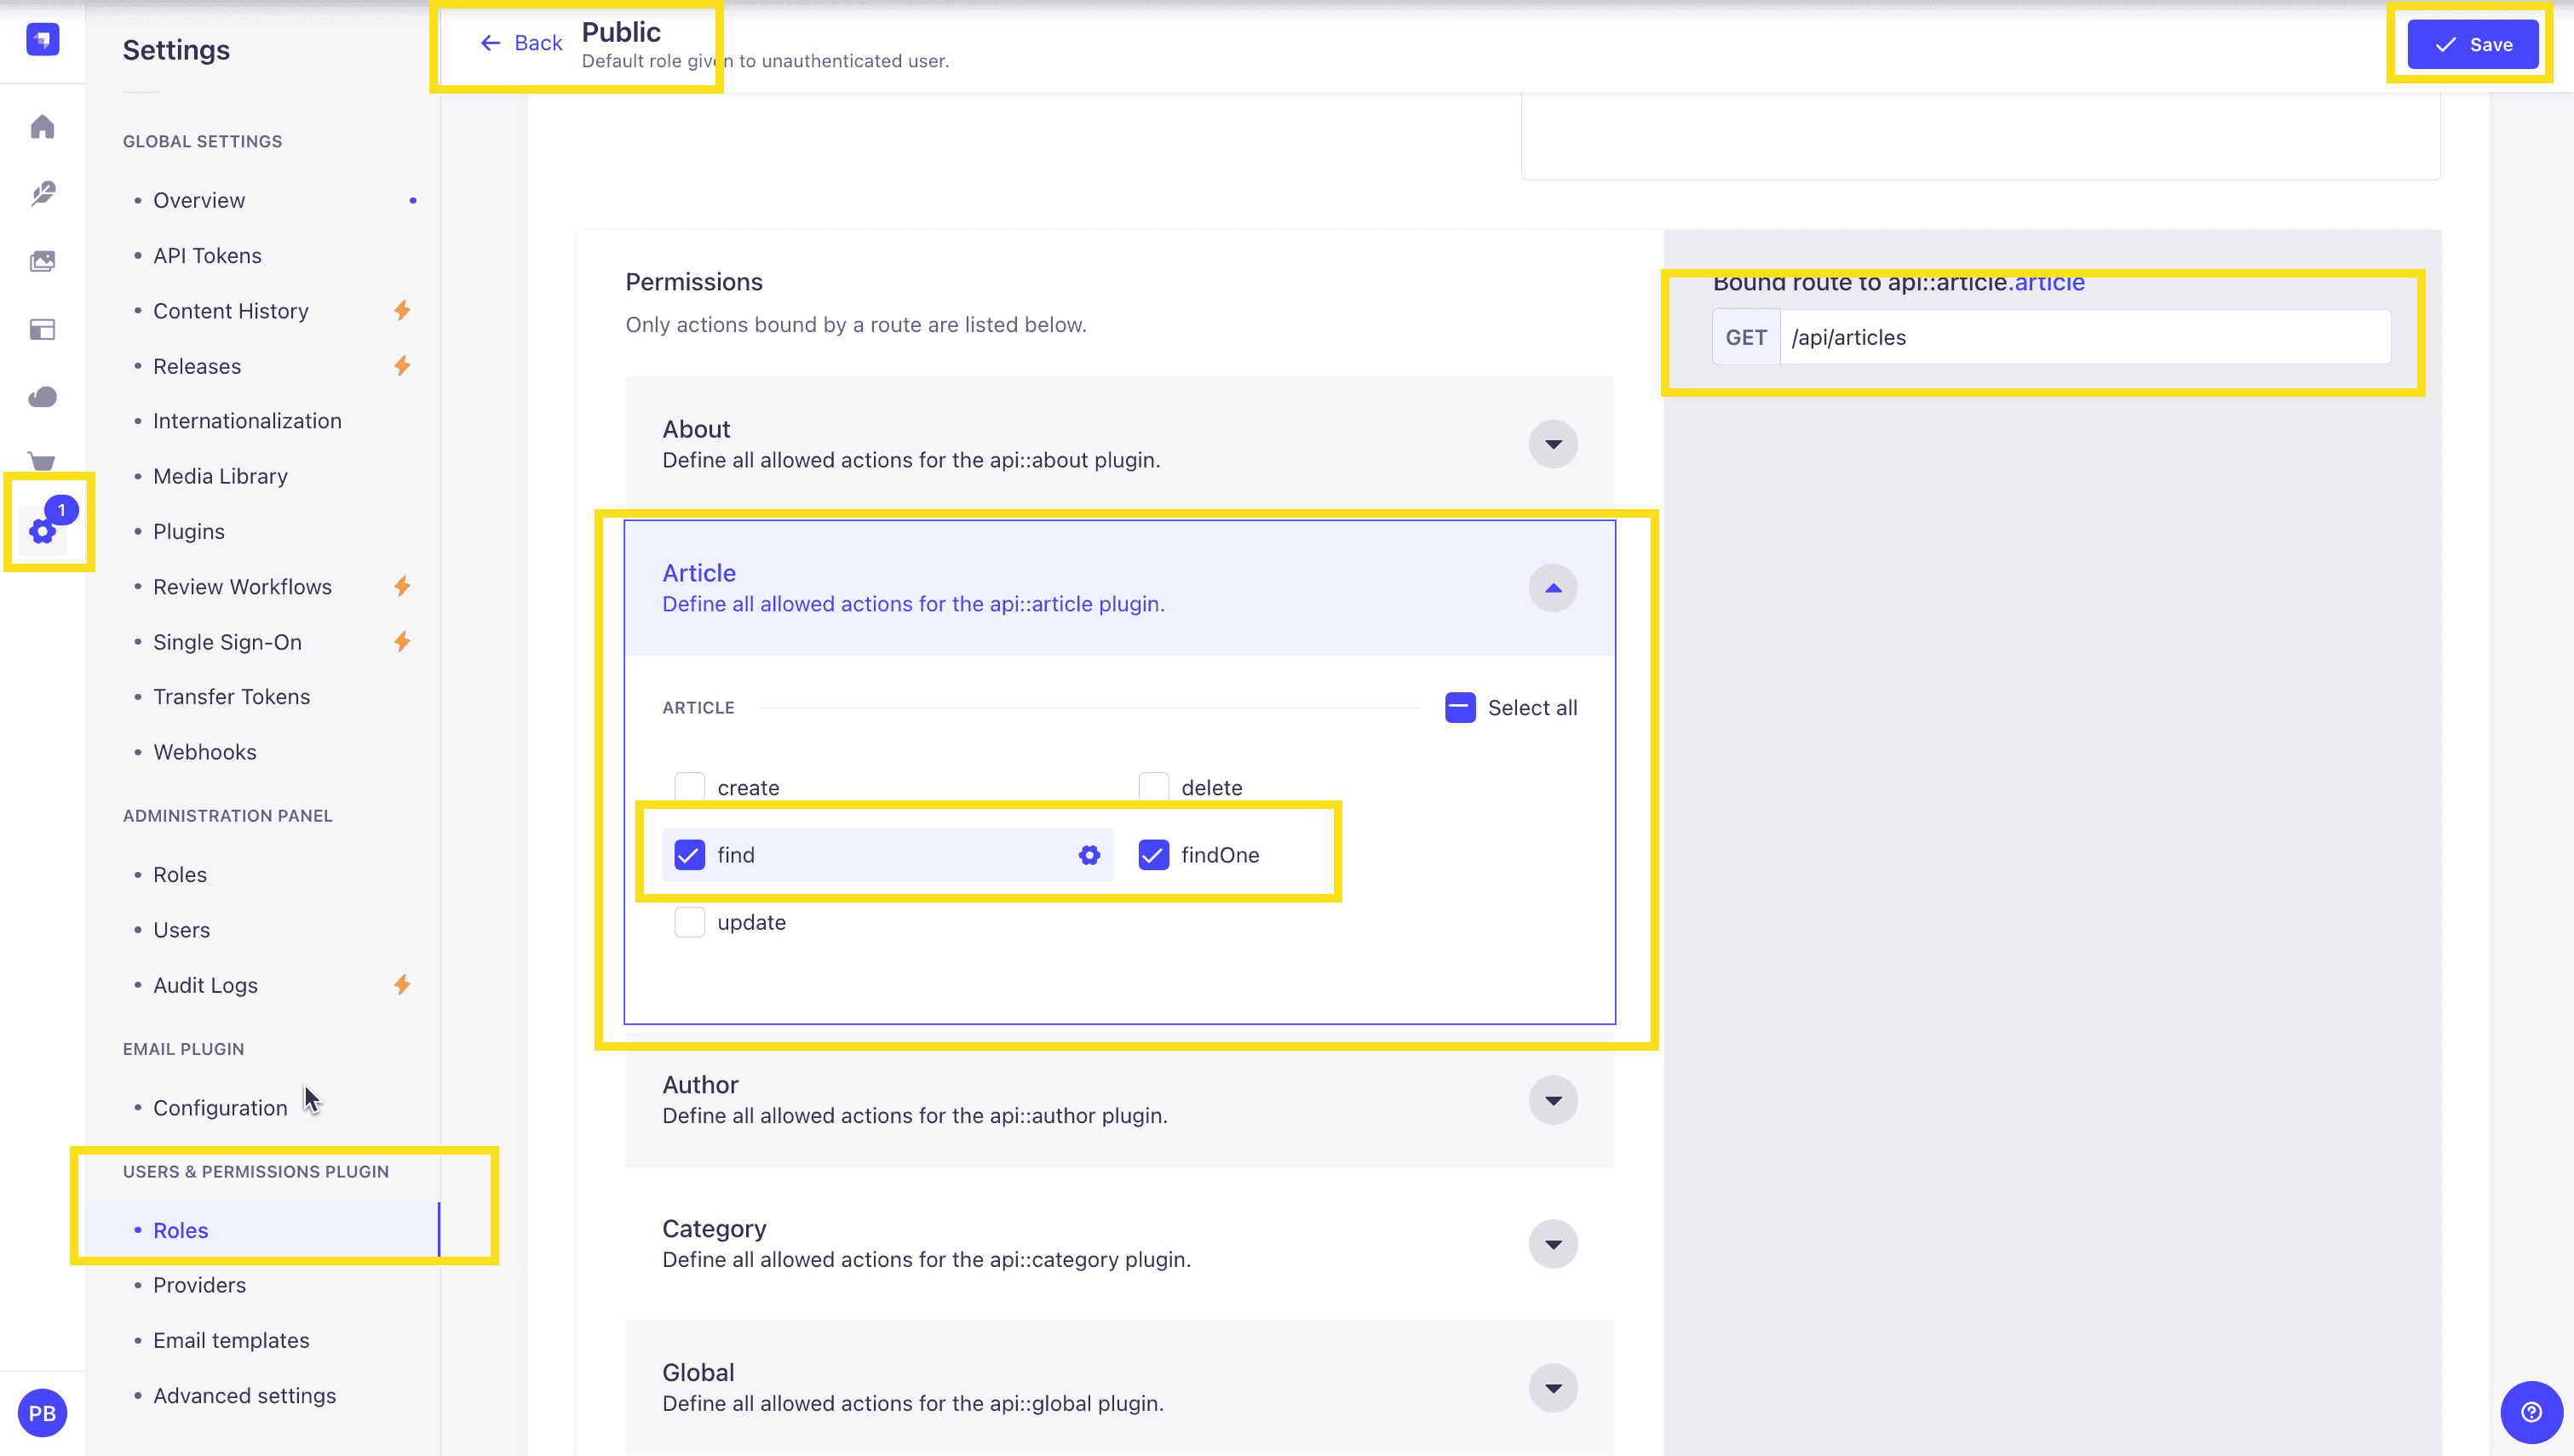
Once all your articles are published, we will expose our Strapi API for the Articles Collection. This can be done in Settings -> Users & Permissions plugin -> Roles -> Public -> Article.
You should have find and findOne selected. If not, go ahead and select them.
Test API
Now, if we make a GET request to http://localhost:1337/api/articles, we should see the following data for our articles.
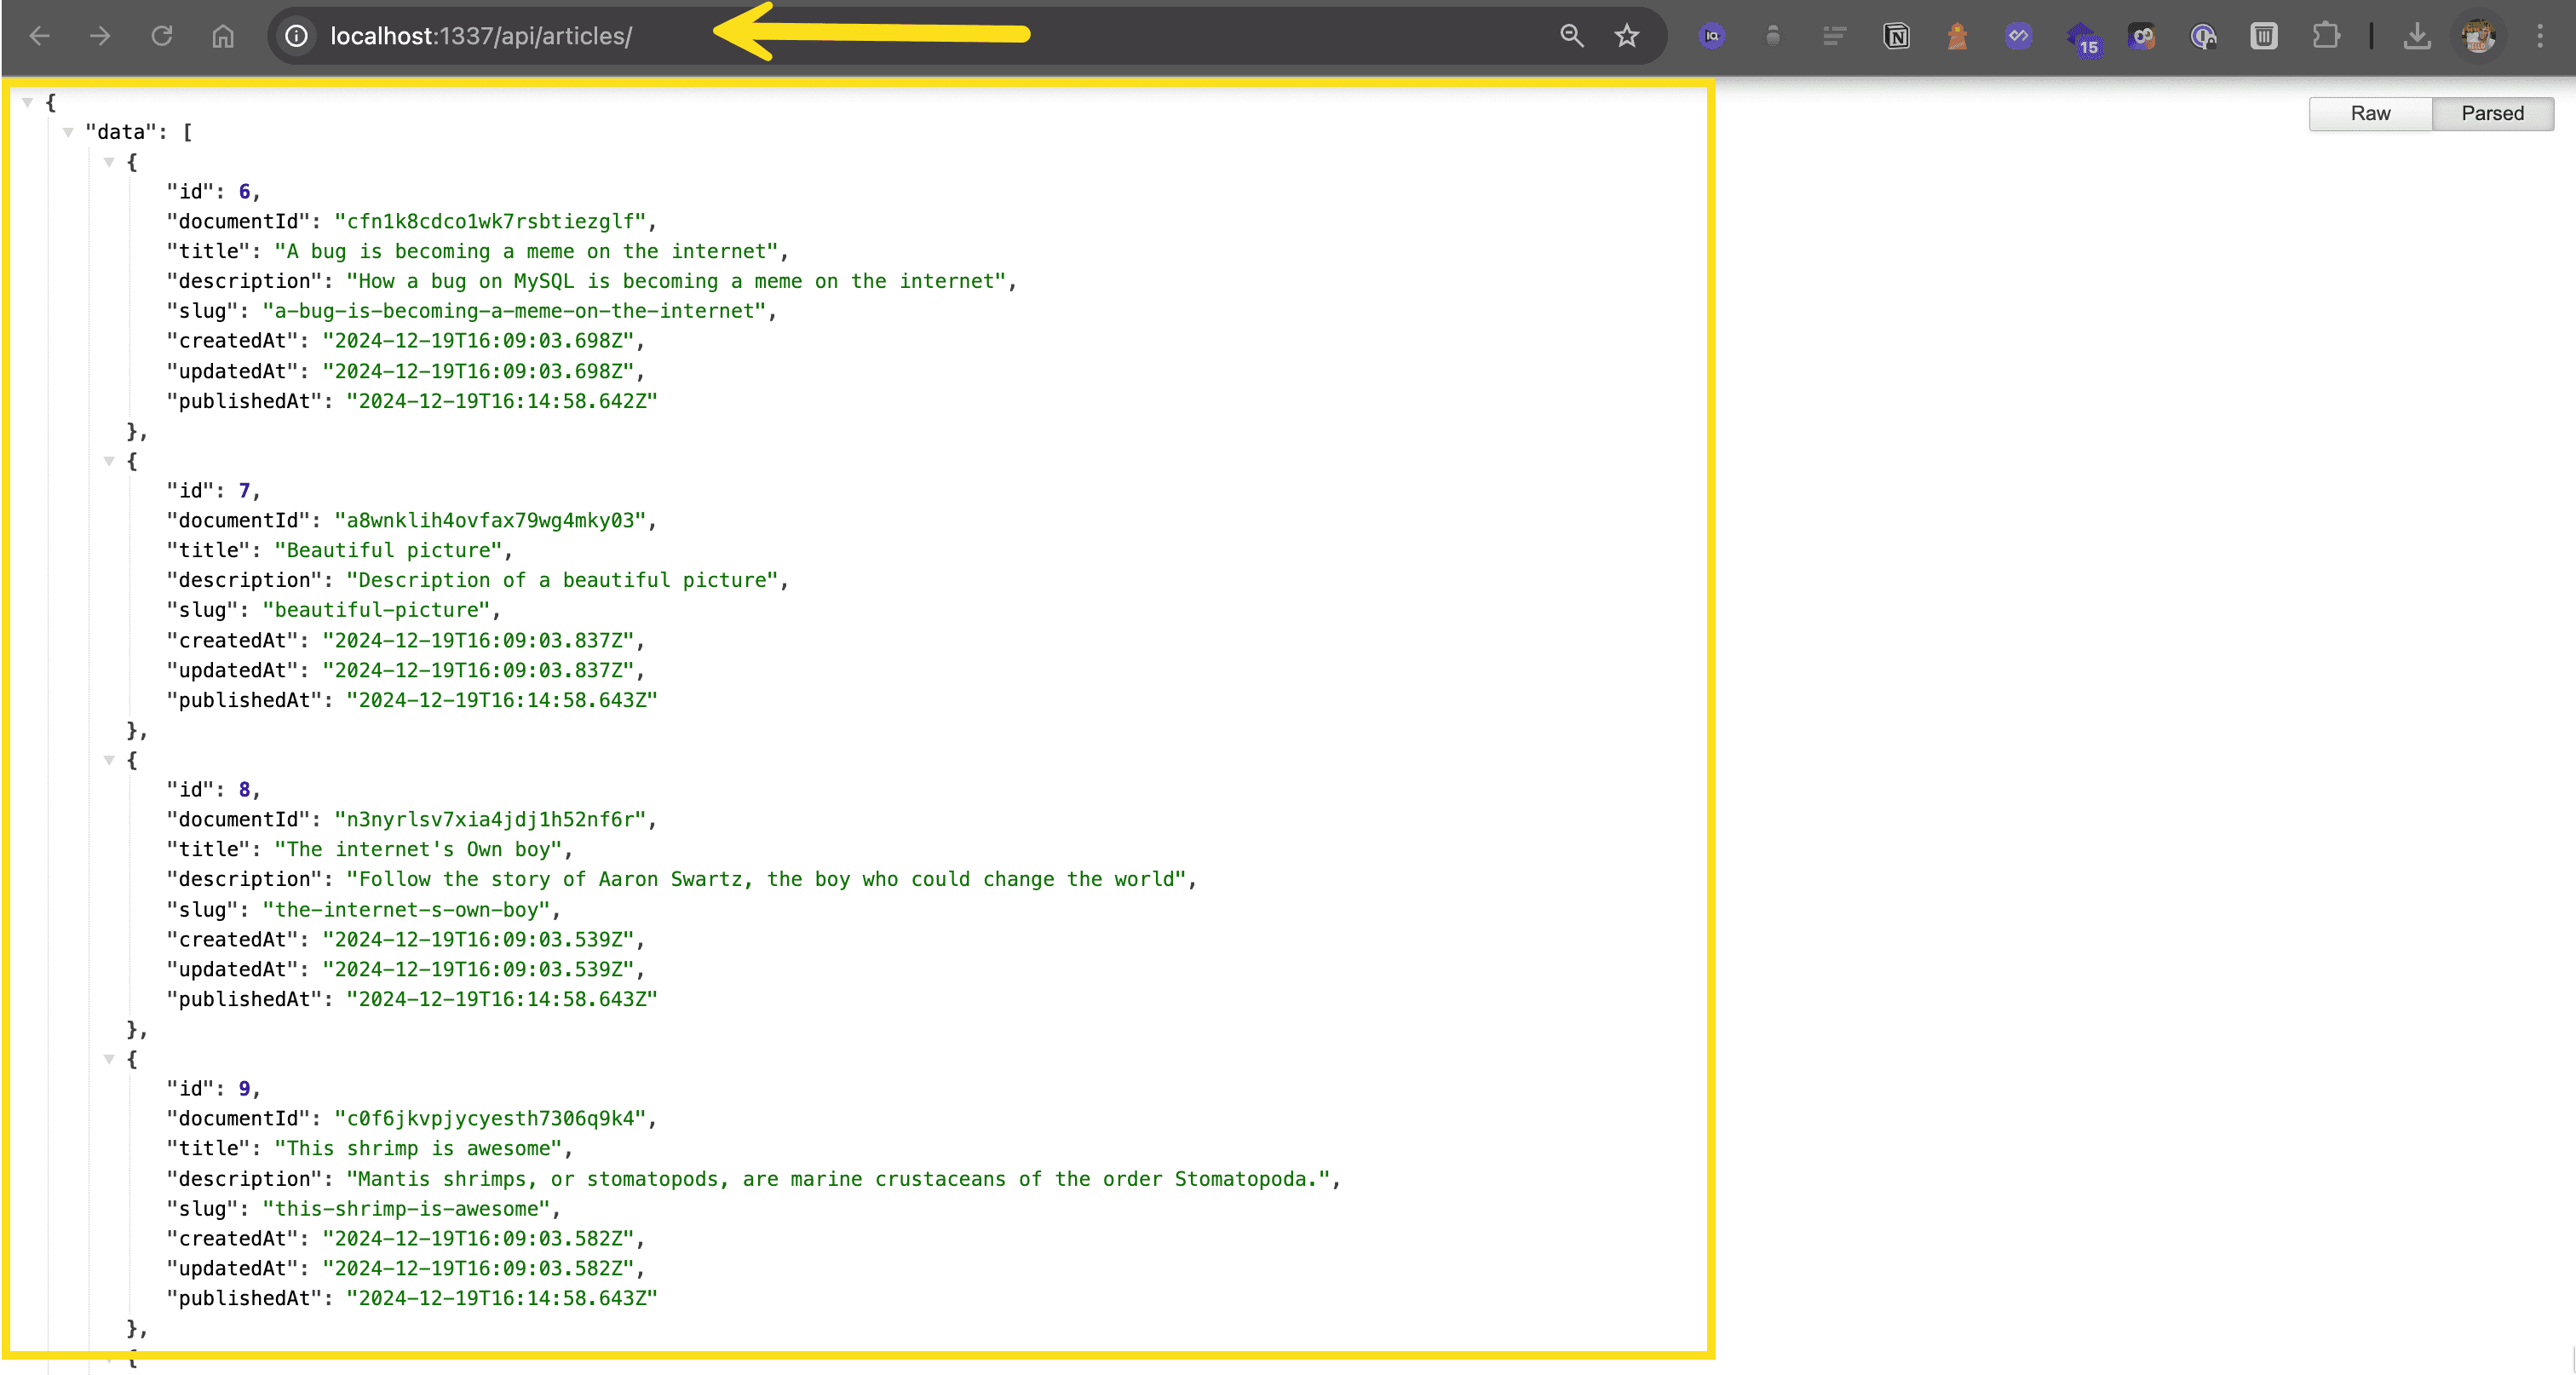
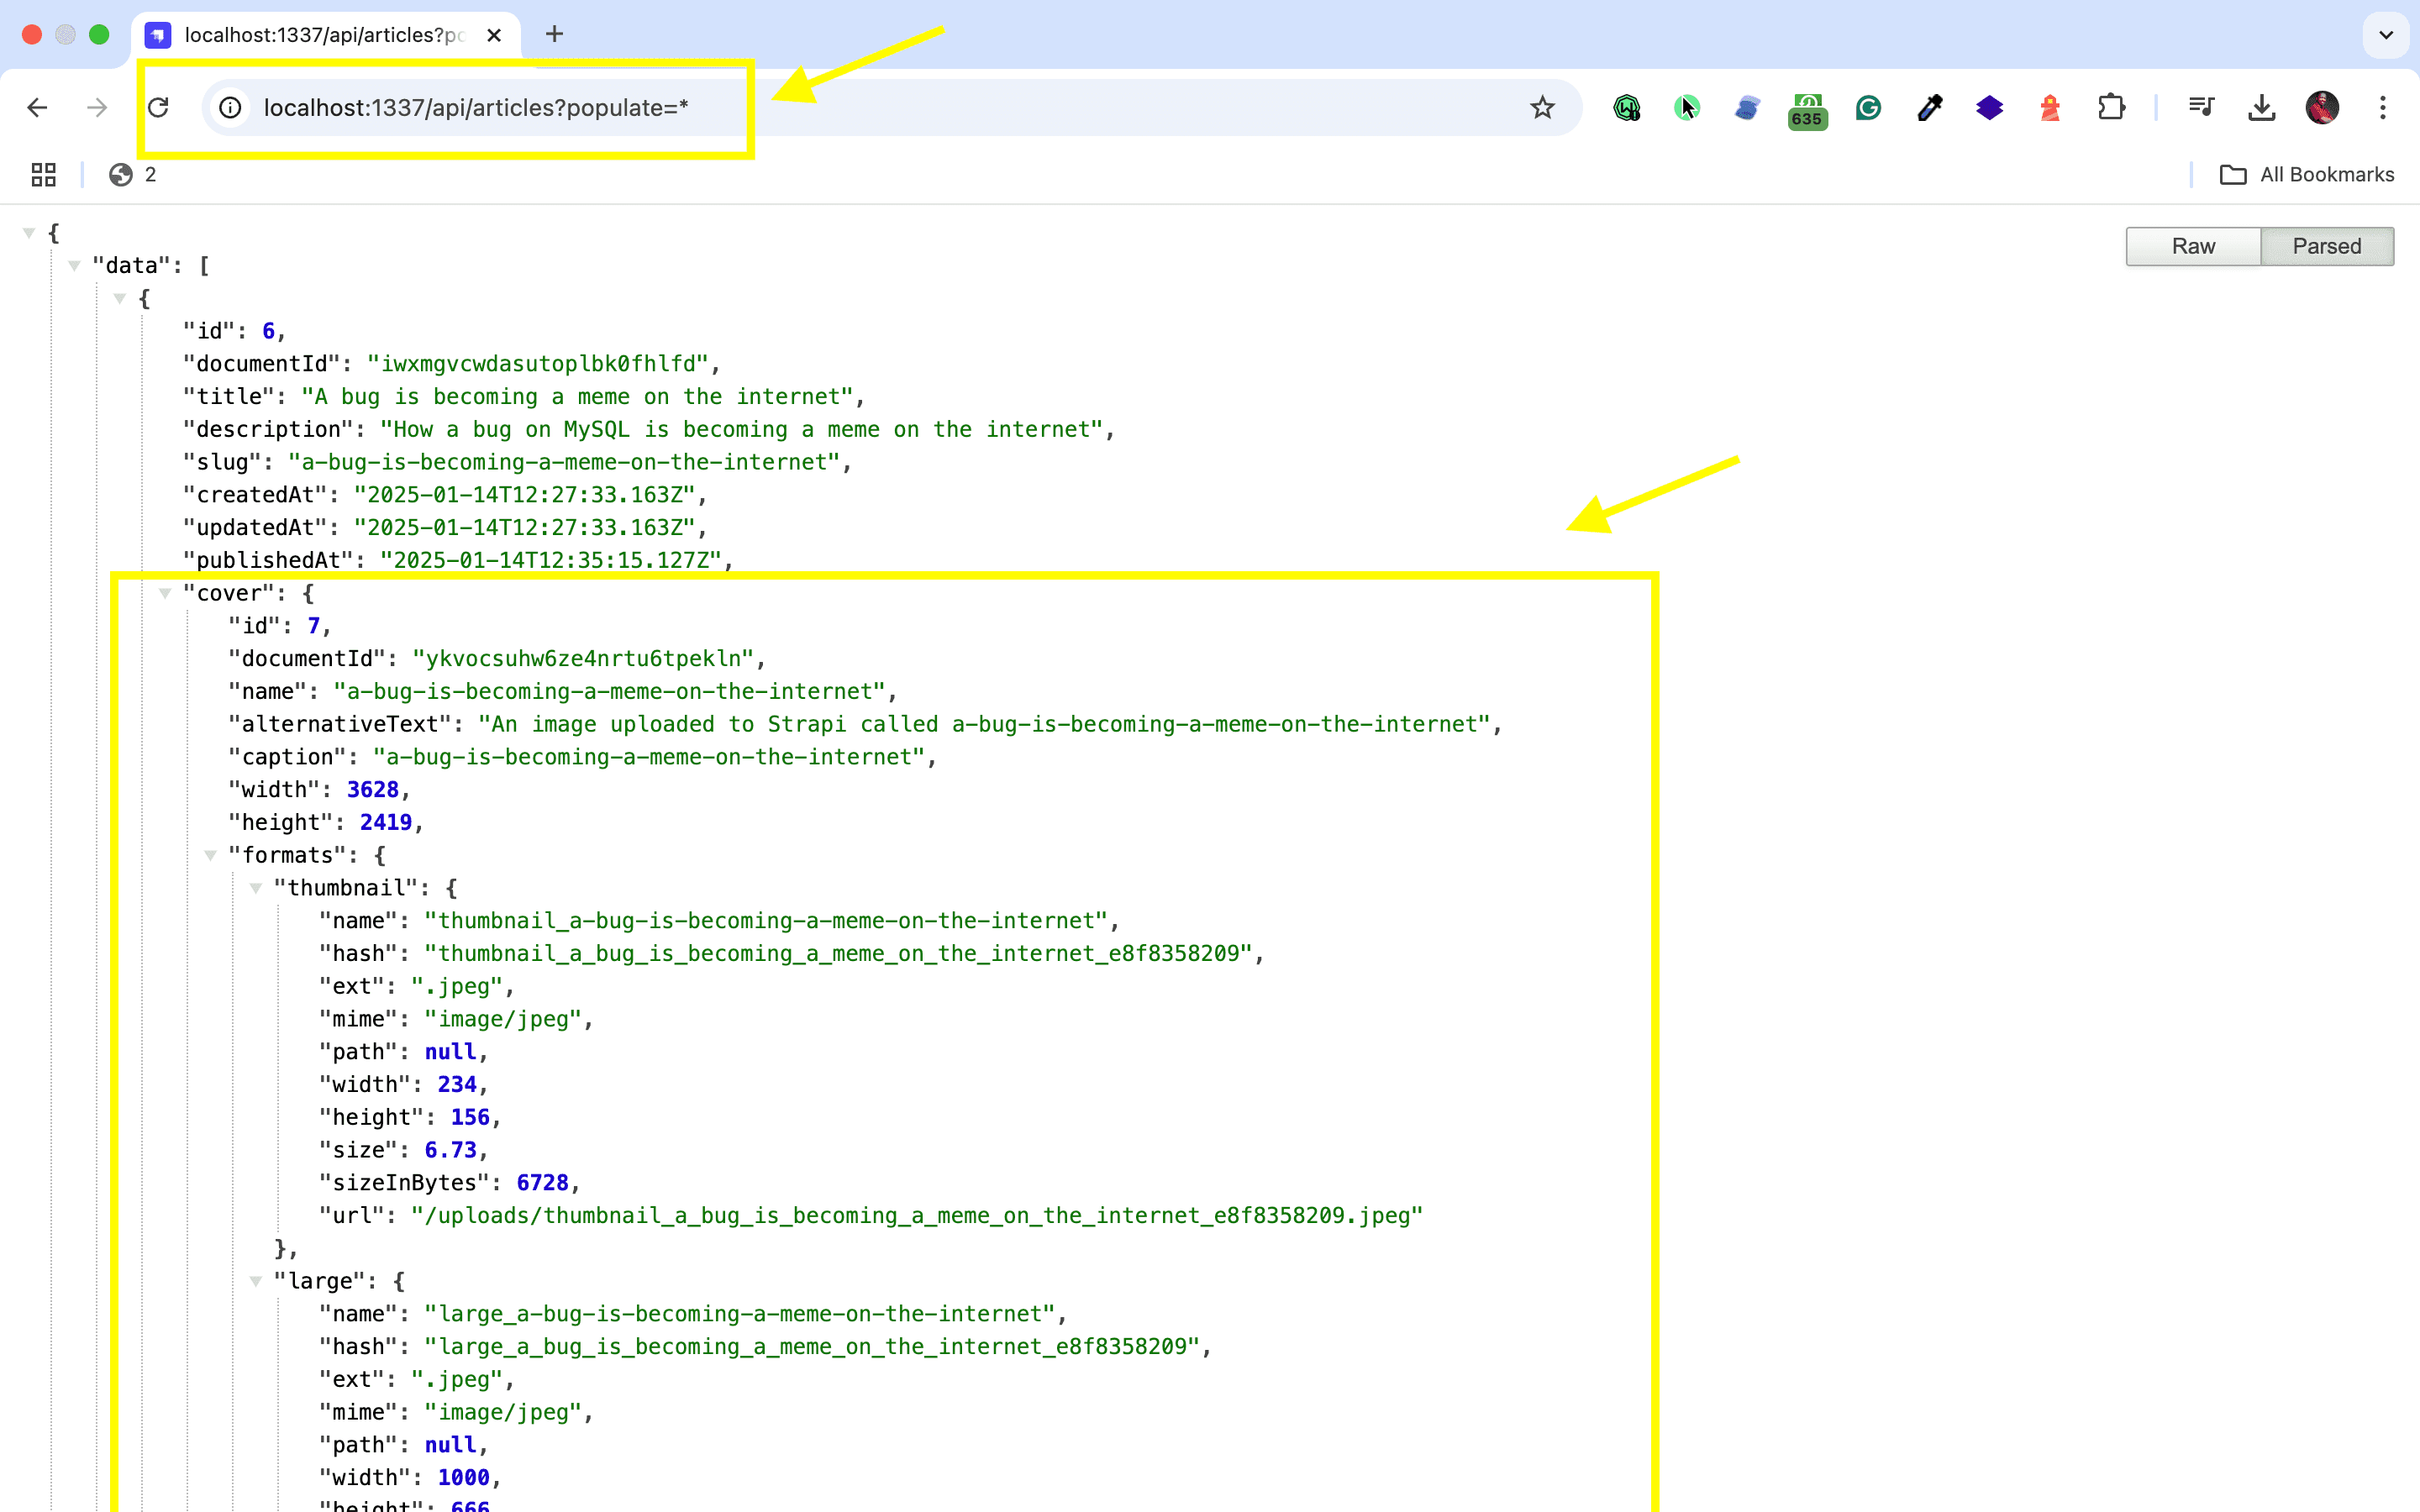
🖐️ Note: The article covers (images) are not returned. This is because the REST API by default does not populate any relations, media fields, components, or dynamic zones.. Learn more about REST API: Population & Field Selection.
So, let's get the article covers by using the populate=* parameter: http://localhost:1337/api/articles?populate=*
Getting Started with GitHub
Integrating your Strapi project with GitHub requires proper setup of both your Git repository and Strapi environment. Understanding Strapi Git workflows can ensure smooth version control and team collaboration.
Installing and Adjusting Settings
With your environment ready, initialize Git and configure your repository:
- Navigate to your project folder:
cd my-project
- Initialize Git in your project:
git init
To maintain a clean and efficient Git repository, adopt practices such as using structured branching strategies like Gitflow, Trunk-Based Development, or GitHub Flow. Implement commit conventions with clear, atomic commits using formats like Conventional Commits. Follow merge protocols with a standard pull request process and appropriate merge strategies. Regularly clean up stale branches, keep dependencies up-to-date, and use continuous integration. Prevent and resolve conflicts by using feature branching and clear collaboration guidelines.
3. To create a .gitignore file for a Strapi project, consider excluding files such as .cache, build, .strapi-updater.json, environment variables like .env and .env.*, dependency directories like node_modules/, logs such as logs, *.log, npm-debug.log*, and database files like *.sqlite and *.sqlite3.
For projects that need an external database connection, setting up your environment variables correctly involves consulting the external database configuration. 4. Stage your files for the initial commit:
git add .
- Create your first commit:
git commit -m "Initial commit"
Code Implementation
Connect your local repository to GitHub and set up continuous integration:
- Create a new repository on GitHub.
- Link your local repository to GitHub:
git remote add origin <your-repository-url>
git push -u origin main
- Create a GitHub Actions configuration for automated workflows at
.github/workflows/strapi-deploy.ymlto build and test Strapi with Node.js version 16.x. Here's an example setup:
name: Strapi CI/CD
on:
 push:
   branches:
     - main
jobs:
 build-and-test:
   runs-on: ubuntu-latest
   steps:
     - uses: actions/checkout@v2
     - name: Setup Node.js
       uses: actions/setup-node@v3
       with:
         node-version: 16.x
     - name: Install Dependencies
       run: npm install
     - name: Build Strapi
       run: npm run build
- Handle sensitive data securely using GitHub Secrets for environment variables:
env:
 DB_HOST: ${{ secrets.DB_HOST }}
 DB_PWD: ${{ secrets.DB_PWD }}
To optimize your continuous integration setup with Strapi and manage environment variables securely, follow these practices:
- Use environment variables to store sensitive data like API keys and database credentials, and exclude environment files from version control.
- Automate deployment processes by integrating Git with CI/CD pipelines, using YAML files for pipeline configurations.
- Ensure security by implementing access management best practices and securely handling personal access tokens and SSH keys.
This setup provides a solid foundation to integrate GitHub with Strapi effectively, ensuring proper version control and continuous integration. The workflow helps maintain code quality while keeping your environment variables secure throughout development.
Strapi Open Office Hours
If you have any questions about Strapi 5 or just would like to stop by and say hi, you can join us at Strapi's Discord Open Office Hours Monday through Friday at 12:30 pm - 1:30 pm CST: Strapi Discord Open Office Hours
For more details, visit the Strapi documentation and GitHub documentation.
Frequently Asked Questions
Initialize Git in your Strapi project directory, create a proper .gitignore file excluding .cache, build, .env, and node_modules, then push to a GitHub repository. Use structured branching strategies like Gitflow or GitHub Flow and implement clear commit conventions for team collaboration.
Yes, GitHub Actions enables CI/CD workflows that automatically build, test, and deploy your Strapi application on pushes to specific branches. Configure YAML pipeline files to run build commands and handle deployments to platforms like Heroku, DigitalOcean, or AWS.
Store sensitive data like database credentials and API keys using GitHub Secrets rather than committing them to your repository. Reference these secrets in your GitHub Actions workflows using the ${{ secrets.SECRET_NAME }} syntax to keep credentials secure.
Your .gitignore should exclude .cache, build, .strapi-updater.json, environment files (.env, .env.local), node_modules, and any generated files. This keeps your repository clean and prevents sensitive information from being exposed.
Strapi uses the Content-Types Builder which generates schema files in your codebase. When team members pull changes, they should run the Strapi build command to sync their local database with the updated schema definitions stored in Git.