Railway
Railway is an infrastructure platform where you can provision infrastructure, develop with that infrastructure locally, and then deploy to the cloud.

What is Strapi?
Strapi is the leading open-source headless CMS offering features, like customizable APIs, role-based permissions, multilingual support, etc. It simplifies content management and integrates effortlessly with modern frontend frameworks.
Explore the Strapi documentation for more details.
Strapi Cloud vs Railway
Strapi Cloud is purpose-built for seamless Strapi hosting.
Strapi Cloud: Built for Strapi
Strapi Cloud provides a tailored deployment environment with features designed to work out of the box:
- Email integration – Built-in support for sending emails without requiring third-party services.
- Persistent storage – No need to configure external file providers or volumes.
- Managed hosting – Includes backups, security patches, performance tuning, and updates.
- Expert support – Paid plans include direct access to the Strapi team.
You can deploy your Strapi project directly from a Git repository. Strapi Cloud handles automatic builds, monitoring, and scaling.
Choosing Between Strapi Cloud and Railway
Choose Strapi Cloud if
- You want fast, reliable deployment with no server configuration.
- You want media storage, email, and backups handled for you.
- You prefer a platform built by the creators of Strapi.
In short, Strapi Cloud provides everything you need for a hassle-free Strapi deployment. Railway is a strong alternative for developers seeking flexibility and control at the cost of additional setup.
What is Railway?
Railway is an infrastructure platform where you can provision infrastructure, develop with that infrastructure locally, and then deploy to the cloud.
How to self-host a Strapi app on Railway
Looking for a simple and powerful way to get your Strapi application live? In this guide, you will learn how to deploy a Strapi application on Railway, a modern hosting platform that simplifies the deployment process.
We will cover everything you need to know, from setting up your project with either SQLite or PostgreSQL databases to ensuring your files persist using Railway's volumes. You will also discover how to optimize your deployment for cost and performance. This includes enabling serverless mode and offloading your media library to an external provider like Cloudinary.
To help you make the best choice for your project, this tutorial also compares deploying on Railway with using Strapi Cloud. You will get a clear overview of both hosting solutions. They no offer 1 click deployment.
🚀 One-Click Deploy on Railway Deploy Strapi instantly on Railway using this emplate — pre-configured with Postgres 17 and the latest version of Strapi. Deploy on Railway →
Before we get started, please check out the video demo below:
Prerequisites
To follow along with this article, you will need the following:
- Node.js: Only Active LTS or Maintenance LTS versions are supported (currently v20 and v22). You can find installation instructions on the official Node.js website.
- Railway account: A Railway account is required for deployment. You can sign up for free on the Railway website.
- A basic understanding of Strapi: This guide assumes you have some familiarity with Strapi. If you are new to it, we highly recommend completing the official Strapi Quick Start Guide to learn the fundamentals.
Setup Strapi 5 Headless CMS Project Locally
Start by scaffolding a new Strapi 5 project locally. This will serve as an example of a Strapi project you want to deploy to Railway.
On your local machine, open a terminal in your working directory and create a Strapi project named my-app by running the following command:
npx create-strapi-app@latest myapp \
 --skip-cloud \
 --skip-db \
 --no-example \
 --js \
 --use-npm \
 --install \
 --no-git-init
Wait for your Strapi app to finish installing.
Then, navigate into your Strapi project folder:
cd my-appCreate a Strapi Admin and Login
Create an admin user for your Strapi app by running the following command. This example uses chef@strapi.io as the email and Gourmet1234 as the password.
npm run strapi admin:create-user -- --firstname=Kai --lastname=Doe --email=chef@strapi.io --password=Gourmet1234Next, start your Strapi server:
npm run developThis will launch your Strapi server on port 1337. Visit localhost:1337/admin in your browser. Log in using the admin credentials you created earlier.
Create a Collection Type Called Post
We will create a sample Strapi collection type named Post as an example for this integration.
Visit the Content-Type-Builder page of your Strapi project.
Click the plus icon(+) next to COLLECTION TYPES in your Strapi admin panel to create a new collection type named Post.
Add the following fields to the Post collection:
title: a Text field (short text)content: a Text field (long text)image: a Media field (single media)
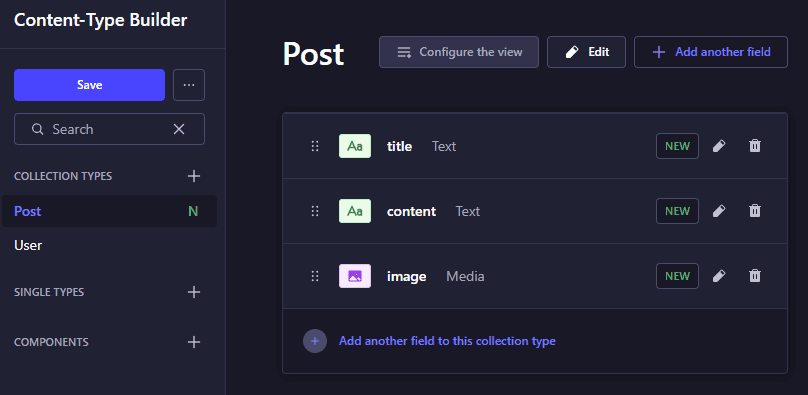
Click the Save button at the top-right corner and wait for the server to restart.
Deploy Strapi to Railway Using a SQLite database
This section explores how you can deploy Strapi to Railway using a SQLite database.
If you prefer a deployment using a PostgreSQL database, please skip ahead to the section titled: "Deploy to Railway using a PostgreSQL database".
Install Railway CLI Tool
After creating your Post collection, you can proceed to deploy your Strapi app to Railway.
In your terminal, stop the Strapi server by pressing Ctrl + C .
Railway provides a CLI tool to help deploy your app. You will use this tool to deploy your Strapi app.
Install the Railway CLI by running the following command:
npm i -g @railway/cliAuthenticate your Railway account
Log in to your Railway account by running the following command:
railway loginThis command will open a new tab in your default browser and redirect you to the Railway authentication page.
Follow the on-screen instructions to complete the authentication process.
Create and Link a Railway Project
Create a new Railway project and assign it a name. In this example, the project is named my-app. Run the following command in your terminal:
railway init --name my-appAfter running the command, a link to your Railway project will appear in the terminal output.
Next, ensure that you are in your Strapi project folder (my-app), then link it to your Railway project by running:
railway link --project my-appCreate and Link a Railway service
Create a new Railway service within your Railway project and give it a name. In this example, the service is named strapi. Run the following command:
railway add --service strapiNext, link the newly created Railway service to the Railway project you created earlier by running:
railway link --service strapi --project my-appAdd Environment Variables to Your Railway Service
Use the following command to add environment variables to your Railway service:
source .env && railway variables \
  --set "HOST=$HOST" \
  --set "PORT=$PORT" \
  --set "APP_KEYS=$APP_KEYS" \
  --set "API_TOKEN_SALT=$API_TOKEN_SALT" \
  --set "ADMIN_JWT_SECRET=$ADMIN_JWT_SECRET" \
  --set "TRANSFER_TOKEN_SALT=$TRANSFER_TOKEN_SALT" \
  --set "ENCRYPTION_KEY=$ENCRYPTION_KEY" \
  --set "DATABASE_CLIENT=$DATABASE_CLIENT" \
  --set "DATABASE_FILENAME=$DATABASE_FILENAME" \
  --set "DATABASE_SSL=$DATABASE_SSL" \
  --set "JWT_SECRET=$JWT_SECRET"
Add Config-as-code using railway.toml
Railway supports defining your project configuration using a railway.toml file. This file lives in the root of your Strapi project and allows you to specify build and deployment steps in code, making your setup more reproducible and easier to manage across environments.
Here’s a basic example tailored for deploying a Strapi app using Nixpacks:
Create a railway.toml file in the root of your Strapi project folder and add the following content:
[build]
builder = "NIXPACKS"

[build.nixpacksPlan.phases.setup]
nixPkgs = ["nodejs_22"]

[build.nixpacksPlan.phases.install]
cmds = ["npm install"]

[build.nixpacksPlan.phases.build]
cmds = ["npm run build"]

[deploy]
startCommand = "npm run start"
This configuration ensures Railway installs Node.js 22, runs the build commands, and starts the Strapi server using the defined script.
Deploy Strapi App and Generate a Domain in Railway
Deploy your Strapi app to Railway by running the following command:
railway upThis uploads your Strapi project folder to Railway's servers. Wait for your project to be built and deployed.
Once the build is complete, return to your terminal and stop the process by pressing Ctrl + C.
Generate a domain for your Strapi app by running:
railway domainOpen the generated domain in your browser and register an admin user for your Strapi production app.
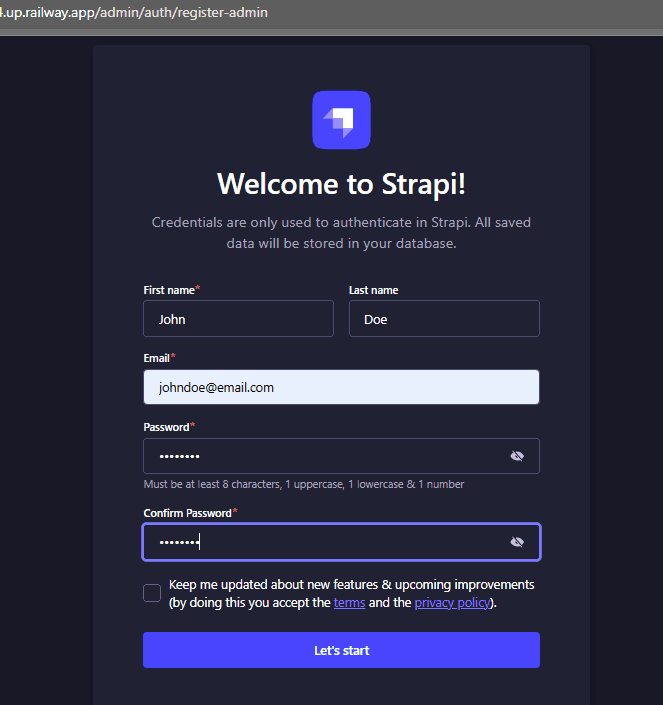
Add an Entry to Your "Post" Collection Type
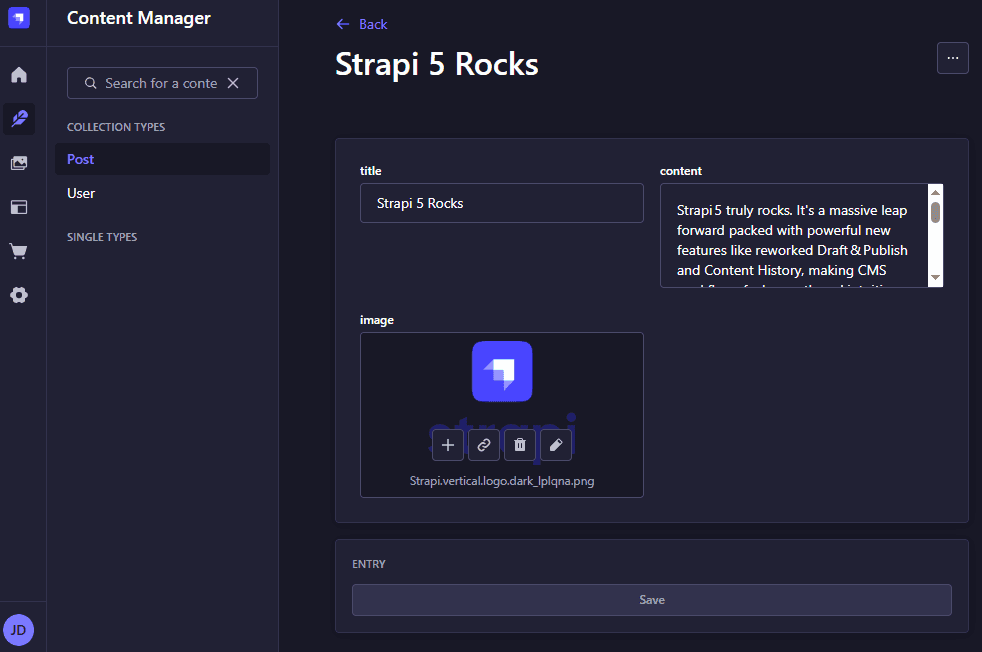
Once logged in to your Strapi Admin dashboard, create a new entry in your "Post" collection. Use the following sample content:
- In the
titlefield, addStrapi 5 Rocks. - In the
contentfield, add the following text:
Strapi 5 truly rocks. It's a massive leap forward, packed with powerful new features like reworked Draft & Publish and Content History, making CMS workflows feel smooth and intuitive. Under the hood, a full TypeScript rewrite, Vite-powered builds, and a refined API (both REST & GraphQL) keep things blazing fast and developer-friendly. Plus, the introduction of a sleek Plugin SDK, powerful Document Service API, and automated upgrade CLI makes extending and evolving Strapi projects a breeze. - In the
imagefield, upload any preferred image of your choice. - Click the Save button at the top-right corner to save your entry.
Set Strapi Roles and Permissions for Post Collection Type
After adding an entry to your Post collection, next set roles and permissions to make the content accessible.
- Visit the Settings page then select Roles under Users & Permissions Plugin.
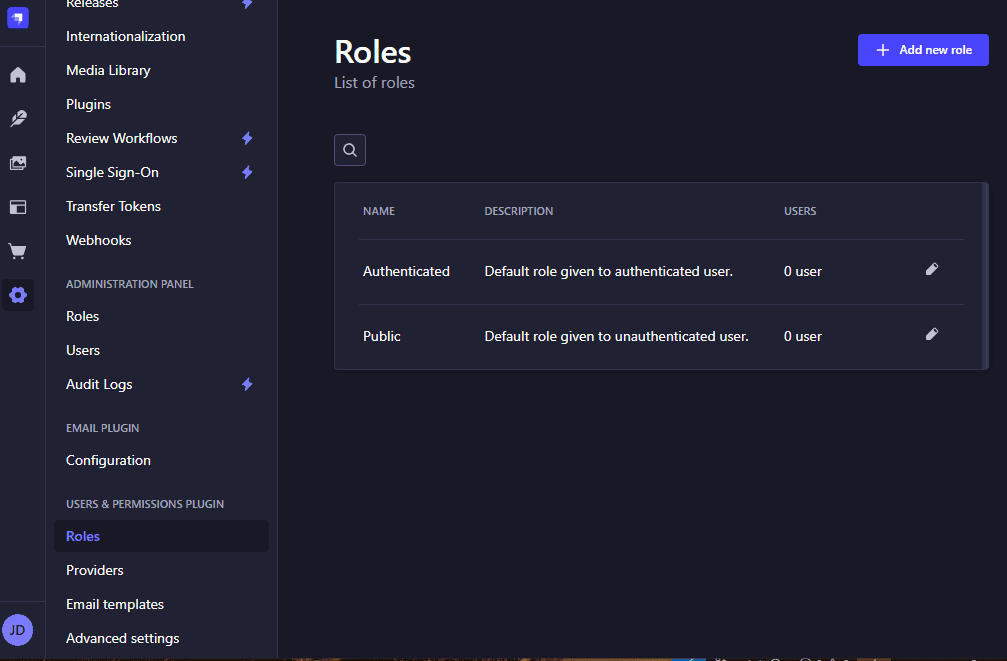
- Select the Public role. Click the Permissions tab and select Post.
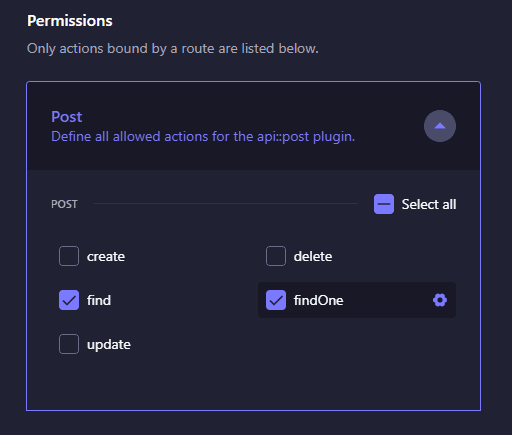
- Enable the
findandfindOnepermission for your Post collection.
- Click the Save button at the top-right corner to apply your API permissions and make the content publicly accessible.
Test Deployed Strapi API
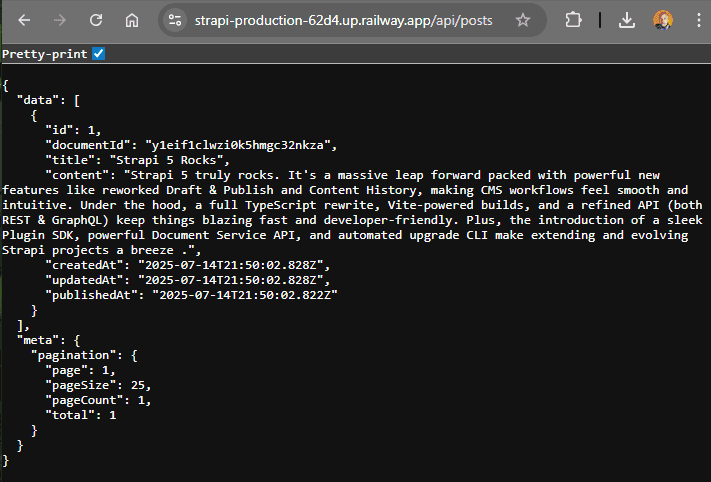
Visit <your-railway-project-url>/api/posts in your browser to access the list of posts from the Strapi API backend. (Replace <your-railway-project-url> with the URL of your Railway-hosted Strapi project.)
You should receive an API response similar to the screenshot below:
👋 Note The databases for your Railway-hosted project and your local project are different. Data is not automatically synchronized between them. To transfer data between projects, you can use the Strapi data management system.
How to Deploy Strapi to Railway Using a PostgreSQL Database
This section explains how to deploy Strapi to Railway using a PostgreSQL database. If you have already followed the previous section, “Deploy to Railway Using a SQLite Database,” you may skip ahead to the next section, “How to Make File Storage Persist for Your Strapi App.”
Install Railway CLI Tool
Railway provides a CLI tool to help deploy your app. Install the Railway CLI by running the following command in your terminal:
npm i -g @railway/cliAuthenticate Your Railway Account
Log in to your Railway account by running the following command:
railway loginThis command will open a new tab in your default browser and redirect you to the Railway authentication page. Follow the on-screen instructions to complete the authentication process.
Create a Railway Project
Create a new Railway project and assign it a name. In this example, the project is named my-app-pg. Run the following command in your terminal:
railway init --name my-app-pgAfter running the command, a link to your project will appear in the terminal.
Create a Railway Postgres Service
Create a new Railway service to host the PostgreSQL database in your Railway project. Run the following command:
railway add --database postgresRetrieve Database Details
The next step is to retrieve the details of your newly created PostgreSQL database service.
Run the following command in your terminal:
railway variables --service Postgres --kv > .env.railwayLink Your Railway Project to Local Strapi Project
Return to your terminal and stop your locally running Strapi server by pressing Ctrl + C.
Next, link your Strapi project folder to your Railway project named my-app-pg by running:
railway link --project my-app-pgCreate and Link a Railway Service
Create a new Railway service within your Railway project and give it a name. In this example, the service is named strapi-pg. Run the following command:
railway add --service strapi-pgNext, link the newly created Railway service to your previously created Railway project, my-app-pg, by running:
railway link --service strapi-pg --project my-app-pgAdd Environment Variables to Railway Service
Railway supports private networking. This can reduce egress fees when your Strapi service communicates with the PostgreSQL service.
To take advantage of this feature, copy the variables PGHOST and PGPORT from the .env.railway file you created earlier to the .env of your Strapi app.
echo "" >> .env && grep -E "^(PGHOST|PGPORT)=" ../.env.railway >> .envAdd environment variables to your Railway service by running the following command:
source .env && railway variables \
  --set "HOST=$PGHOST" \
  --set "PORT=$PGPORT" \
  --set "APP_KEYS=$APP_KEYS" \
  --set "API_TOKEN_SALT=$API_TOKEN_SALT" \
  --set "ADMIN_JWT_SECRET=$ADMIN_JWT_SECRET" \
  --set "TRANSFER_TOKEN_SALT=$TRANSFER_TOKEN_SALT" \
  --set "ENCRYPTION_KEY=$ENCRYPTION_KEY" \
  --set "DATABASE_CLIENT=$DATABASE_CLIENT" \
  --set "DATABASE_HOST=$DATABASE_HOST" \
  --set "DATABASE_PORT=$DATABASE_PORT" \
  --set "DATABASE_NAME=$DATABASE_NAME" \
  --set "DATABASE_USERNAME=$DATABASE_USERNAME" \
  --set "DATABASE_PASSWORD=$DATABASE_PASSWORD" \
  --set "DATABASE_SSL=$DATABASE_SSL" \
  --set "JWT_SECRET=$JWT_SECRET"
Add Config-as-code Using railway.toml
Railway supports defining your project configuration using a railway.toml file. This file lives in the root of your Strapi project and allows you to specify build and deployment steps in code, making your setup more reproducible and easier to manage across environments.
Here’s a basic example tailored for deploying a Strapi app using Nixpacks:
Create a railway.toml file in the root of your Strapi project folder and the following content:
[build]
builder = "NIXPACKS"

[build.nixpacksPlan.phases.setup]
nixPkgs = ["nodejs_22"]

[build.nixpacksPlan.phases.install]
cmds = ["npm install"]

[build.nixpacksPlan.phases.build]
cmds = ["npm run build"]

[deploy]
startCommand = "npm run start"
This configuration ensures Railway installs Node.js 22, runs the build commands, and starts the Strapi server using the defined script.
Deploy Strapi App and Generate a domain in Railway
Deploy your Strapi app to Railway by running the following command:
railway upThis command uploads your Strapi project folder to Railway’s servers. Wait for your project to be built and deployed.
Once the build is complete, return to your terminal and stop the process by pressing Ctrl + C.
Generate a domain for your Strapi app by running:
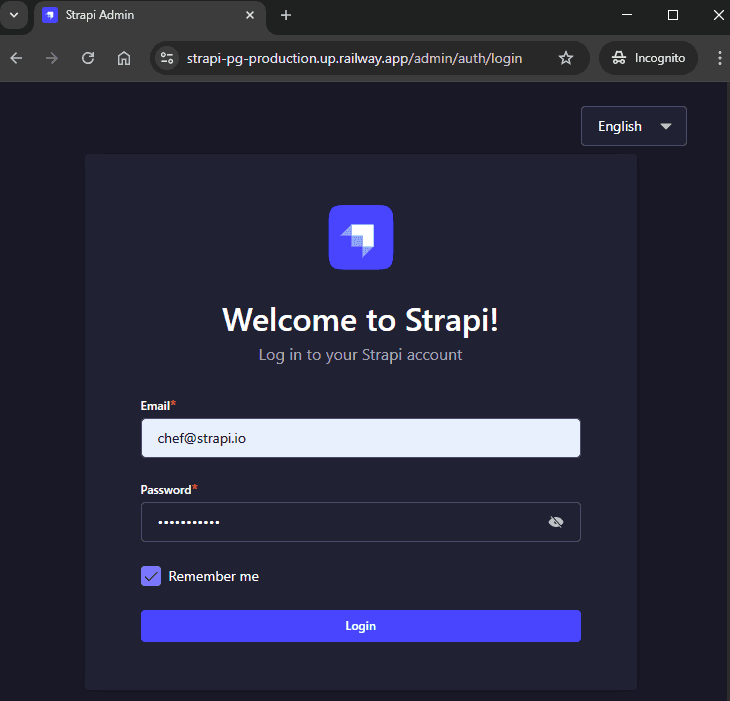
railway domainOpen the generated domain in your browser and log in using the admin credentials you created during your local Strapi installation.
Add Entry to Your Post Collection
Once logged in to your Strapi Admin dashboard, create an entry in your "Post" collection. Use the following sample content to create an entry:
- In the
titlefield, addStrapi 5 Rocks. - In the
contentfield, add the following text:
Strapi 5 truly rocks. It's a massive leap forward, packed with powerful new features like reworked Draft & Publish and Content History, making CMS workflows feel smooth and intuitive. Under the hood, a full TypeScript rewrite, Vite-powered builds, and a refined API (both REST & GraphQL) keep things blazing fast and developer-friendly. Plus, the introduction of a sleek Plugin SDK, powerful Document Service API, and automated upgrade CLI makes extending and evolving Strapi projects a breeze. - In the
imagefield, upload any preferred image of your choice. - Click the Save button at the top-right corner to save your entry.
Set Roles and Permissions for Post Collection Type
After adding an entry to your "Post" collection, next set roles and permissions to make the content accessible.
- Visit the Settings page then select Roles under Users & Permissions Plugin.
- Select Public role. Click the Permissions tab and select Post.
- Enable the
findandfindOnepermission for your Post collection.
- Click the Save button to apply the API permissions and make the content publicly accessible.
Test Deployed Strapi API
Visit <your-railway-project-url>/api/posts in your browser to access the list of posts from the Strapi API backend. (Replace <your-railway-project-url> with the URL of your Railway-hosted Strapi project.)
You should receive an API response similar to the screenshot below:
How to Enable Persistent File Storage for your Strapi App in Railway
👋 Note This setup works best when your Strapi app is deployed on Railway using a PostgreSQL database. The instructions below assume you're using Postgres.
Railway has a feature called Volumes that enables persistent file storage for your Strapi service. With volumes, uploaded media, and other files remain intact even after your app restarts or redeploys.
Link Your Local Strapi Project and Railway Service
Open your terminal and link your local Strapi project to your Railway project and service. In this example, the Railway project is named my-app-pg, and the service is strapi-pg.
Run the following command:
railway link --project my-app-pg --service strapi-pgAdd a Volume
Next, add a persistent volume to your Railway service:
railway volume addWhen prompted to enter a mount path, type:
/app/public/uploadsYou should see output similar to:
> Enter the mount path of the volume /app/public/uploads
  Volume "sparkling-volume" created for service strapi-pg in environment production at mount path "/app/public/uploads"
Redeploy Your Strapi App
Finally, redeploy your Strapi app to apply the changes:
railway upWith this setup, your file uploads are stored persistently in the mounted volume, ensuring they are not lost during service restarts or redeployments.
Cost Saving Measures
The following are some cost-saving measures you can apply to reduce hosting expenses on Railway.
Enable Railway Serverless Mode
Railway has a Serverless Mode (formerly “App-Sleeping”) that lets your Strapi service scale down to zero after approximately 10 minutes of inactivity, so you only pay when it’s actively in use.
Let’s explore how to enable this feature using the Railway Dashboard.
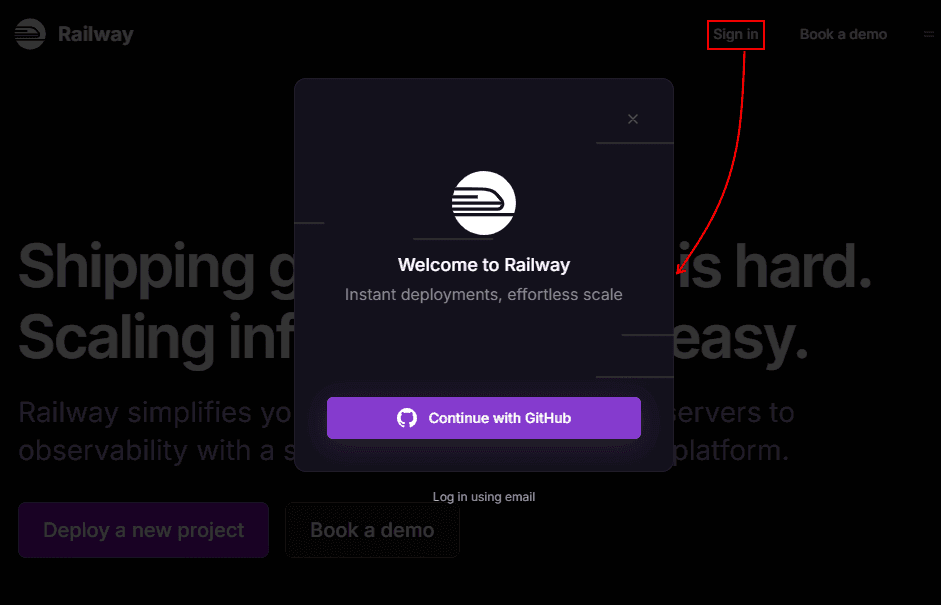
Open your browser and visit the Railway website home page. Click the Sign In button to log in to your account.
Next, open your Railway user account dashboard.
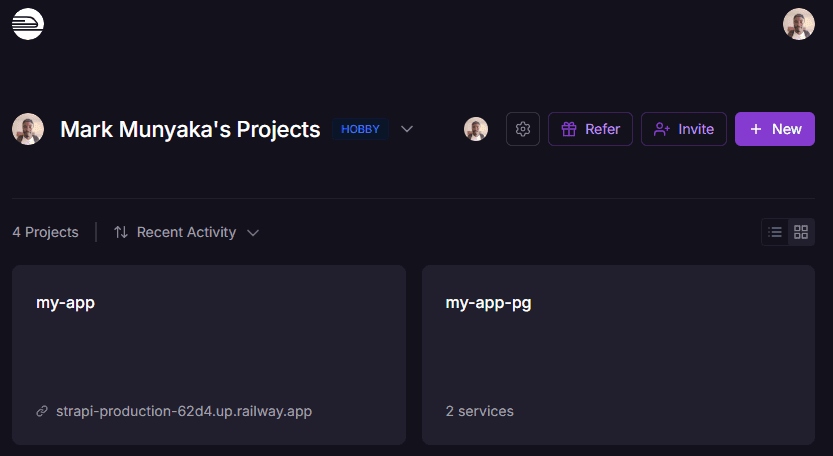
You will see all your projects listed. Select the one hosting your Strapi app.
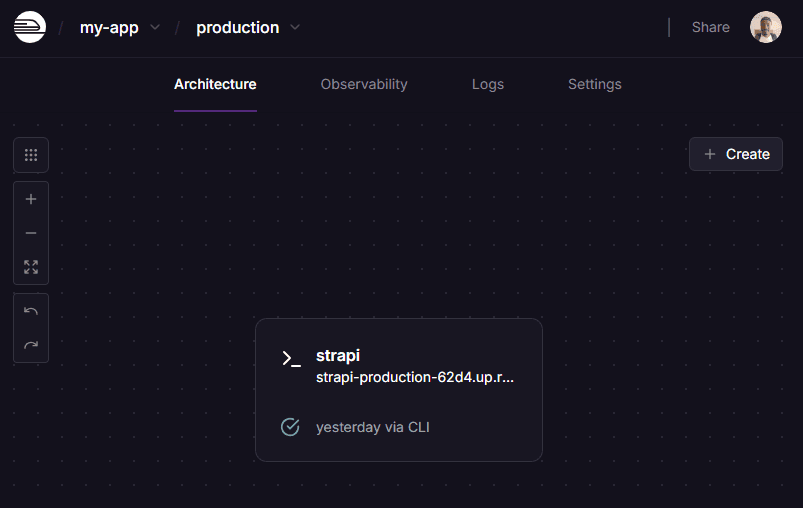
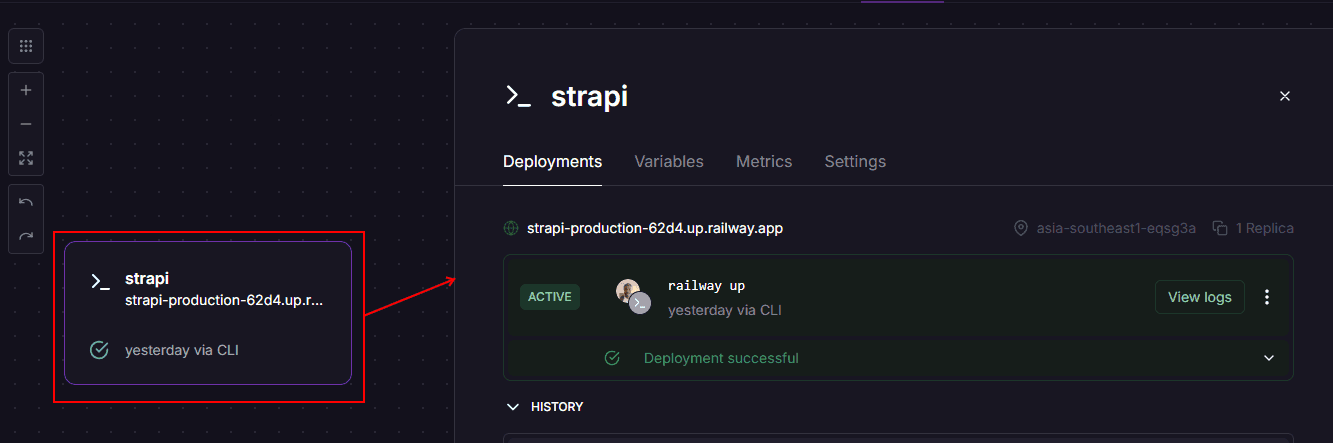
Now select the service running your Strapi app.
Click the Settings menu. Scroll down to the Deploy section. Find the Serverless area. Toggle the "Enable Serverless" button to activate it.
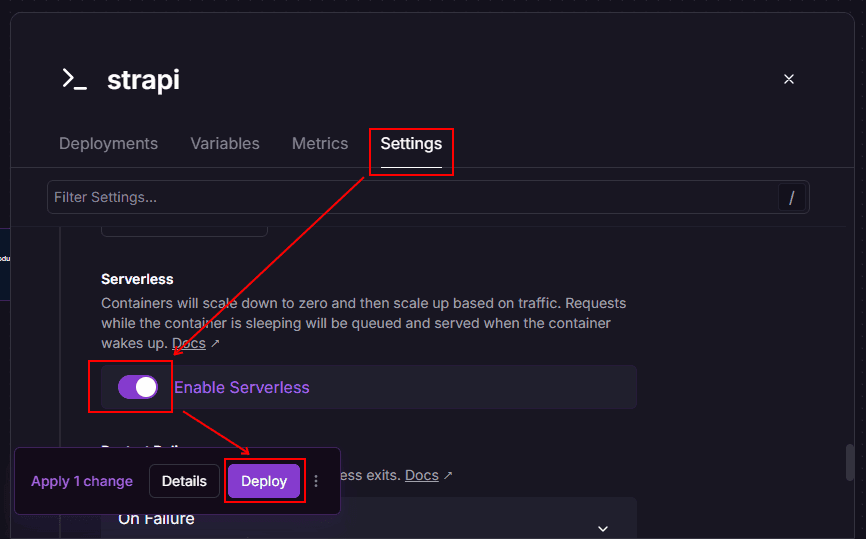
Deploy your app by clicking the Deploy button. Wait for your Strapi to be rebuilt, then redeployed. After deployment is successful, serverless mode will be active. After ~10 minutes with no outbound traffic, Railway will sleep the service. On the first new incoming request, it will wake up, though expect a small cold-start delay.
This is ideal for low-traffic use cases—your Strapi server is only running (and billed) when necessary.
Offload media to an external provider (e.g., Cloudinary)
Rather than mounting a persistent disk, you can configure Strapi to use an external file-storage provider in the Strapi marketplace like Cloudinary, Cloudflare R2, or Google Cloud Storage. These services often include free tiers, which can help you avoid the cost of attaching a volume.
Volumes on Railway are priced at [$0.15 per GB per month](https://railway.com/pricing#:~:text=Volumes,per%20GB%20/%20mo, per GB/mo), so using an external provider can be a cost-effective alternative.
Strapi also recommends using such providers instead of relying on local filesystem storage in PaaS deployments.
To integrate an external provider, follow the official Strapi guide. Below is a quick summary using Cloudinary as an example:
- Create a local Strapi project.
- Follow the integration instructions in the article, "Integrate Strapi with Cloudinary". Start from the "Setting Up Your Cloudinary Account" section up to the "Testing the Integration" section.
- After verifying the setup locally, deploy the Strapi app to Railway.
The setup steps for Cloudflare R2 and Google Cloud Storage follow a similar pattern.
Split Strapi Admin and Backend Deployment
Another cost-saving strategy is to split your Strapi application into two separate deployments: the admin panel(frontend) and the API backend. This approach lets you leverage different hosting providers optimally while keeping costs low.
Instead of deploying the full Strapi app on Railway, you can host only the API backend in headless mode on Railway. You can then host the admin panel on an edge runtime hosting service like Vercel, Netlify, or Cloudflare Pages, which often have generous free tiers.
This separation reduces resource usage on the Railway, since you are not hosting the admin interface there.
Strapi Open Office Hours
If you have any questions about Strapi 5 or just would like to stop by and say hi, you can join us at Strapi's Discord Open Office Hours Monday through Friday at 12:30 pm - 1:30 pm CST: Strapi Discord Open Office Hours
For more details, visit the Strapi documentation and Railway documentation.