React Router 7
React Router is a multi-strategy router for React bridging the gap from React 18 to React 19. You can use it maximally as a React framework or minimally as a library with your own architecture.
Why Use React Router 7?
React Router 7 introduces several enhancements that aim to improve developer workflow and application performance. Here's a breakdown:
For Developers:
- Simplified Installation: React Router 7 unifies core functionality into a single package, react-router, streamlining installation and management.
- Streamlined Data Handling: The removal of the json() utility function in favor of manual response object construction offers greater flexibility and transparency in data handling.
- Simplified defer Functionality: The defer function, used for delayed data loading, has been simplified, reducing boilerplate code.
- Framework Mode for Full-Stack Development: React Router 7 introduces a "framework mode" enabling full-stack React application development with features like server-side rendering (SSR), code splitting, and file-based routing, all within a familiar tool.
- Improved Nested Routing with Layout Routes: Layout routes, using the Outlet component, allow developers to define shared layouts for nested routes, reducing code duplication and promoting a clear separation of layout and content.
- Enhanced Type Safety: Improved type safety for route parameters, loader data, and actions ensures better developer experience and reduces runtime errors.
Why Use Strapi?
Strapi is the leading open-source headless CMS offering features, like customizable APIs, role-based permissions, multilingual support, etc. It simplifies content management and integrates effortlessly with modern frontend frameworks.
Explore the Strapi documentation for more details.
Strapi 5 Highlights
The out-of-the-box Strapi features allow you to get up and running in no time:
- Single types: Create one-off pages that have a unique content structure.
- Draft and Publish: Reduce the risk of publishing errors and streamline collaboration.
- 100% TypeScript Support: Enjoy type safety & easy maintainability
- Customizable API: With Strapi, you can just hop in your code editor and edit the code to fit your API to your needs.
- Integrations: Strapi supports integrations with Cloudinary, SendGrid, Algolia, and others.
- Editor interface: The editor allows you to pull in dynamic blocks of content.
- Authentication: Secure and authorize access to your API with JWT or providers.
- RBAC: Help maximize operational efficiency, reduce dev team support work, and safeguard against unauthorized access or configuration modifications.
- i18n: Manage content in multiple languages. Easily query the different locales through the API.
- Plugins: Customize and extend Strapi using plugins.
Learn more about Strapi 5 feature.
Setup Strapi 5 Headless CMS
We are going to start by setting up our Strapi 5 project with the following command:
🖐️ Note: make sure that you have created a new directory for your project.
You can find the full documentation for Strapi 5 here.
Install Strapi
npx create-strapi-app@latest serverYou will be asked to choose if you would like to use Strapi Cloud we will choose to skip for now.
🚀 Welcome to Strapi! Ready to bring your project to life?

...

? Please log in or sign up.
  Login/Sign up
❯ Skip
After that, you will be asked how you would like to set up your project. We will choose the following options:
? Do you want to use the default database (sqlite) ? Yes
? Start with an example structure & data? Yes <-- make sure you say yes
? Start with Typescript? Yes
? Install dependencies with npm? Yes
? Initialize a git repository? Yes
Once everything is set up and all the dependencies are installed, you can start your Strapi server with the following command:
cd server
npm run develop
You will be greeted with the Admin Create Account screen.
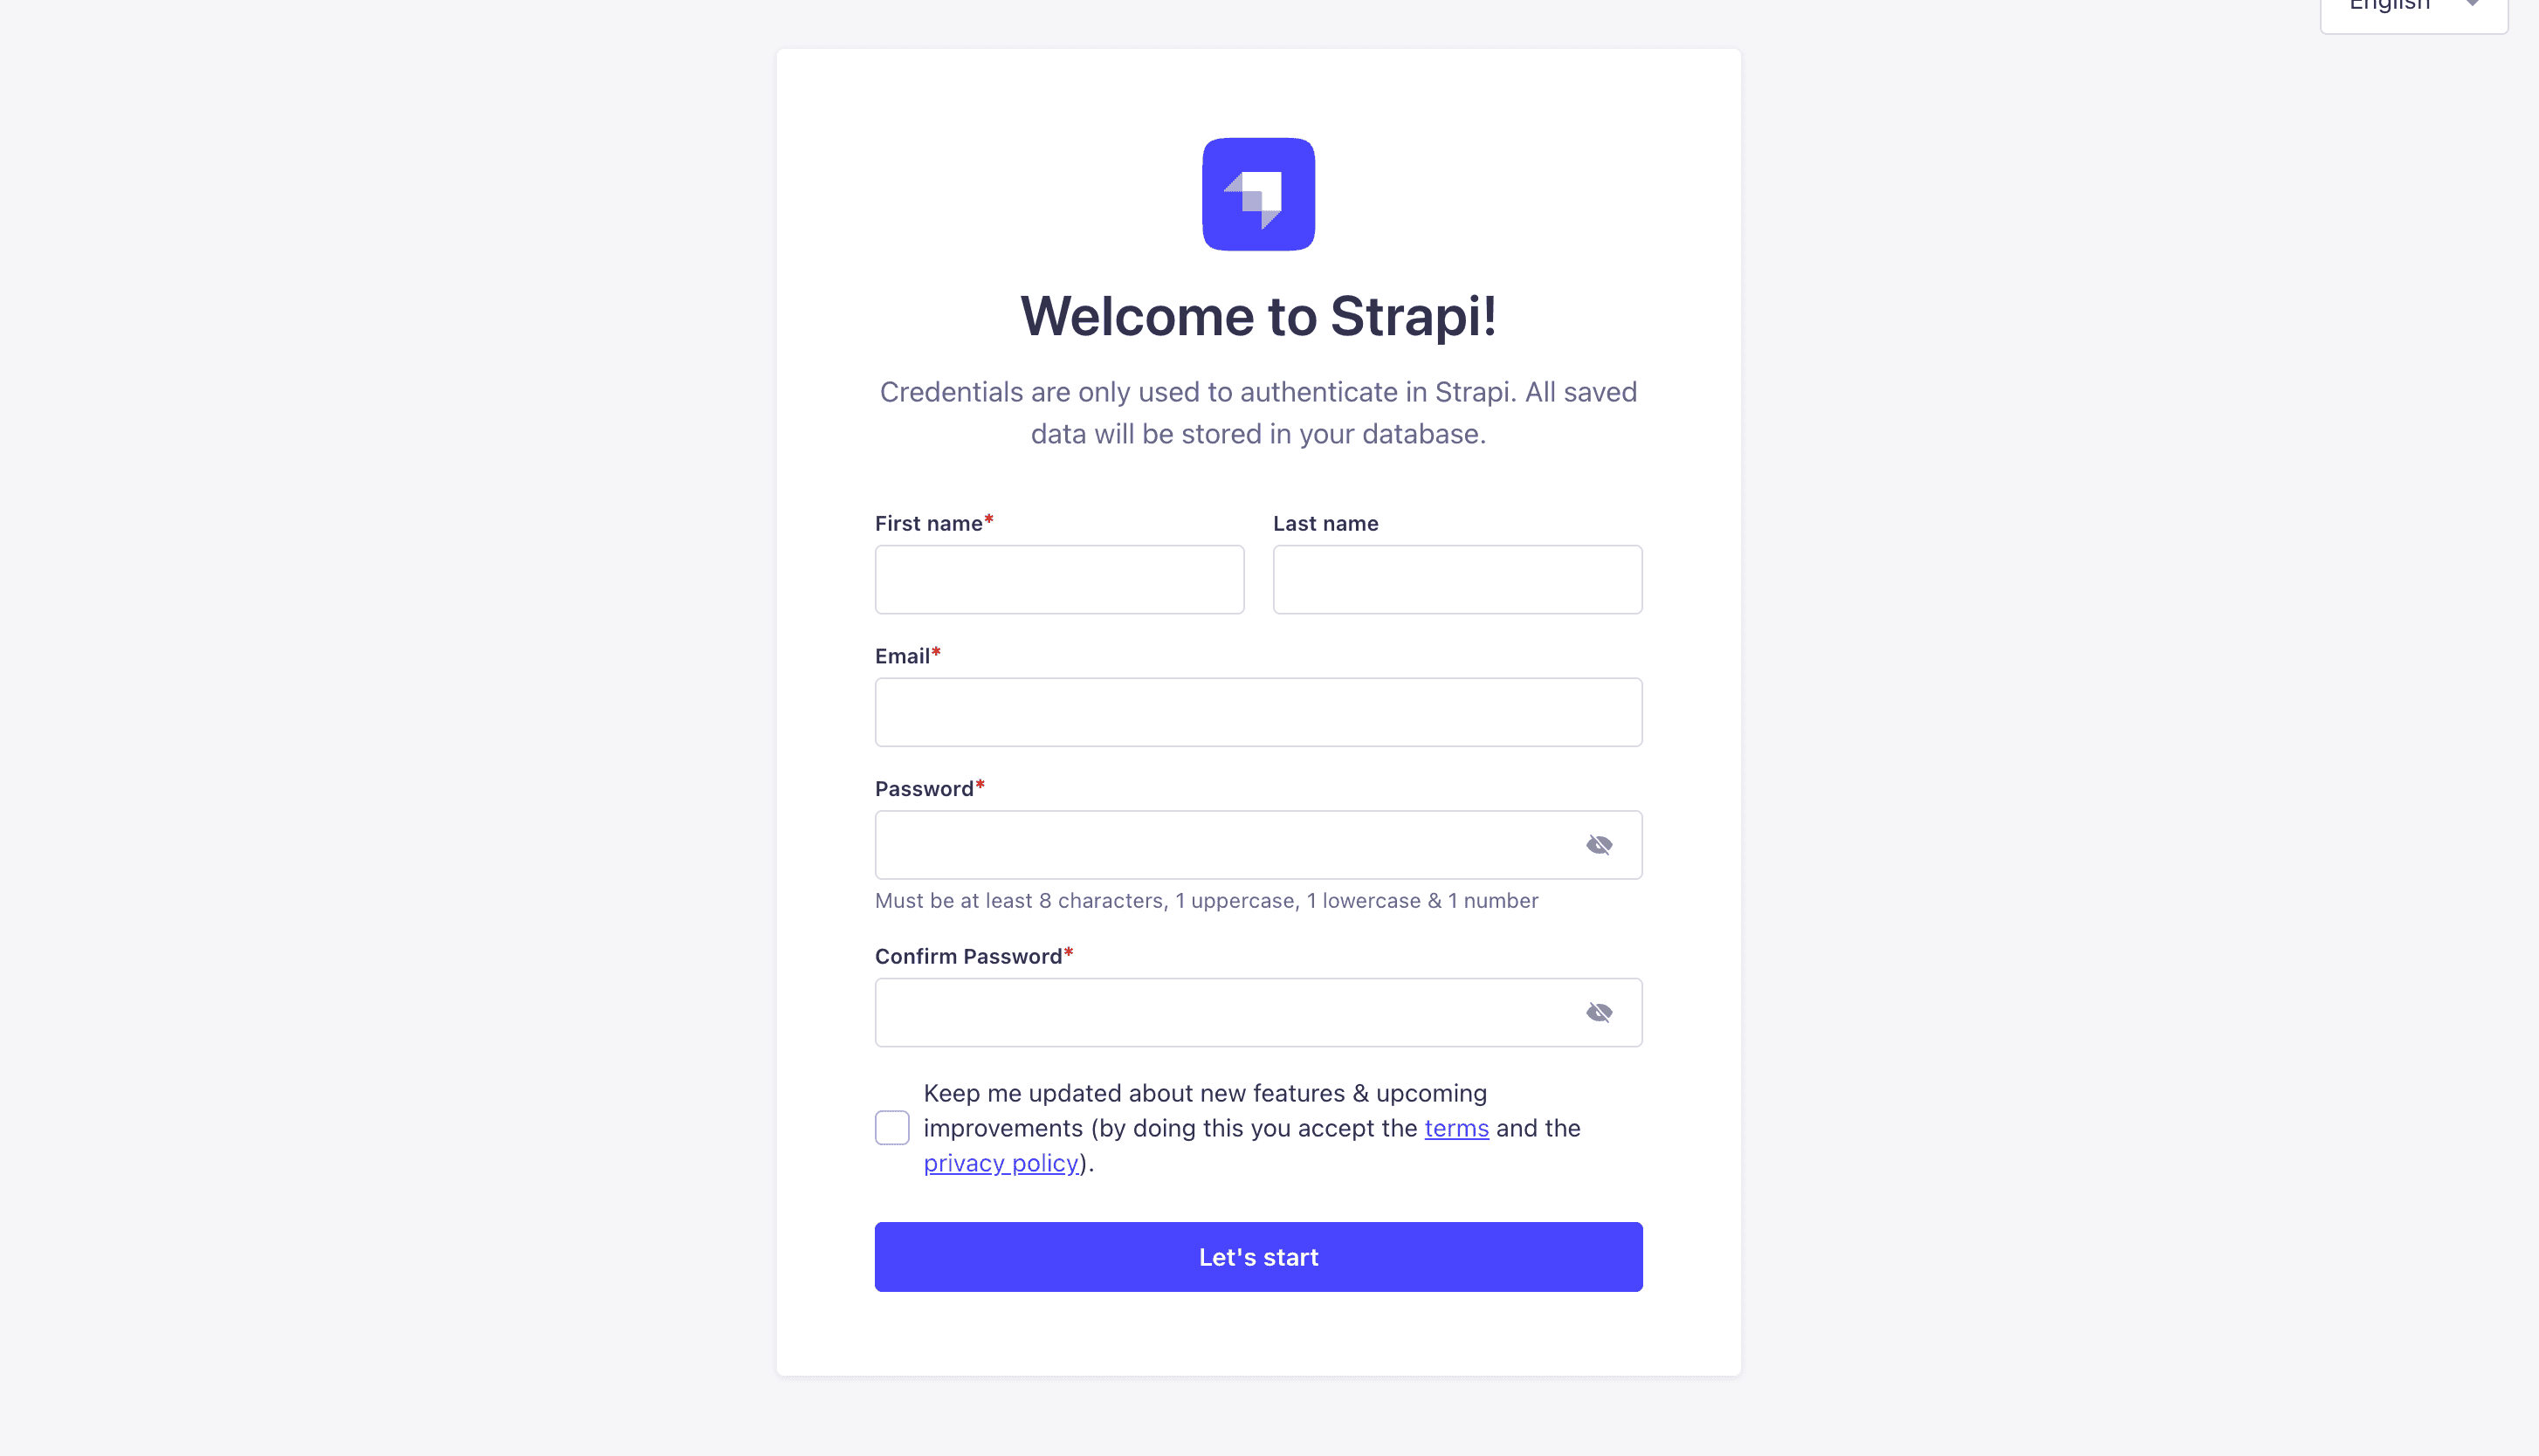
Go ahead and create your first Strapi user. All of this is local so you can use whatever you want.
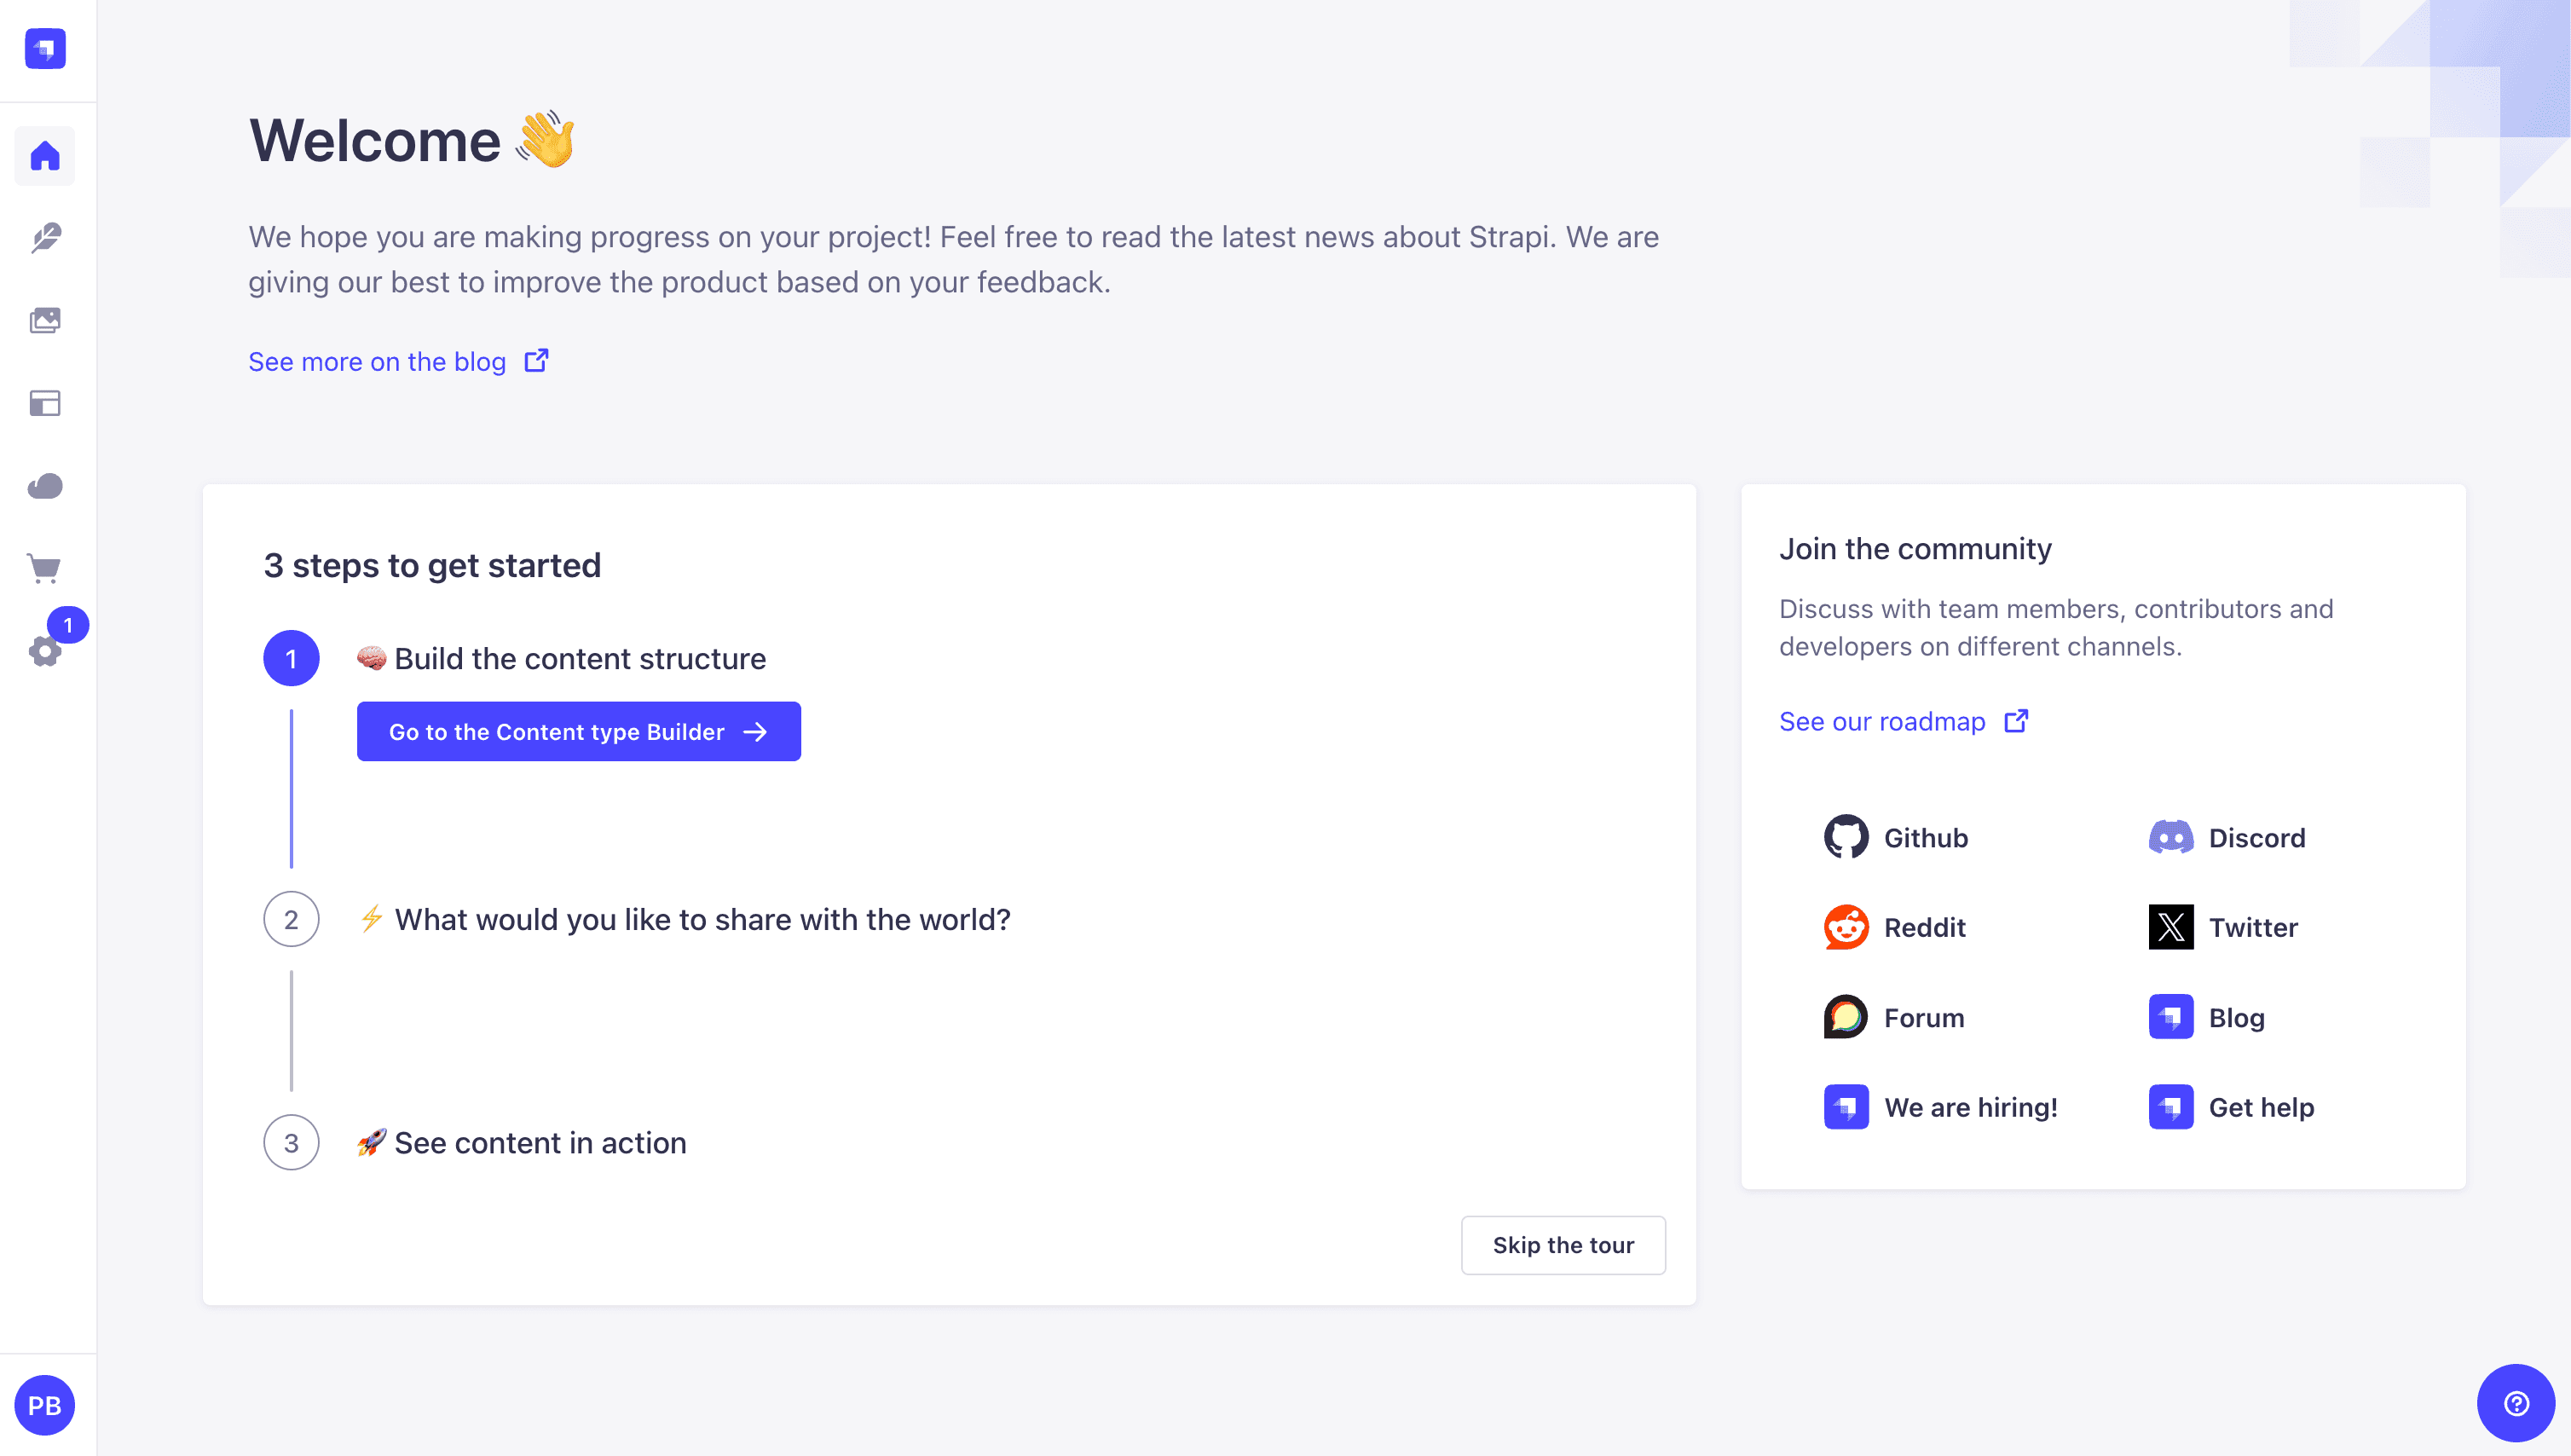
Once you have created your user, you will be redirected to the Strapi Dashboard screen.
Publish Article Entries
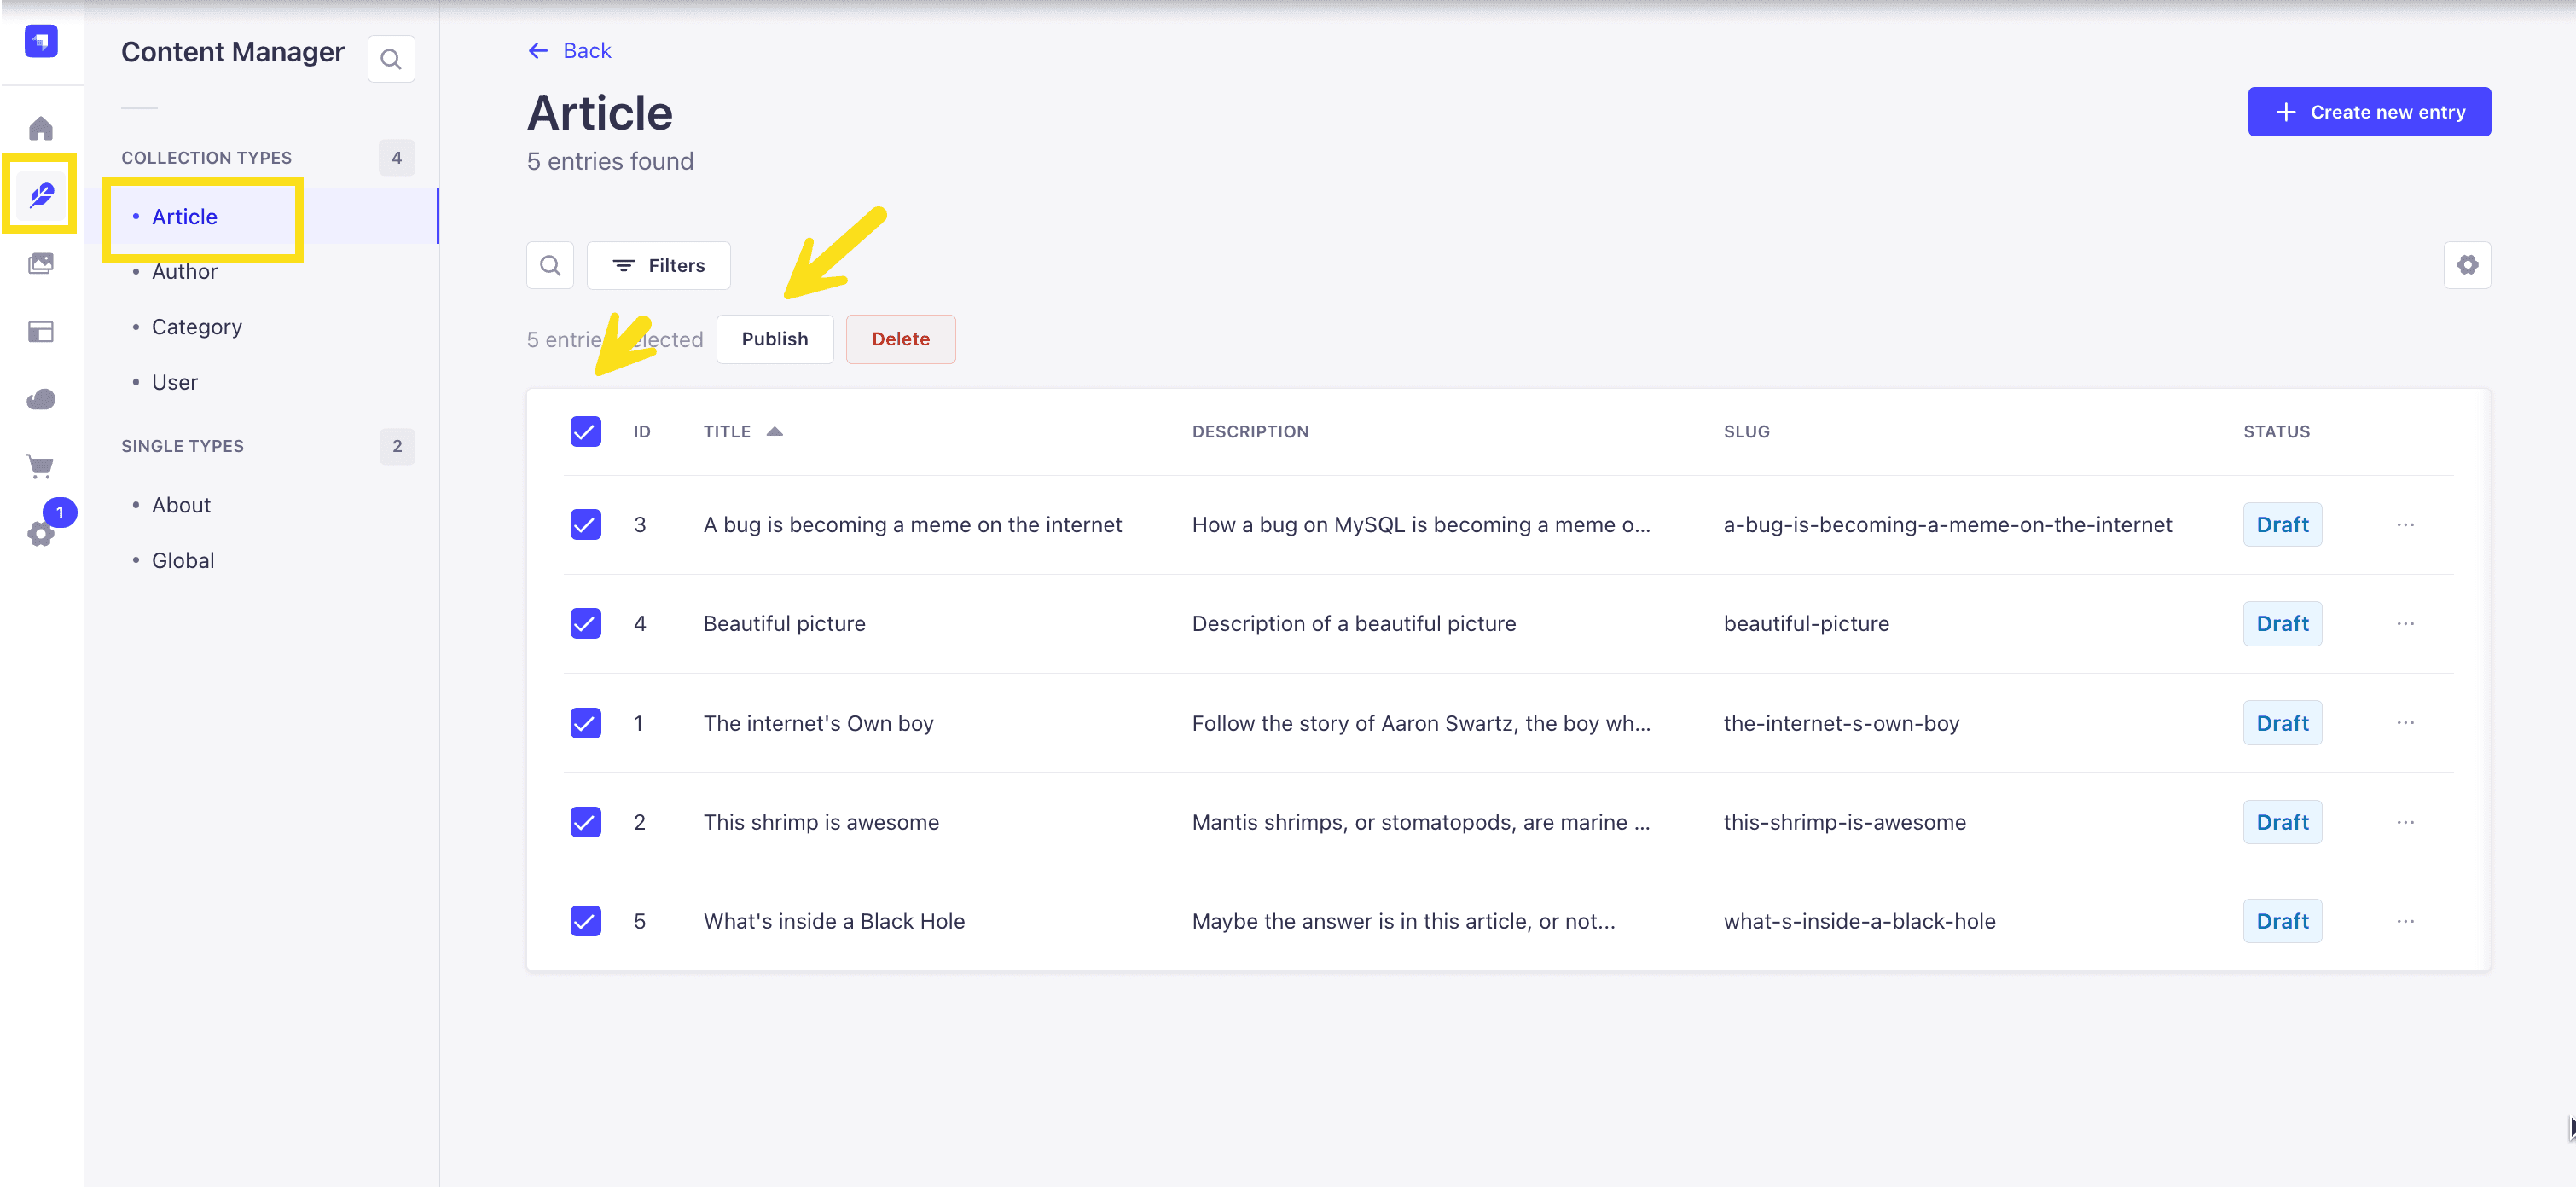
Since we created our app with the example data, you should be able to navigate to your Article collection and see the data that was created for us.
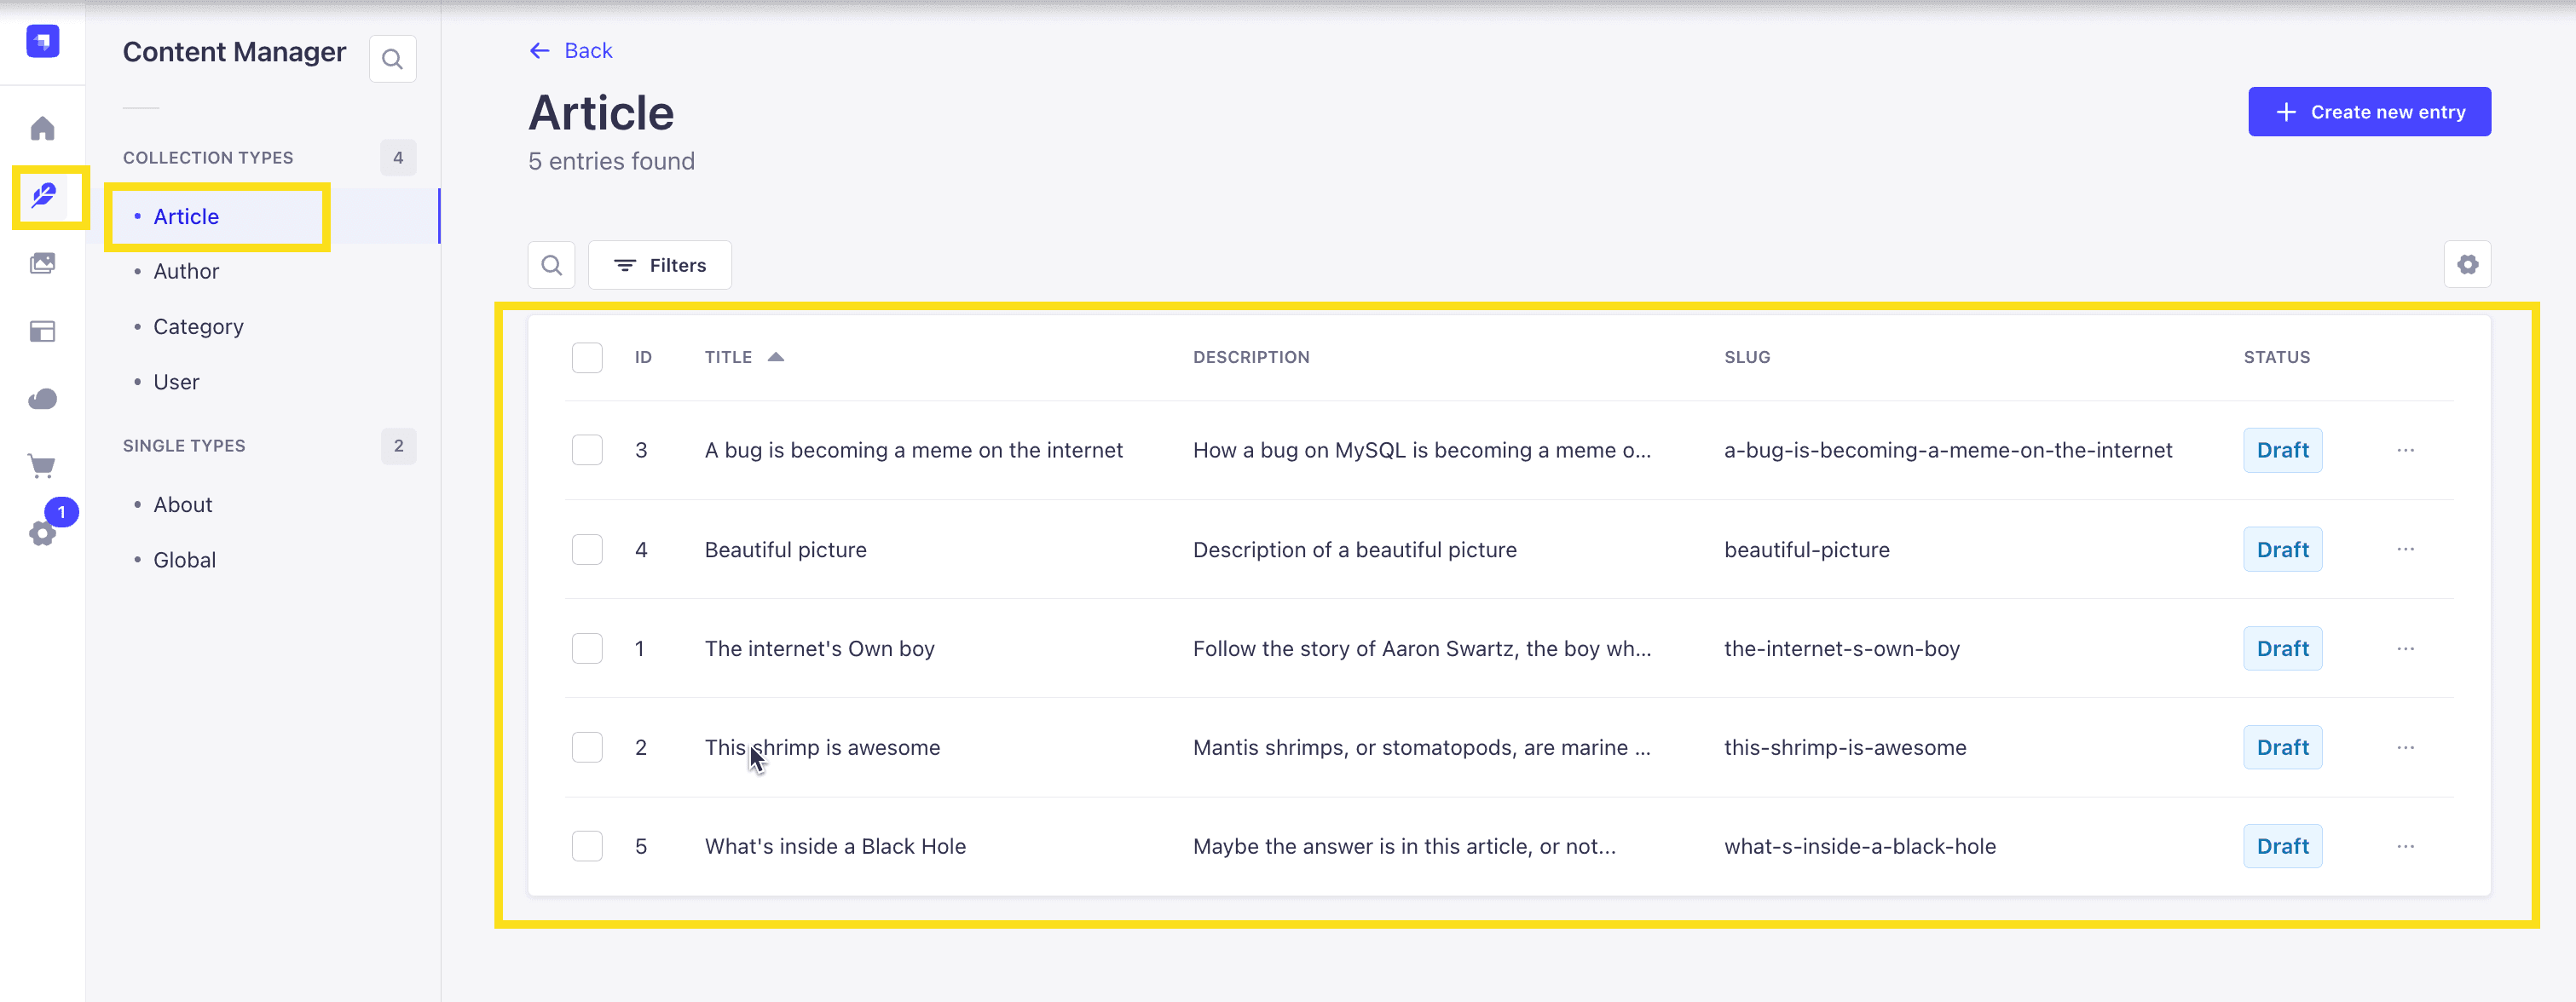
Now, let's make sure that all of the data is published. If not, you can select all items via the checkbox and then click the Publish button.
Enable API Access
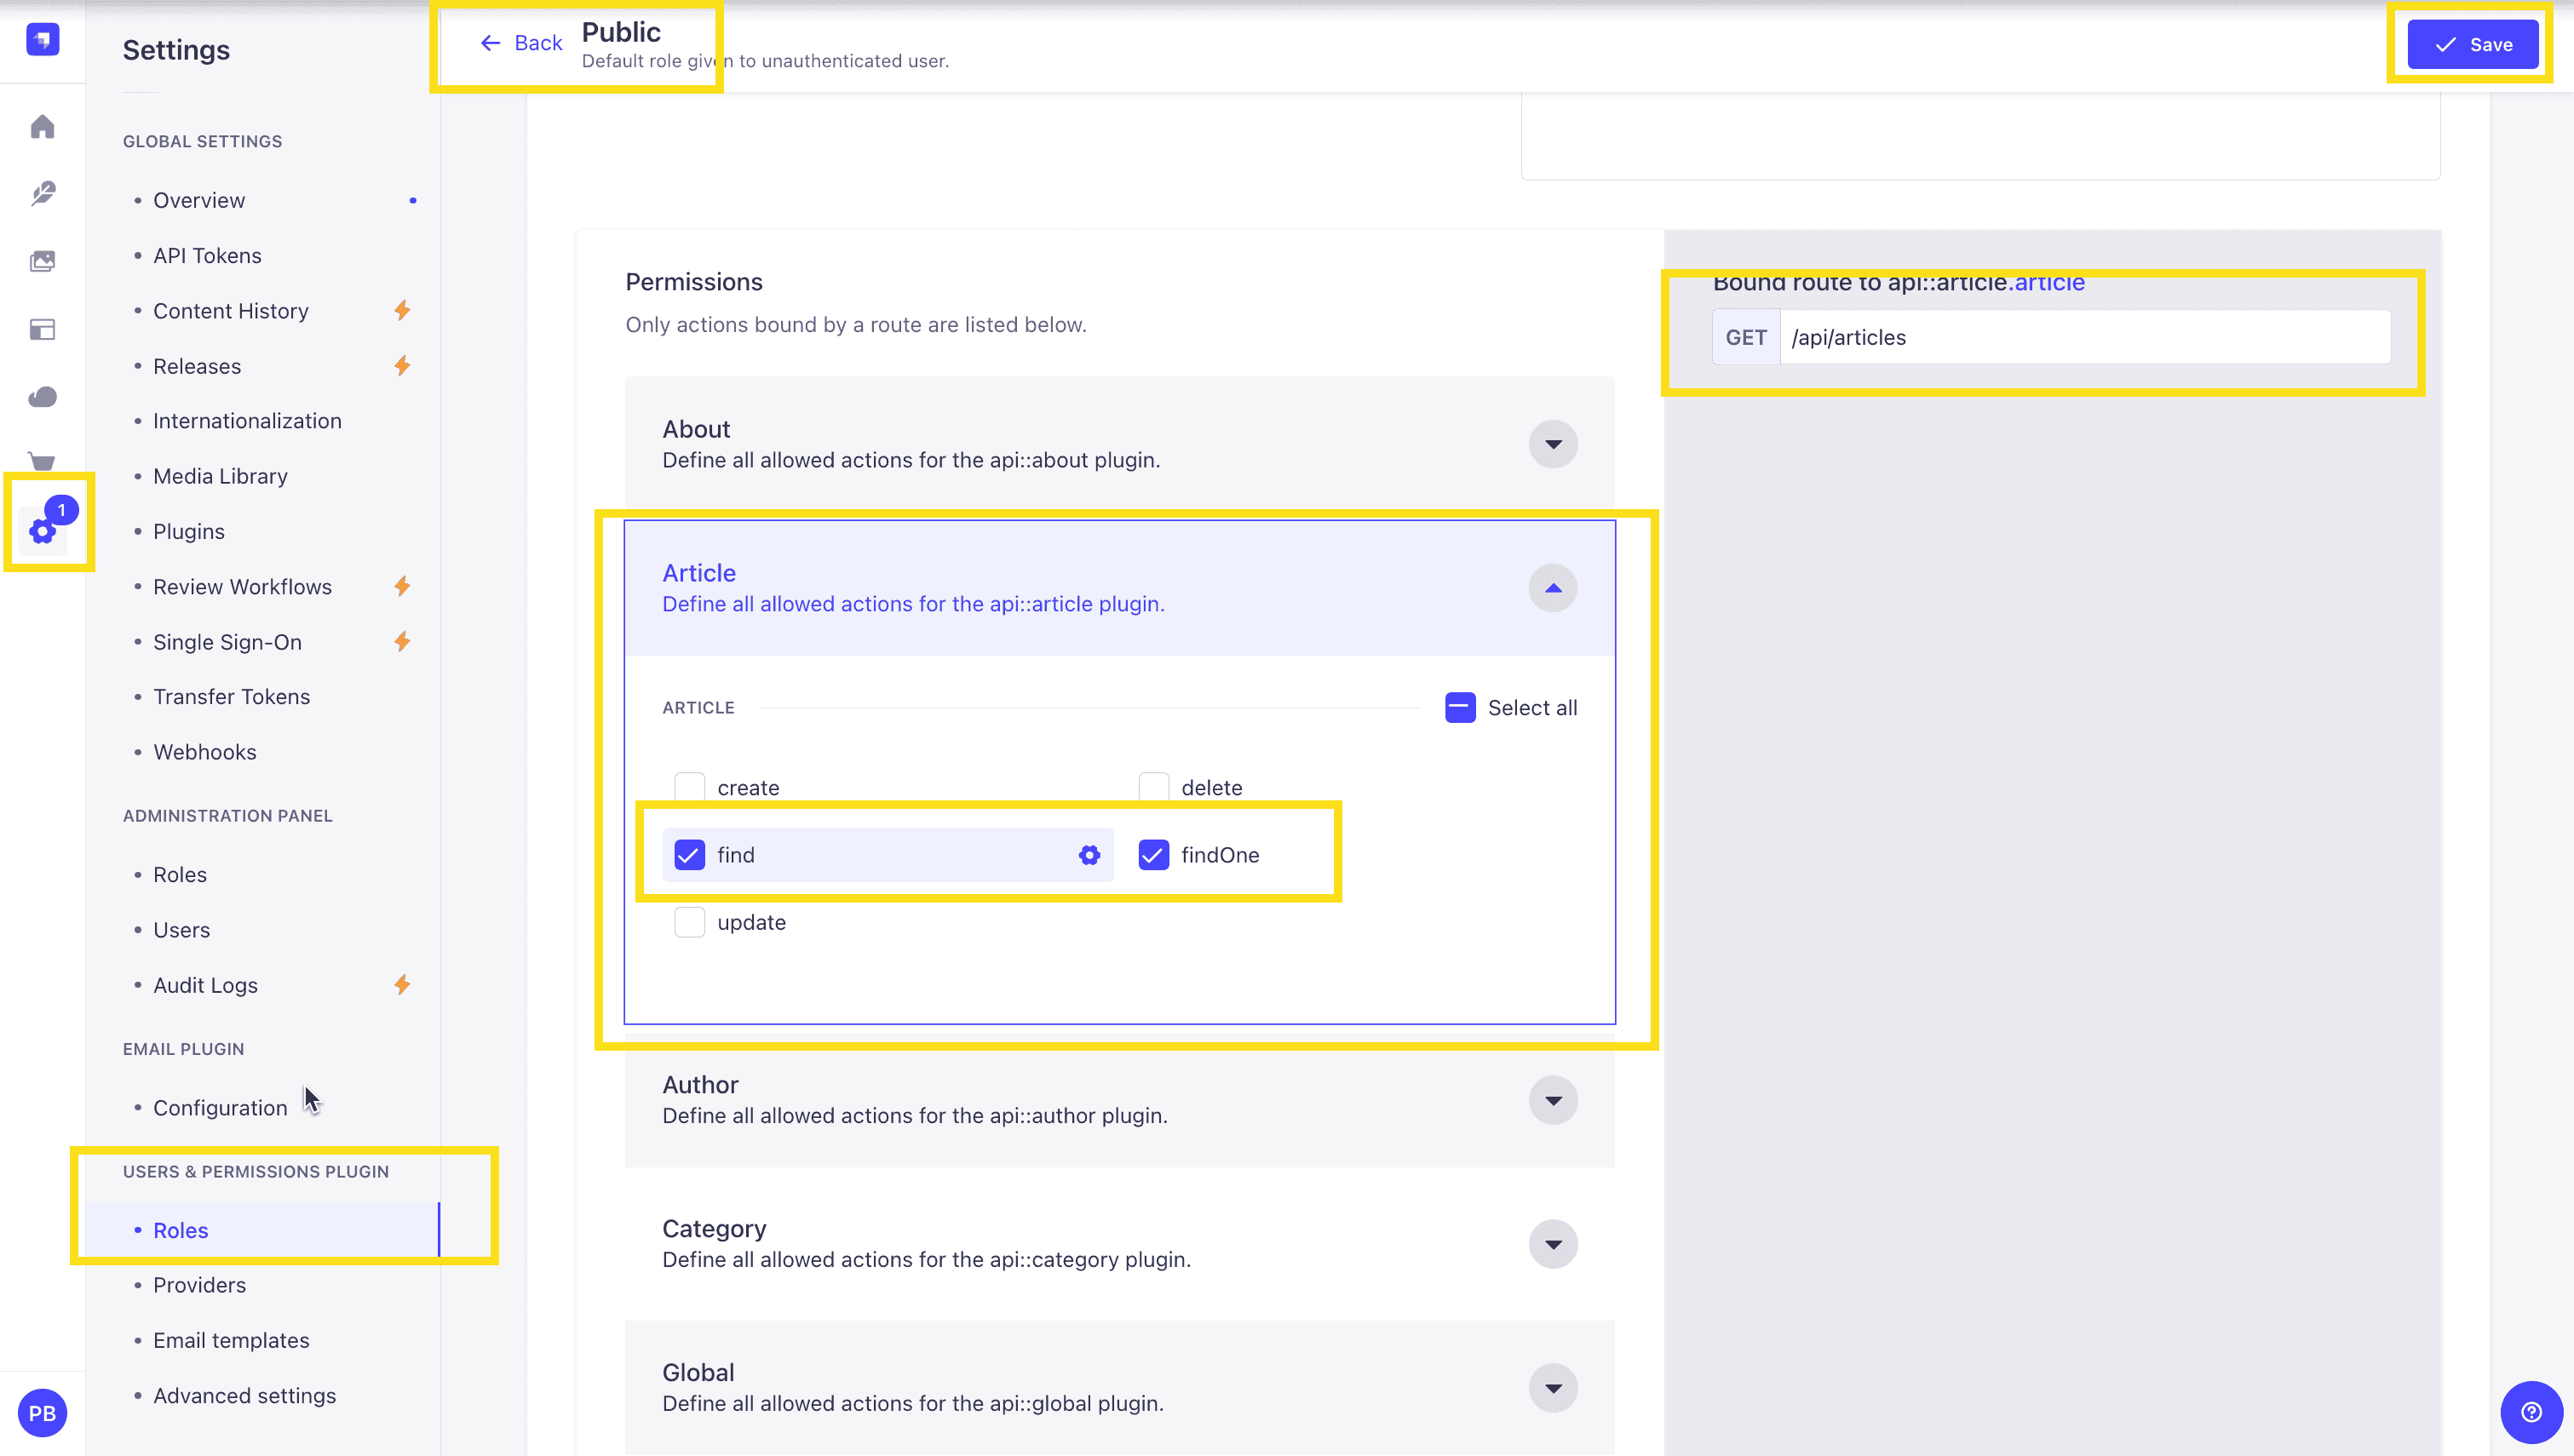
Once all your articles are published, we will expose our Strapi API for the Articles Collection. This can be done in Settings -> Users & Permissions plugin -> Roles -> Public -> Article.
You should have find and findOne selected. If not, go ahead and select them.
Test API
Now, if we make a GET request to http://localhost:1337/api/articles, we should see the following data for our articles.
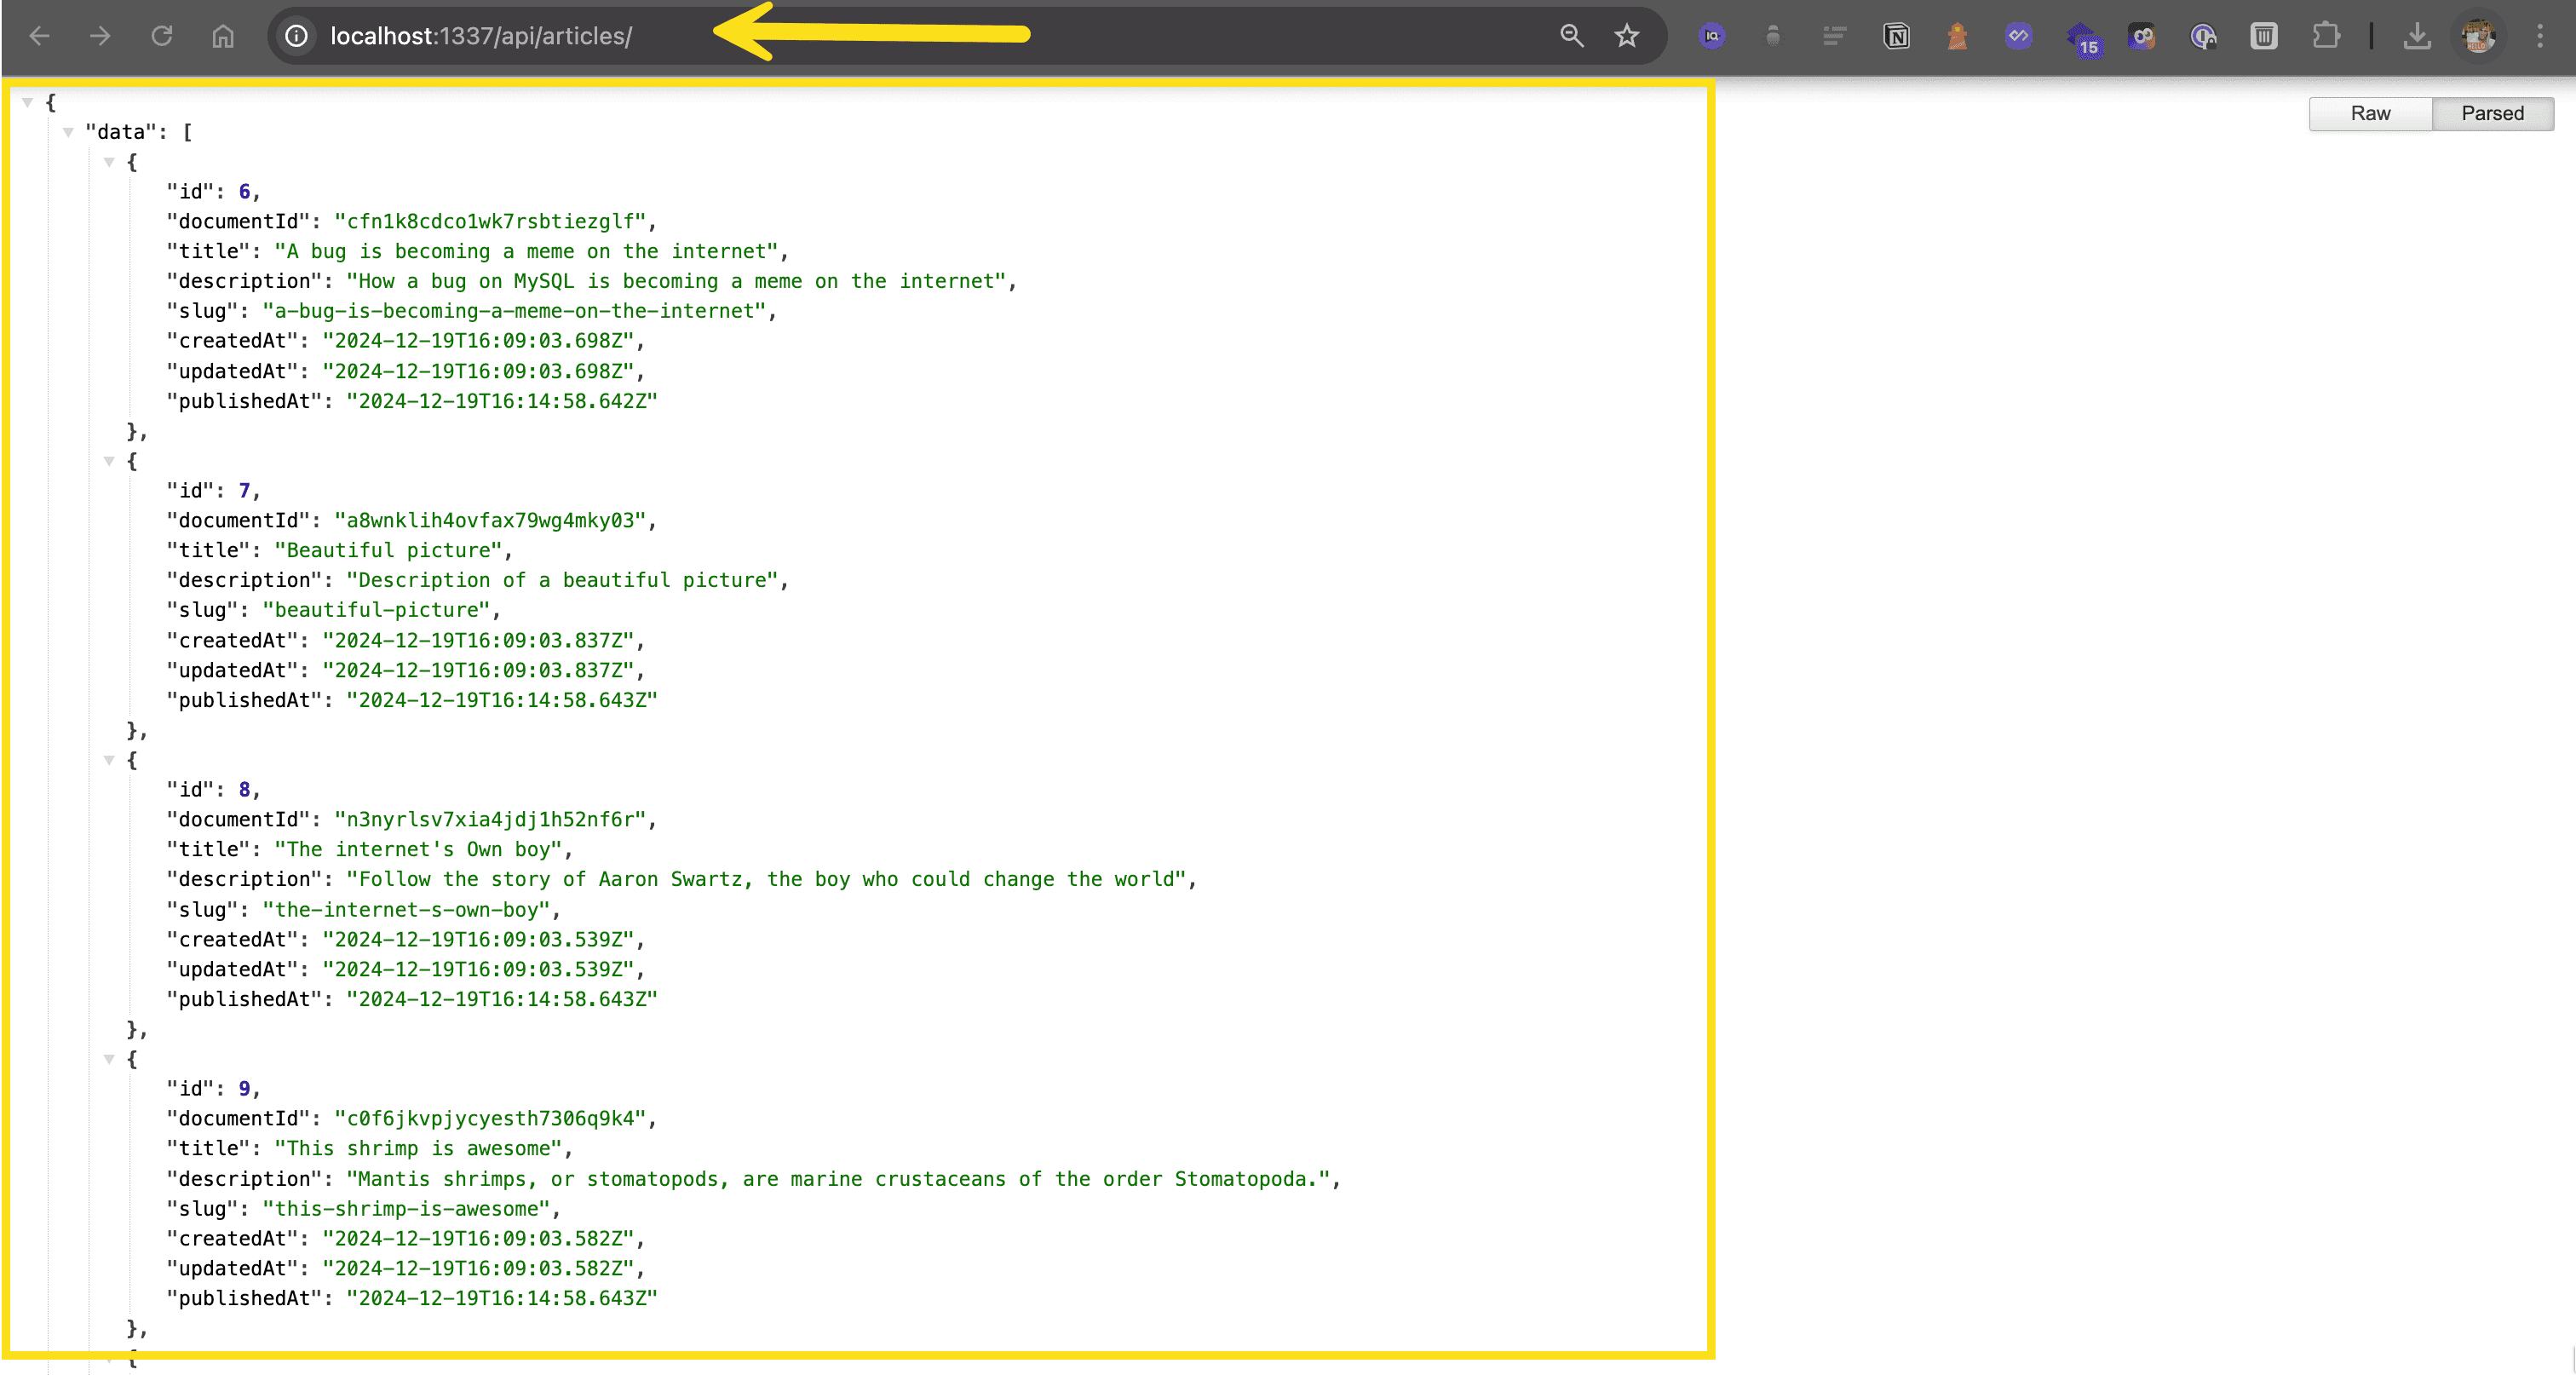
🖐️ Note: The article covers (images) are not returned. This is because the REST API by default does not populate any relations, media fields, components, or dynamic zones.. Learn more about REST API: Population & Field Selection.
So, let's get the article covers by using the populate=* parameter: http://localhost:1337/api/articles?populate=*
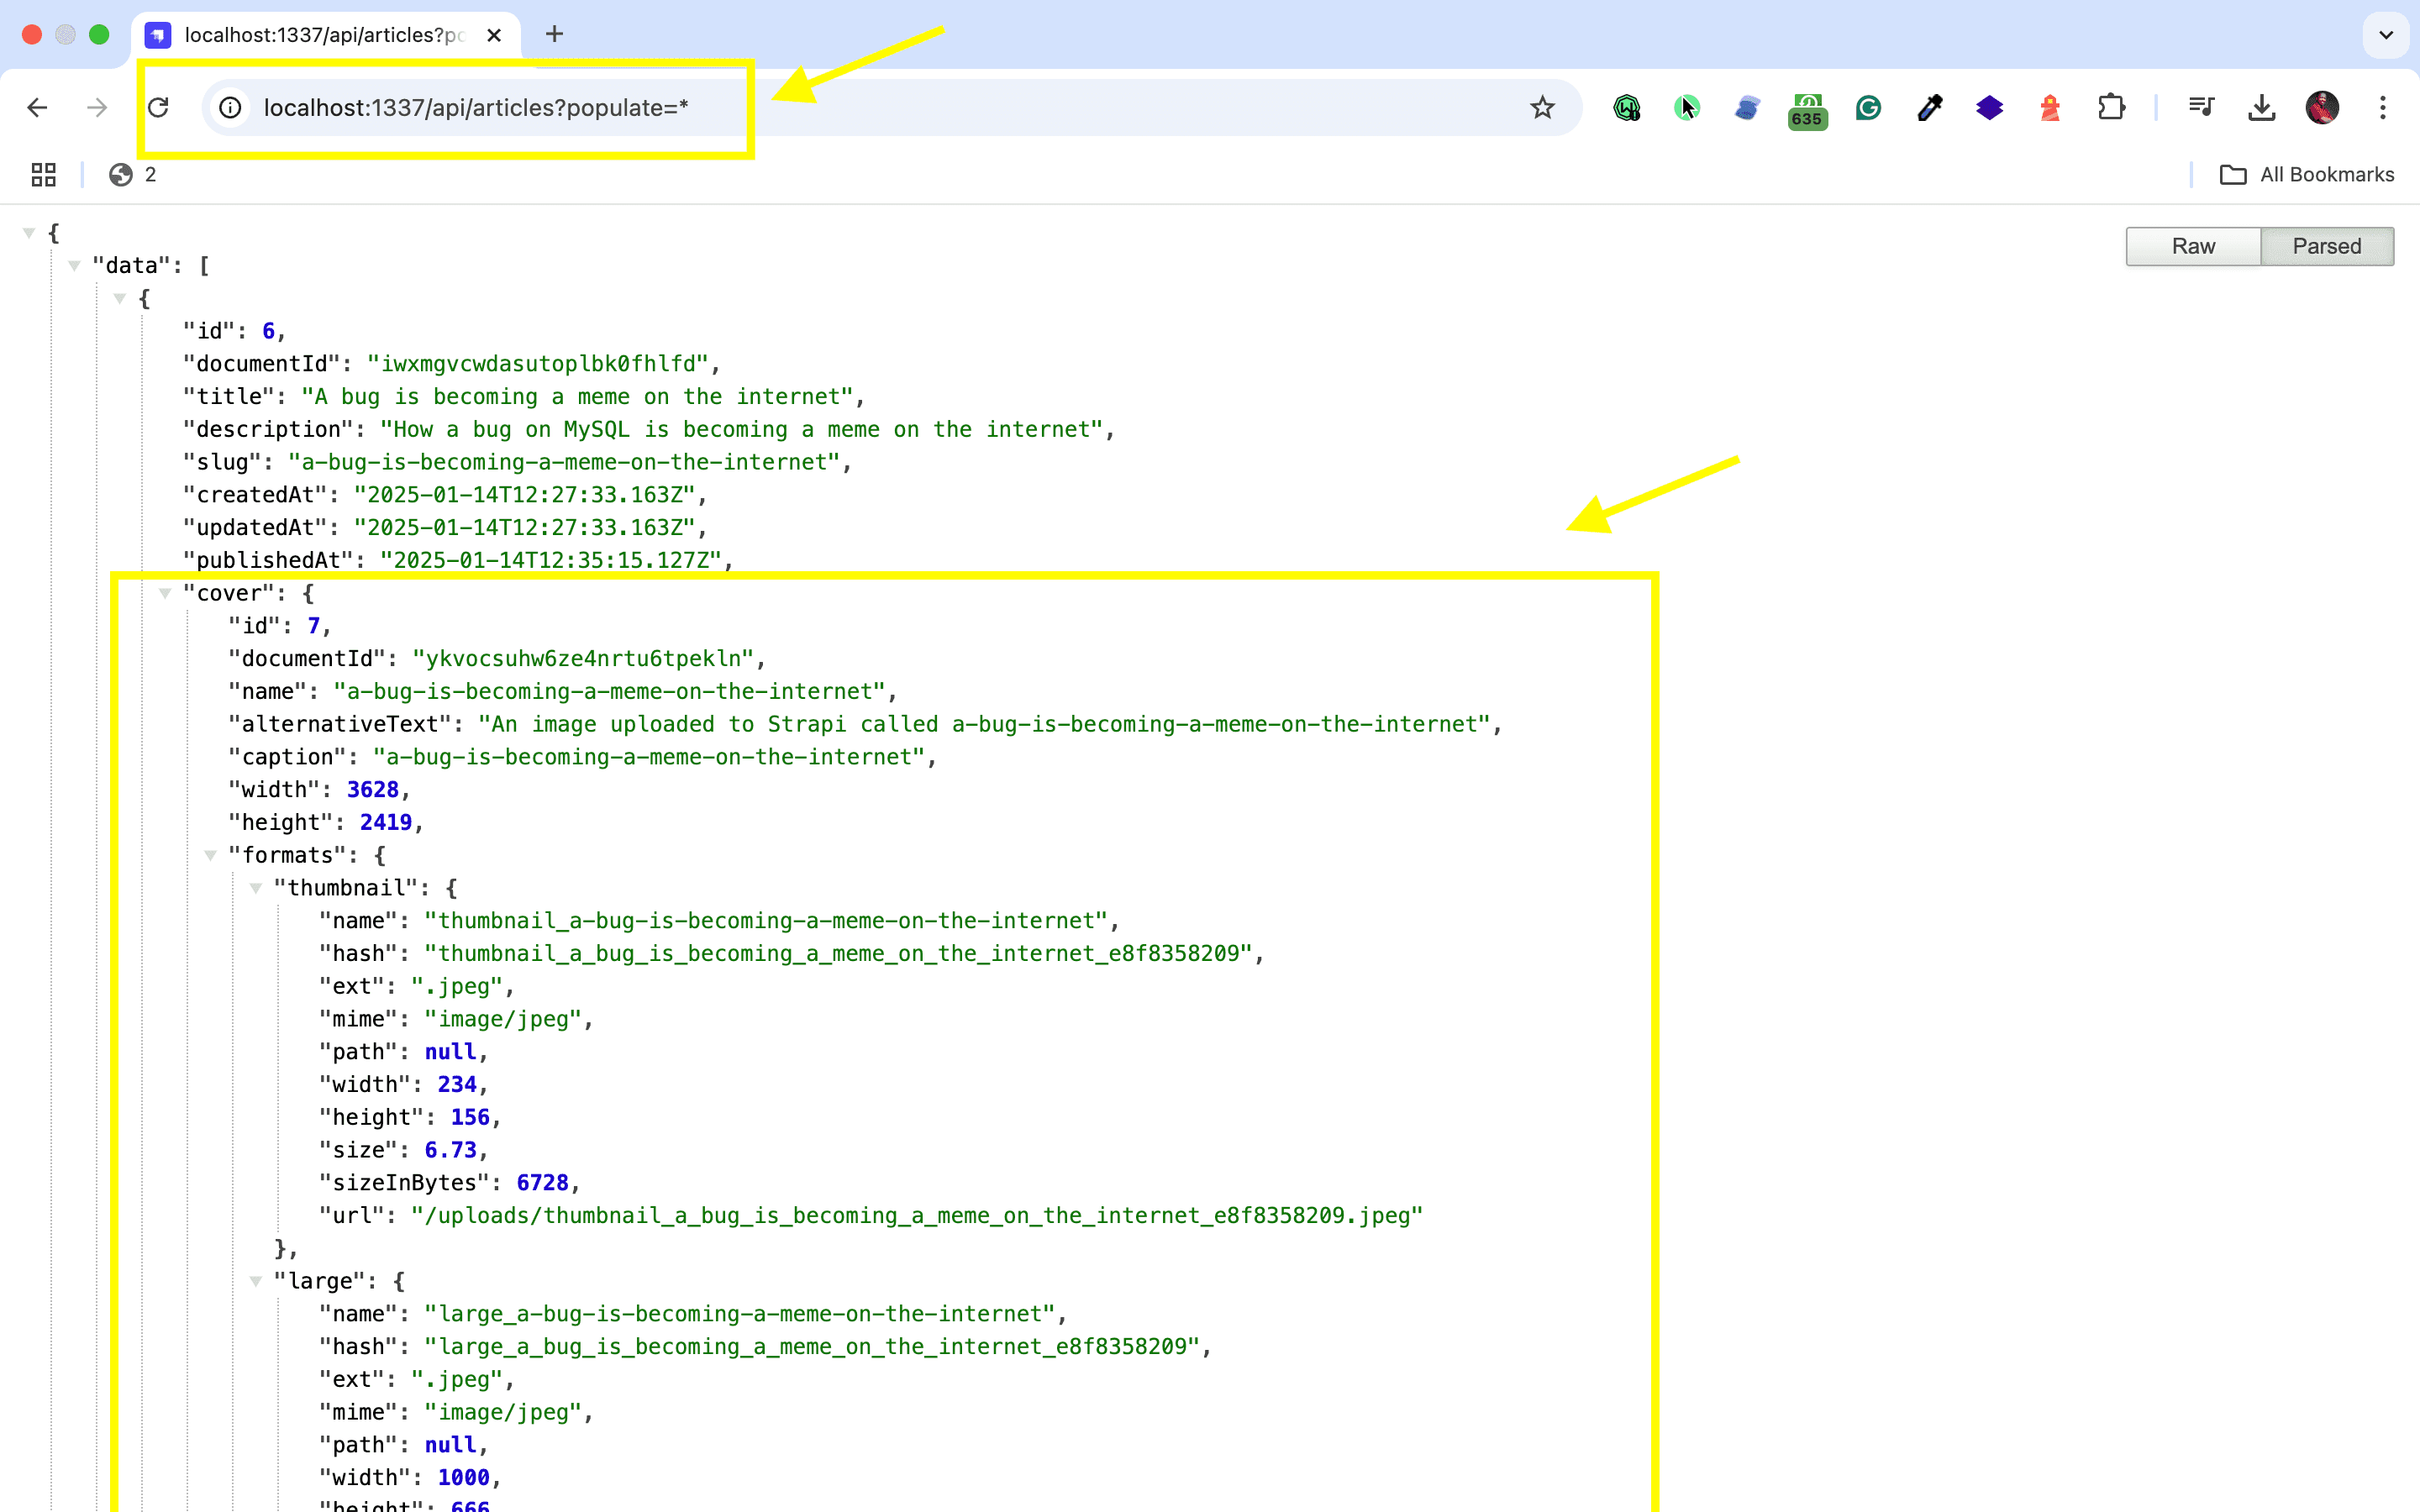
Nice, now that we have our Strapi 5 server setup, we can start to setup our React Router 7 client.
Getting Started with React Router 7
I will walk you through the steps to setup a new React Router 7 project. But here is the link to the React Router 7 Docs that I used for reference.
React Router 7 Installation and Initial Setup
We are going to got the React Router 7 Framework Route.
Make sure that you are in the root directory of your project and run the following command to install React Router 7.
npx create-react-router@latest clientSay Yes to all the default options.
Once everything is installed, you can start your React Router 7 server with the following command:
  cd client
  npm run dev
Nice, now that we have our React Router 7 client setup, we can start to integrate it with our Strapi 5 server.
React Router 7 File Based Routing
We are going to opt in to use the File Based Routing Convention for our React Router 7 application.
You can read more about it here.
In order to do this, we must first install the following package:
npm i @react-router/fs-routesNext, let's navigate to the app/routes.tsx file and update the file to the following:
// https://reactrouter.com/how-to/file-route-conventions

import { type RouteConfig } from "@react-router/dev/routes";
import { flatRoutes } from "@react-router/fs-routes";

export default flatRoutes() satisfies RouteConfig;
And finally, in the client/app/routes folder, rename the home.tsx file to _index.tsx.
and update the file to the following:
//old:
import type { Route } from "./+types/home";

// updated:
import type { Route } from "./+types/_index";
Now restart your React Router 7 and everything should still be working.
If you wanted to add a new route, you can do so by creating a new file in the app/routes folder.
Let's do a simple example.
In the app/routes folder, create a new file called about.tsx.
And update the file to the following:
import type { Route } from "./+types/about";

export function meta({}: Route.MetaArgs) {
  return [
    { title: "About" },
    { name: "description", content: "About Page" },
  ];
}

export default function About() {
  return <div className="container mx-auto p-4">This is the about page</div>;
}
Now restart your React Router 7 and you should be able to navigate to the about page at http://localhost:5173/about.
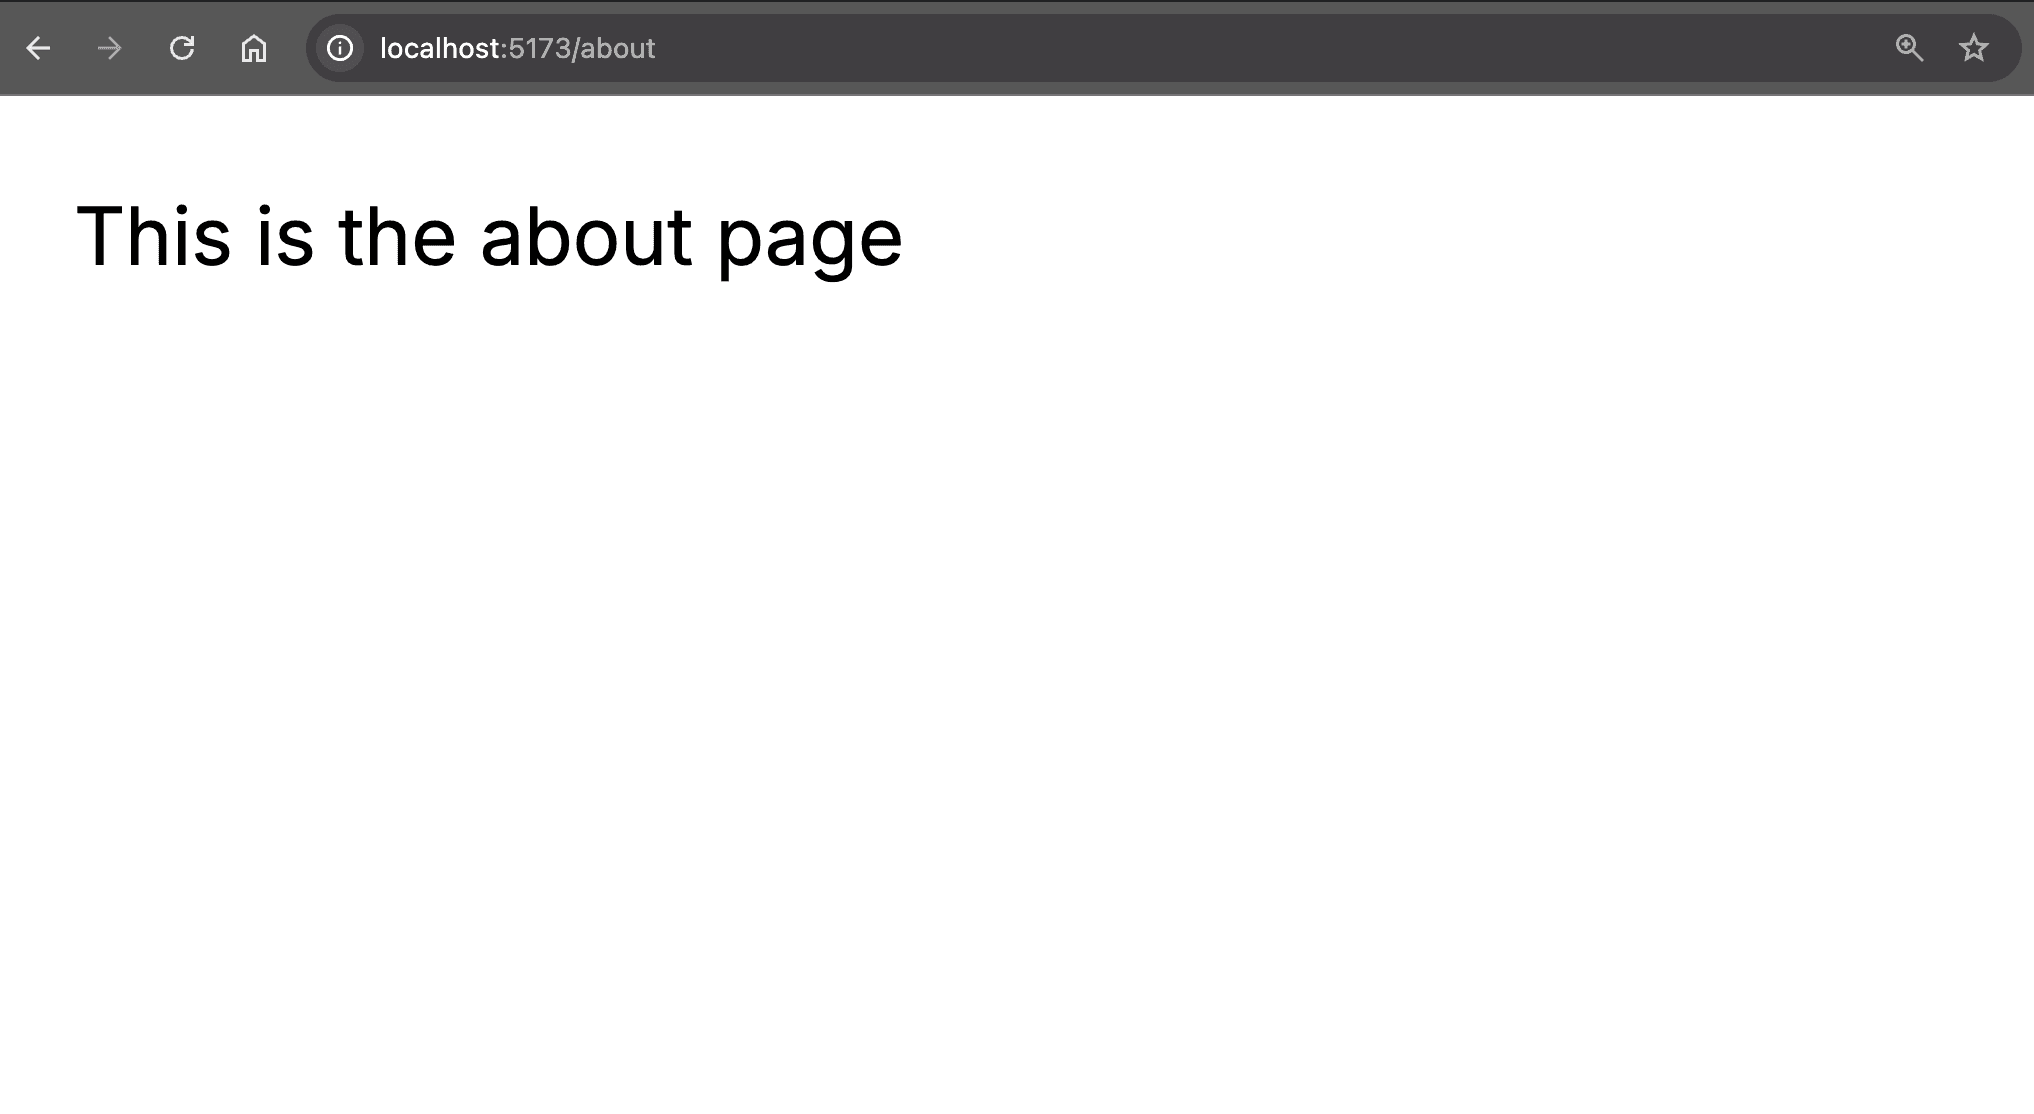
Nice, now that we have a basic route setup, we can start to integrate it with our Strapi 5 server.
Fetching Data from Strapi 5 with React Router 7
We are going to opt in to use server loader to fetch data from our Strapi 5 server.
You can read more about it here.
To make this work, we need to update our app/routes/_index.tsx let's update the file with the following code:
import qs from "qs";

import type { Route } from "./+types/_index";
import { ArticleCard } from "../components/article-card";

interface Article {
  id: number;
  documentId: string;
  title: string;
  description: string;
  slug: string;
  createdAt: string;
  updatedAt: string;
  publishedAt: string;
  cover: {
    url: string;
    alternativeText: string;
  };
}

interface ArticleResponse {
  data: Article[];
}

interface LoaderData {
  articlesData: ArticleResponse;
}

// Server Side Loader
export async function loader({ params }: Route.LoaderArgs) {
  const BASE_URL = import.meta.env.VITE_STRAPI_URL || "http://localhost:1337";
  const path = "/api/articles";
  const url = new URL(path, BASE_URL);

  url.search = qs.stringify({
    populate: {
      cover: {
        fields: ["url", "alternativeText"],
      },
    },
  });

  const articlesData = await fetch(url.href);
  const data = await articlesData.json();
  return { articlesData: data as ArticleResponse };
}

export function meta(/*{}: Route.MetaArgs */) {
  return [
    { title: "Home | React Router 7" },
    { name: "description", content: "Home Page" },
  ];
}

export default function IndexRoute({ loaderData }: { loaderData: LoaderData }) {
  if (!loaderData) return <p>No data found</p>;
  return (
    <div className="container mx-auto px-4 py-8">
      <h1 className="text-3xl font-bold mb-6">
        React Router 7 and Strapi 5 Demo
      </h1>
      <div className="grid grid-cols-1 md:grid-cols-2 lg:grid-cols-3 gap-6">
        {loaderData.articlesData.data.map((article: Article) => (
          <ArticleCard
            key={article.id}
            title={article.title}
            description={article.description}
            publishedAt={article.publishedAt}
            slug={article.slug}
            cover={article.cover}
          />
        ))}
      </div>
    </div>
  );
}
Before this will work, we need to add two more components to our project, and install the qs package that will help us with the query string.
In our projects app folder, create a new folder called components. And let's add two new components to our project.
We will start with the StrapiImage component.
Create a new file called strapi-image.tsx and update the file with the following code:
interface StrapiImageProps {
  src: string;
  alt: string | null;
  height?: number;
  width?: number;
  className?: string;
}

const STRAPI_API_URL = process.env.STRAPI_API_URL ?? "http://localhost:1337";

export function getStrapiMedia(url: string | null) {
  if (url == null) return null;
  if (url.startsWith("data:")) return url;
  if (url.startsWith("http") || url.startsWith("//")) return url;
  return `${STRAPI_API_URL}${url}`;
}

export function StrapiImage({
  src,
  alt,
  className,
  ...rest
}: Readonly<StrapiImageProps>) {
  const imageUrl = getStrapiMedia(src);
  if (!imageUrl) return null;
  return (
    <img
      src={imageUrl}
      alt={alt ?? "No alternative text provided"}
      className={className}
      {...rest}
    />
  );
}
Now let's create the ArticleCard component.
Create a new file called article-card.tsx and update the file with the following code:
import { StrapiImage } from "./strapi-image";

export interface ArticleCardProps {
  title: string;
  description: string;
  publishedAt: string;
  slug: string;
  cover: {
    url: string;
    alternativeText: string;
  };
}

export function ArticleCard({
  title,
  description,
  publishedAt,
  slug,
  cover,
}: Readonly<ArticleCardProps>) {
  return (
    <div className="bg-white rounded-lg shadow-md overflow-hidden hover:shadow-lg transition-shadow duration-300">
      <div className="aspect-w-16 aspect-h-9">
        <StrapiImage
          src={cover.url}
          alt={cover.alternativeText}
          className="object-cover w-full h-full"
        />
      </div>
      <div className="p-6">
        <h2 className="text-xl font-bold text-gray-800 mb-2">{title}</h2>
        <p className="text-gray-600 mb-4 line-clamp-2">{description}</p>
        <div className="flex justify-between items-center text-sm text-gray-500">
          <span>{new Date(publishedAt).toLocaleDateString()}</span>
        </div>
      </div>
    </div>
  );
}
And finally, let's add the qs package to our project.
  npm i qs
  npm i @types/qs
Now restart your React Router 7 app and you Strapi 5 app and you should be able to the following screen.
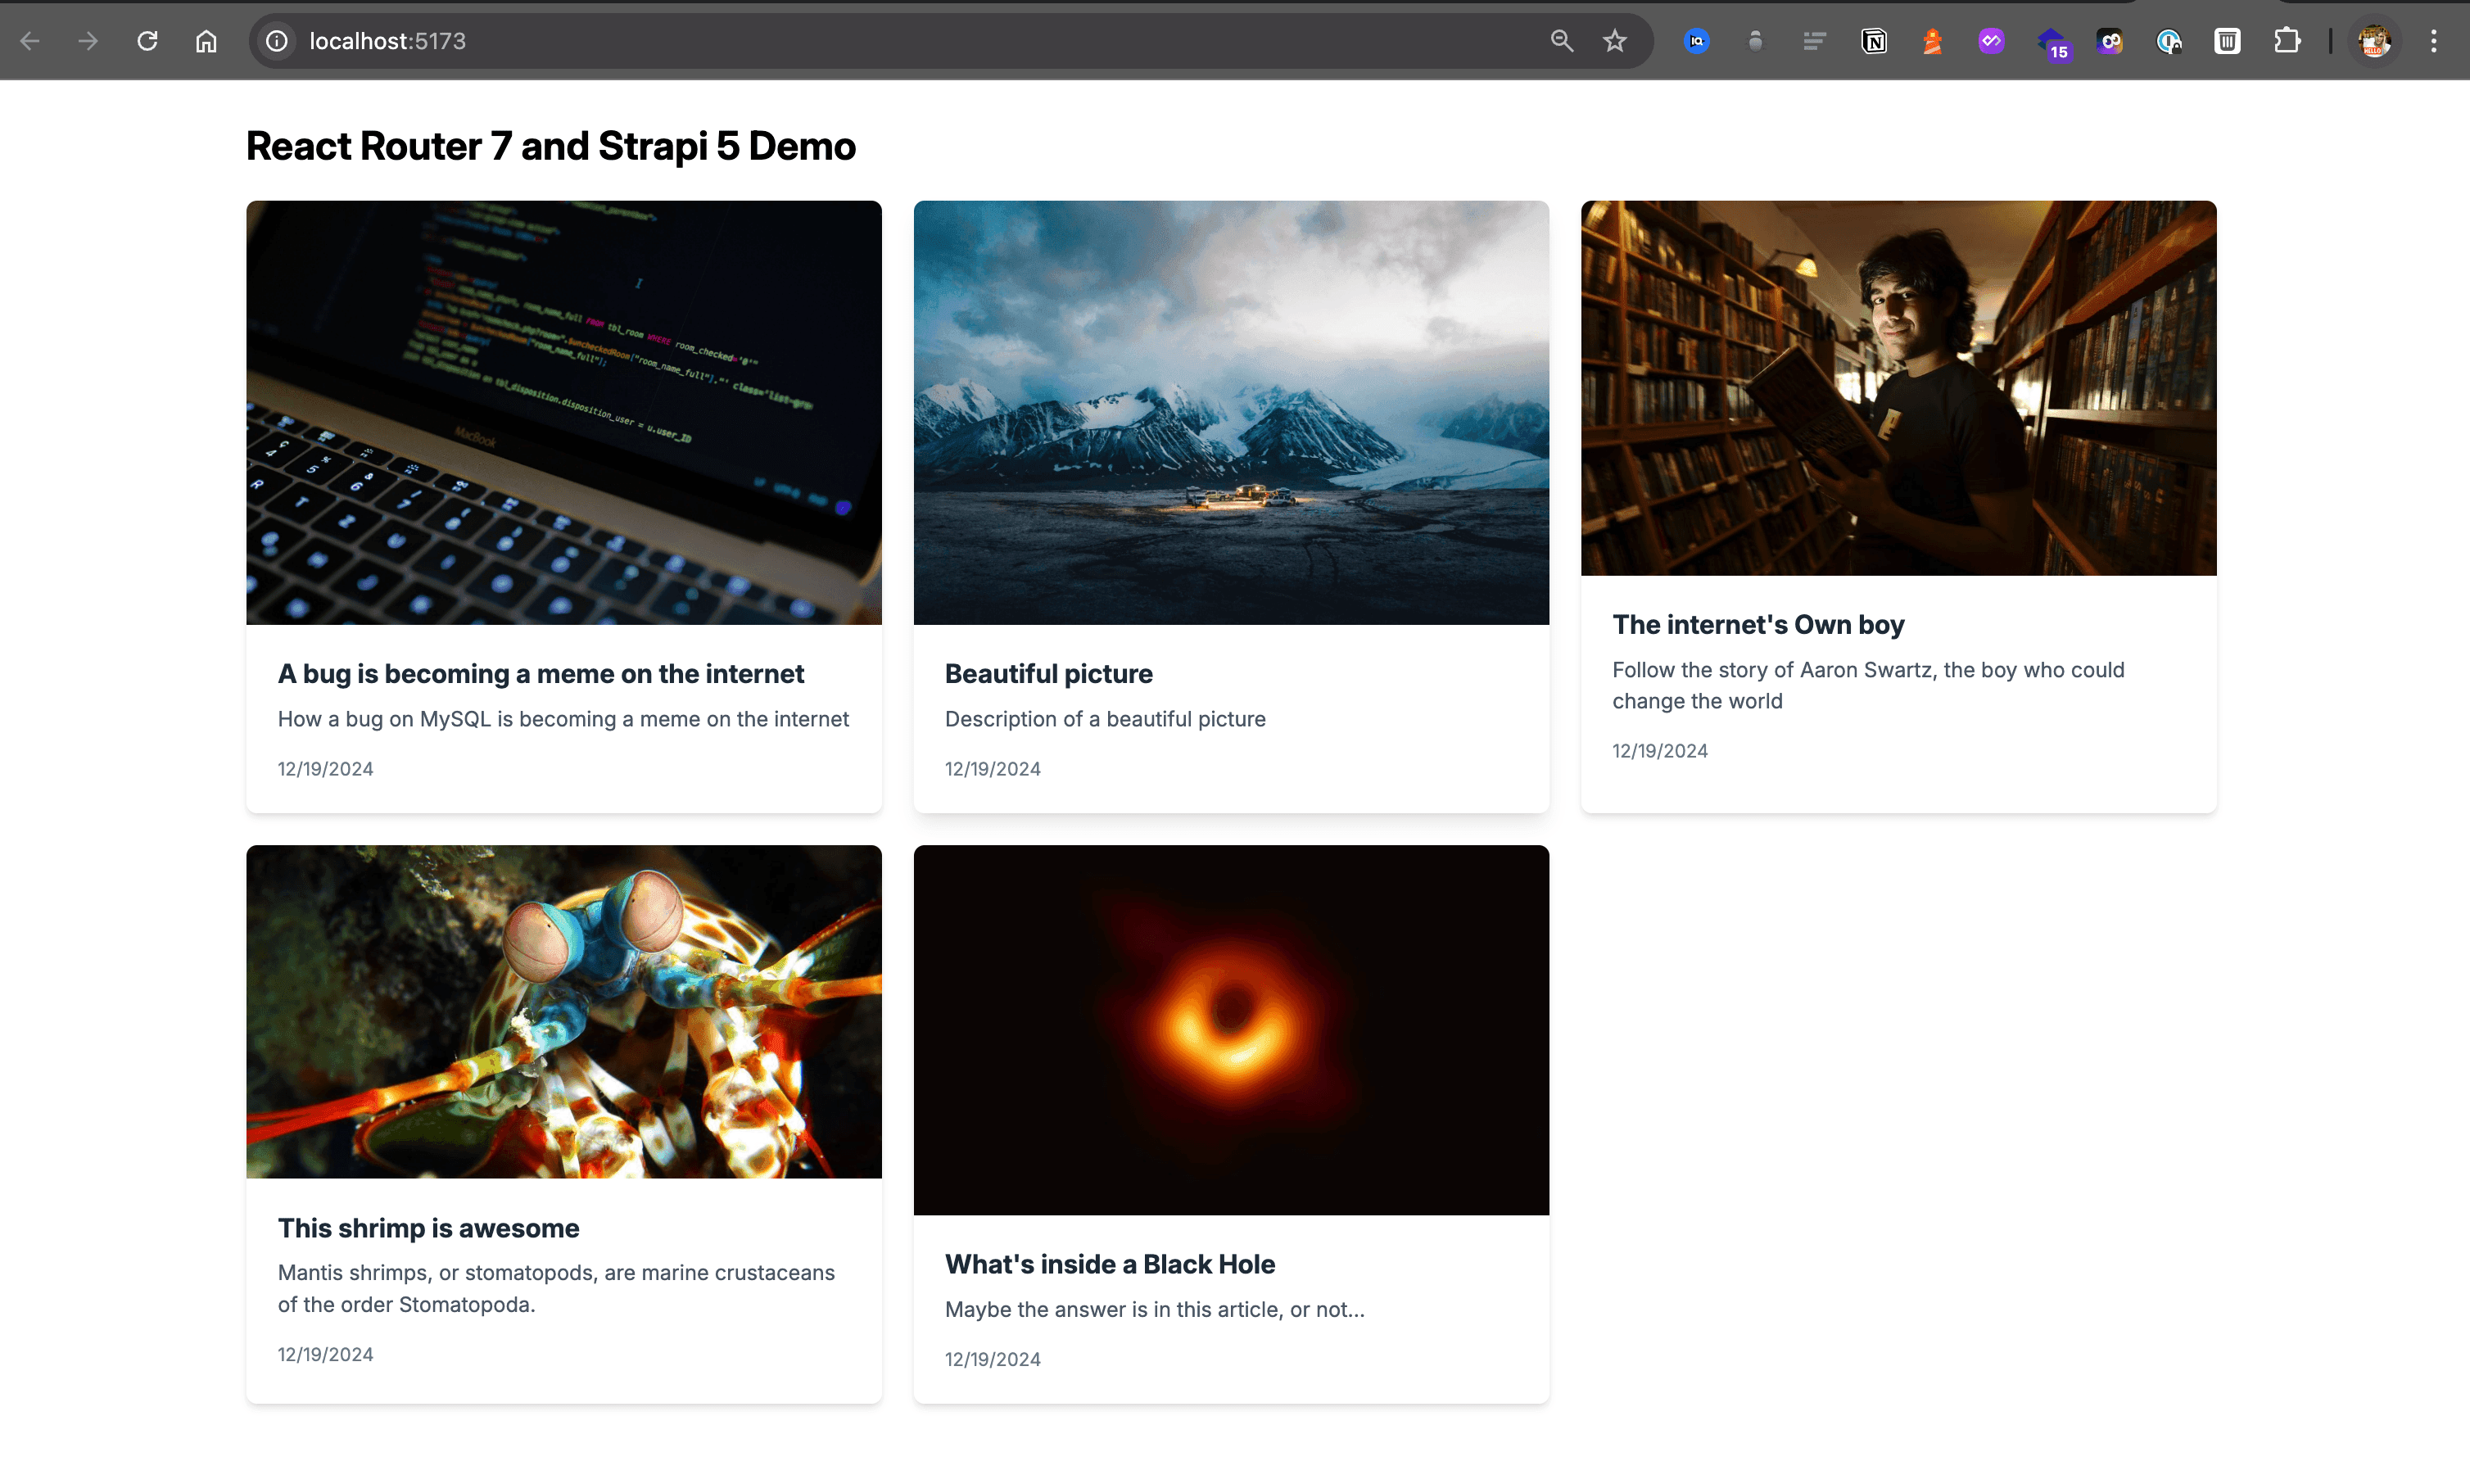
Awesome, great job!
Github Project Repo
You can find the complete code for this project in the following Github repo.
Strapi Open Office Hours
If you have any questions about Strapi 5 or just would like to stop by and say hi, you can join us at Strapi's Discord Open Office Hours Monday through Friday at 12:30 pm - 1:30 pm CST: Strapi Discord Open Office Hours
For more details, visit the Strapi documentation and React Router 7 documentation.