React Native
React Native lets you build native mobile apps using JavaScript. Integrate it with Strapi to power fast, flexible content experiences across iOS and Android

Why Use React Native?
React Native open-source JavaScript framework that allows developers to build native mobile applications for iOS and Android using the same codebase. React Native brings the best parts of developing with React to native development. It's a best-in-class JavaScript library for building user interfaces.
Visit the React Native documentation for more.
Why Use Strapi?
Strapi is the leading open-source headless CMS offering features, like customizable APIs, role-based permissions, multilingual support, etc. It simplifies content management and integrates effortlessly with modern frontend frameworks.
Explore the Strapi documentation for more details.
Strapi 5 Highlights
The out-of-the-box Strapi features allow you to get up and running in no time:
- Single types: Create one-off pages that have a unique content structure.
- Draft and Publish: Reduce the risk of publishing errors and streamline collaboration.
- 100% TypeScript Support: Enjoy type safety & easy maintainability
- Customizable API: With Strapi, you can just hop in your code editor and edit the code to fit your API to your needs.
- Integrations: Strapi supports integrations with Cloudinary, SendGrid, Algolia, and others.
- Editor interface: The editor allows you to pull in dynamic blocks of content.
- Authentication: Secure and authorize access to your API with JWT or providers.
- RBAC: Help maximize operational efficiency, reduce dev team support work, and safeguard against unauthorized access or configuration modifications.
- i18n: Manage content in multiple languages. Easily query the different locales through the API.
- Plugins: Customize and extend Strapi using plugins.
Learn more about Strapi 5 feature.
Setup Strapi 5 Headless CMS
We are going to start by setting up our Strapi 5 project with the following command:
🖐️ Note: make sure that you have created a new directory for your project.
You can find the full documentation for Strapi 5 here.
Install Strapi
npx create-strapi-app@latest serverYou will be asked to choose if you would like to use Strapi Cloud we will choose to skip for now.
🚀 Welcome to Strapi! Ready to bring your project to life?

...

? Please log in or sign up.
  Login/Sign up
❯ Skip
After that, you will be asked how you would like to set up your project. We will choose the following options:
? Do you want to use the default database (sqlite) ? Yes
? Start with an example structure & data? Yes <-- make sure you say yes
? Start with Typescript? Yes
? Install dependencies with npm? Yes
? Initialize a git repository? Yes
Once everything is set up and all the dependencies are installed, you can start your Strapi server with the following command:
cd server
npm run develop
You will be greeted with the Admin Create Account screen.
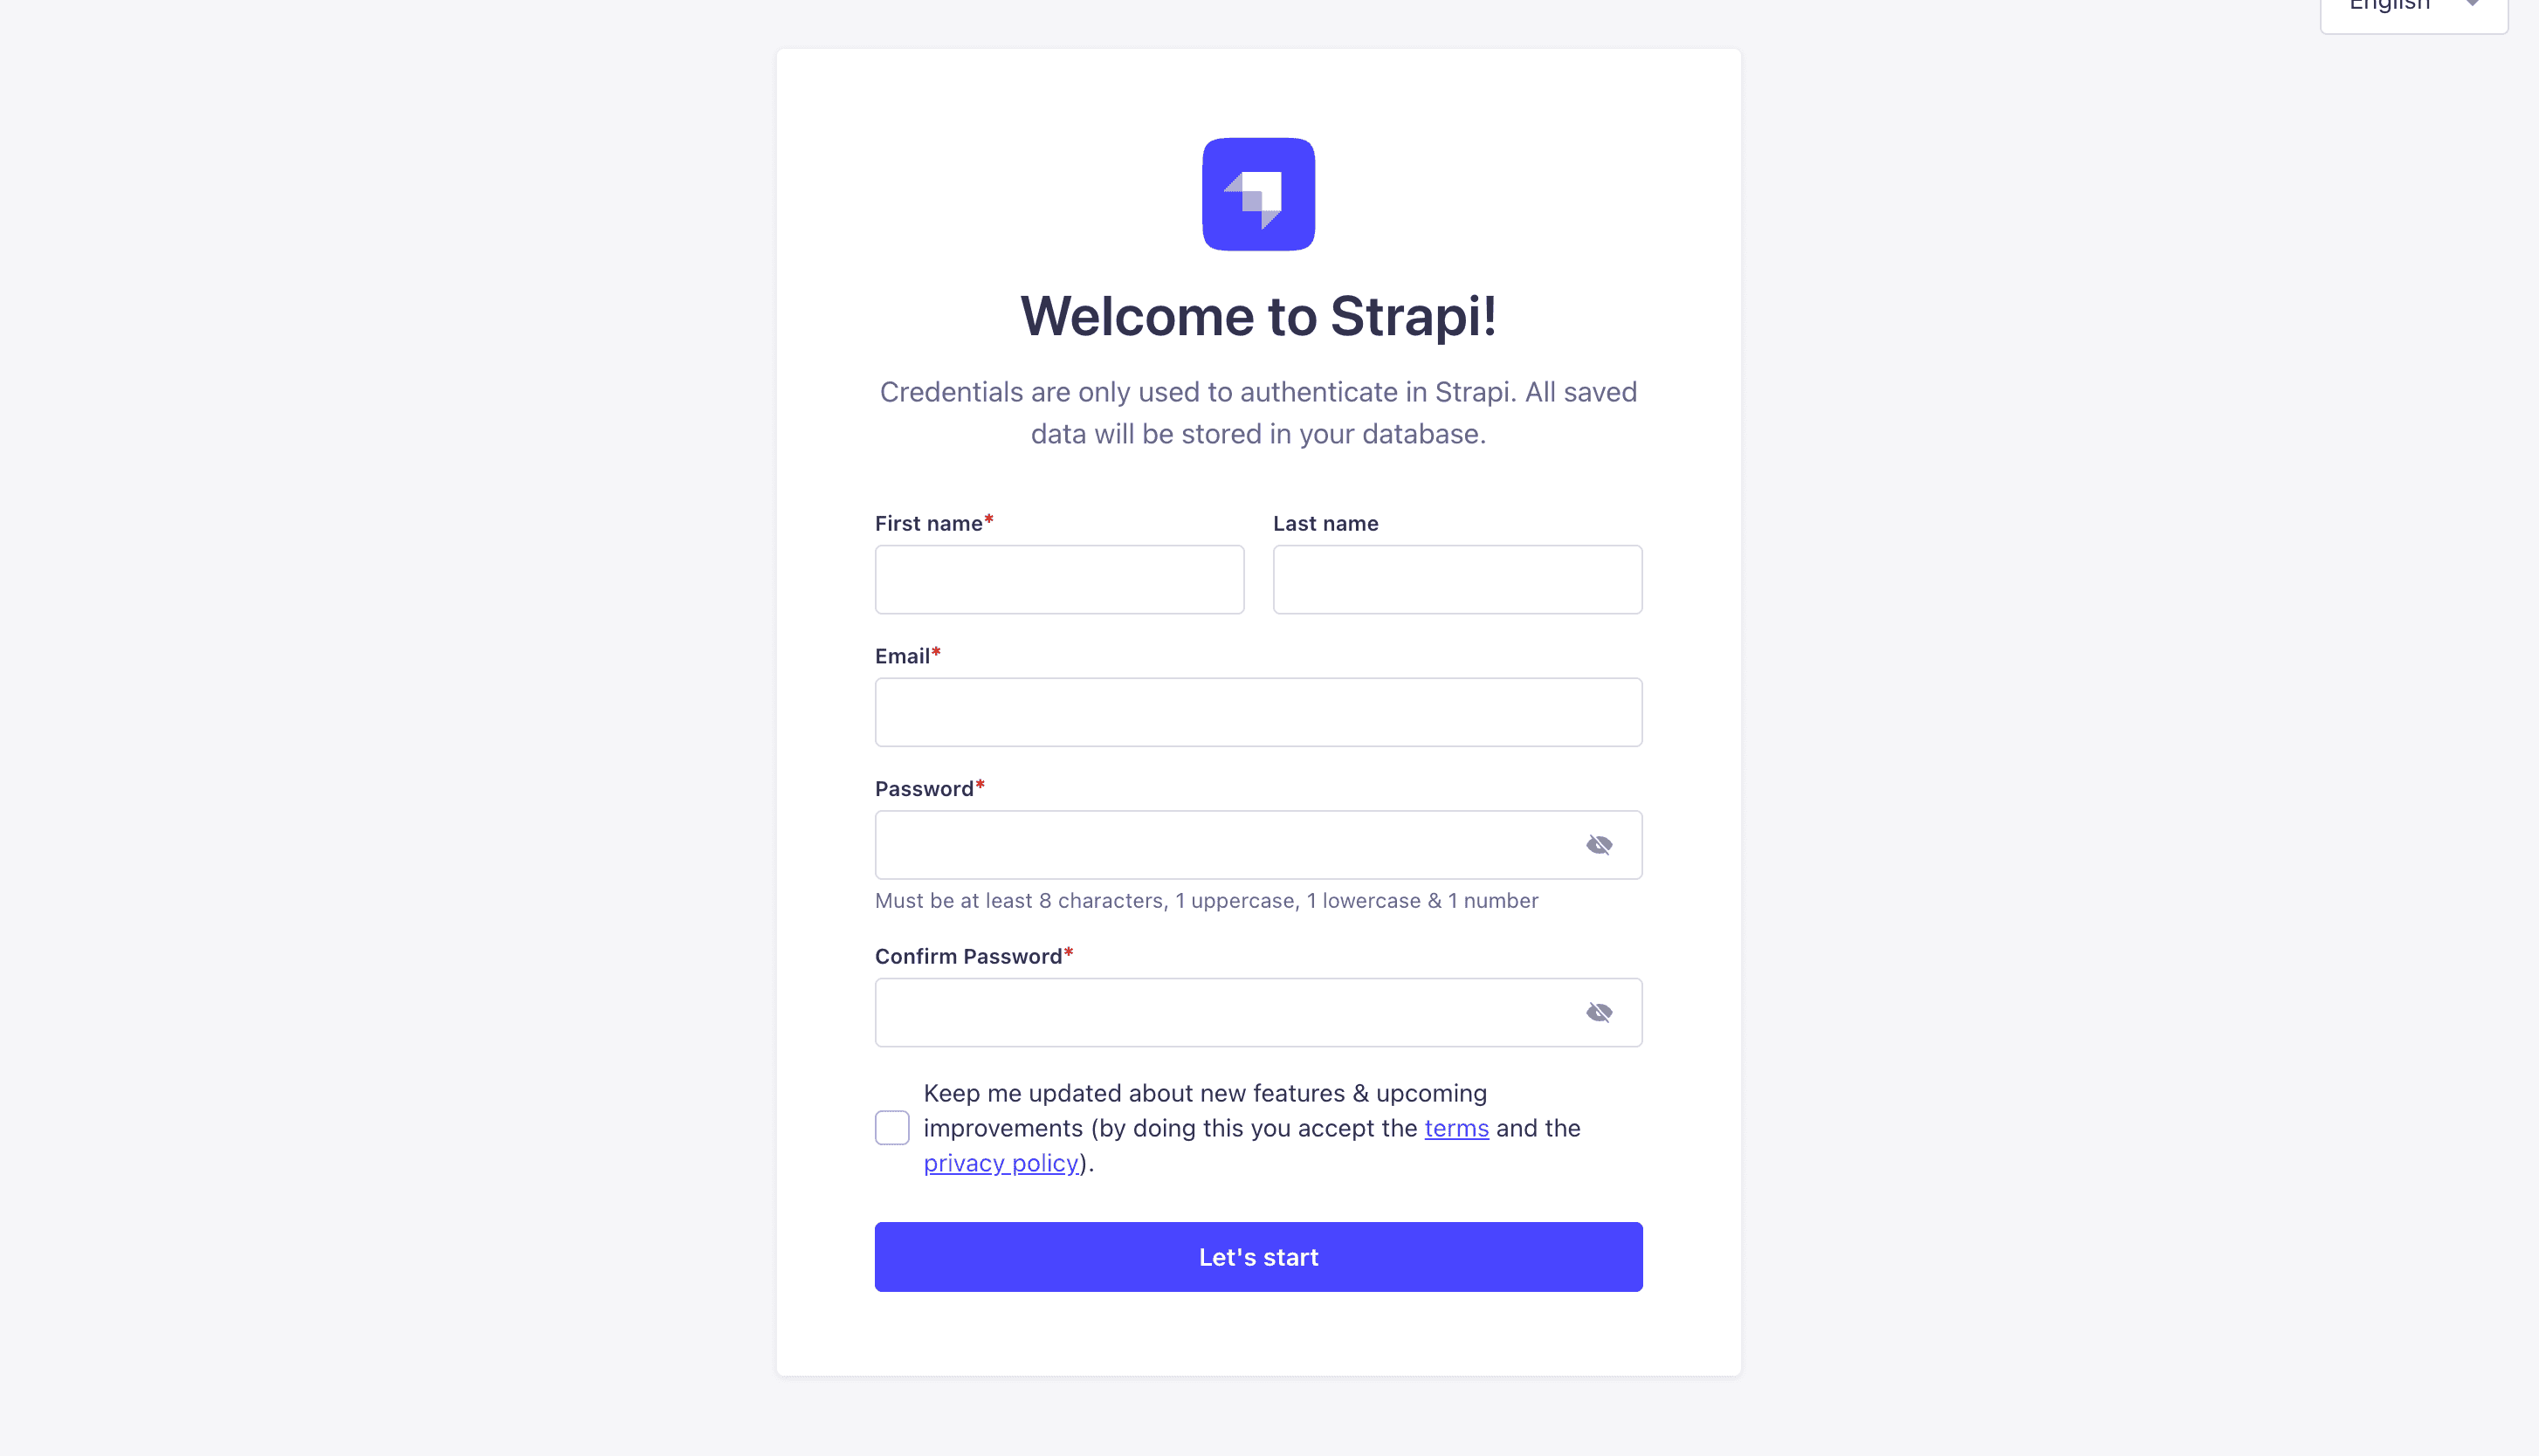
Go ahead and create your first Strapi user. All of this is local so you can use whatever you want.
Once you have created your user, you will be redirected to the Strapi Dashboard screen.
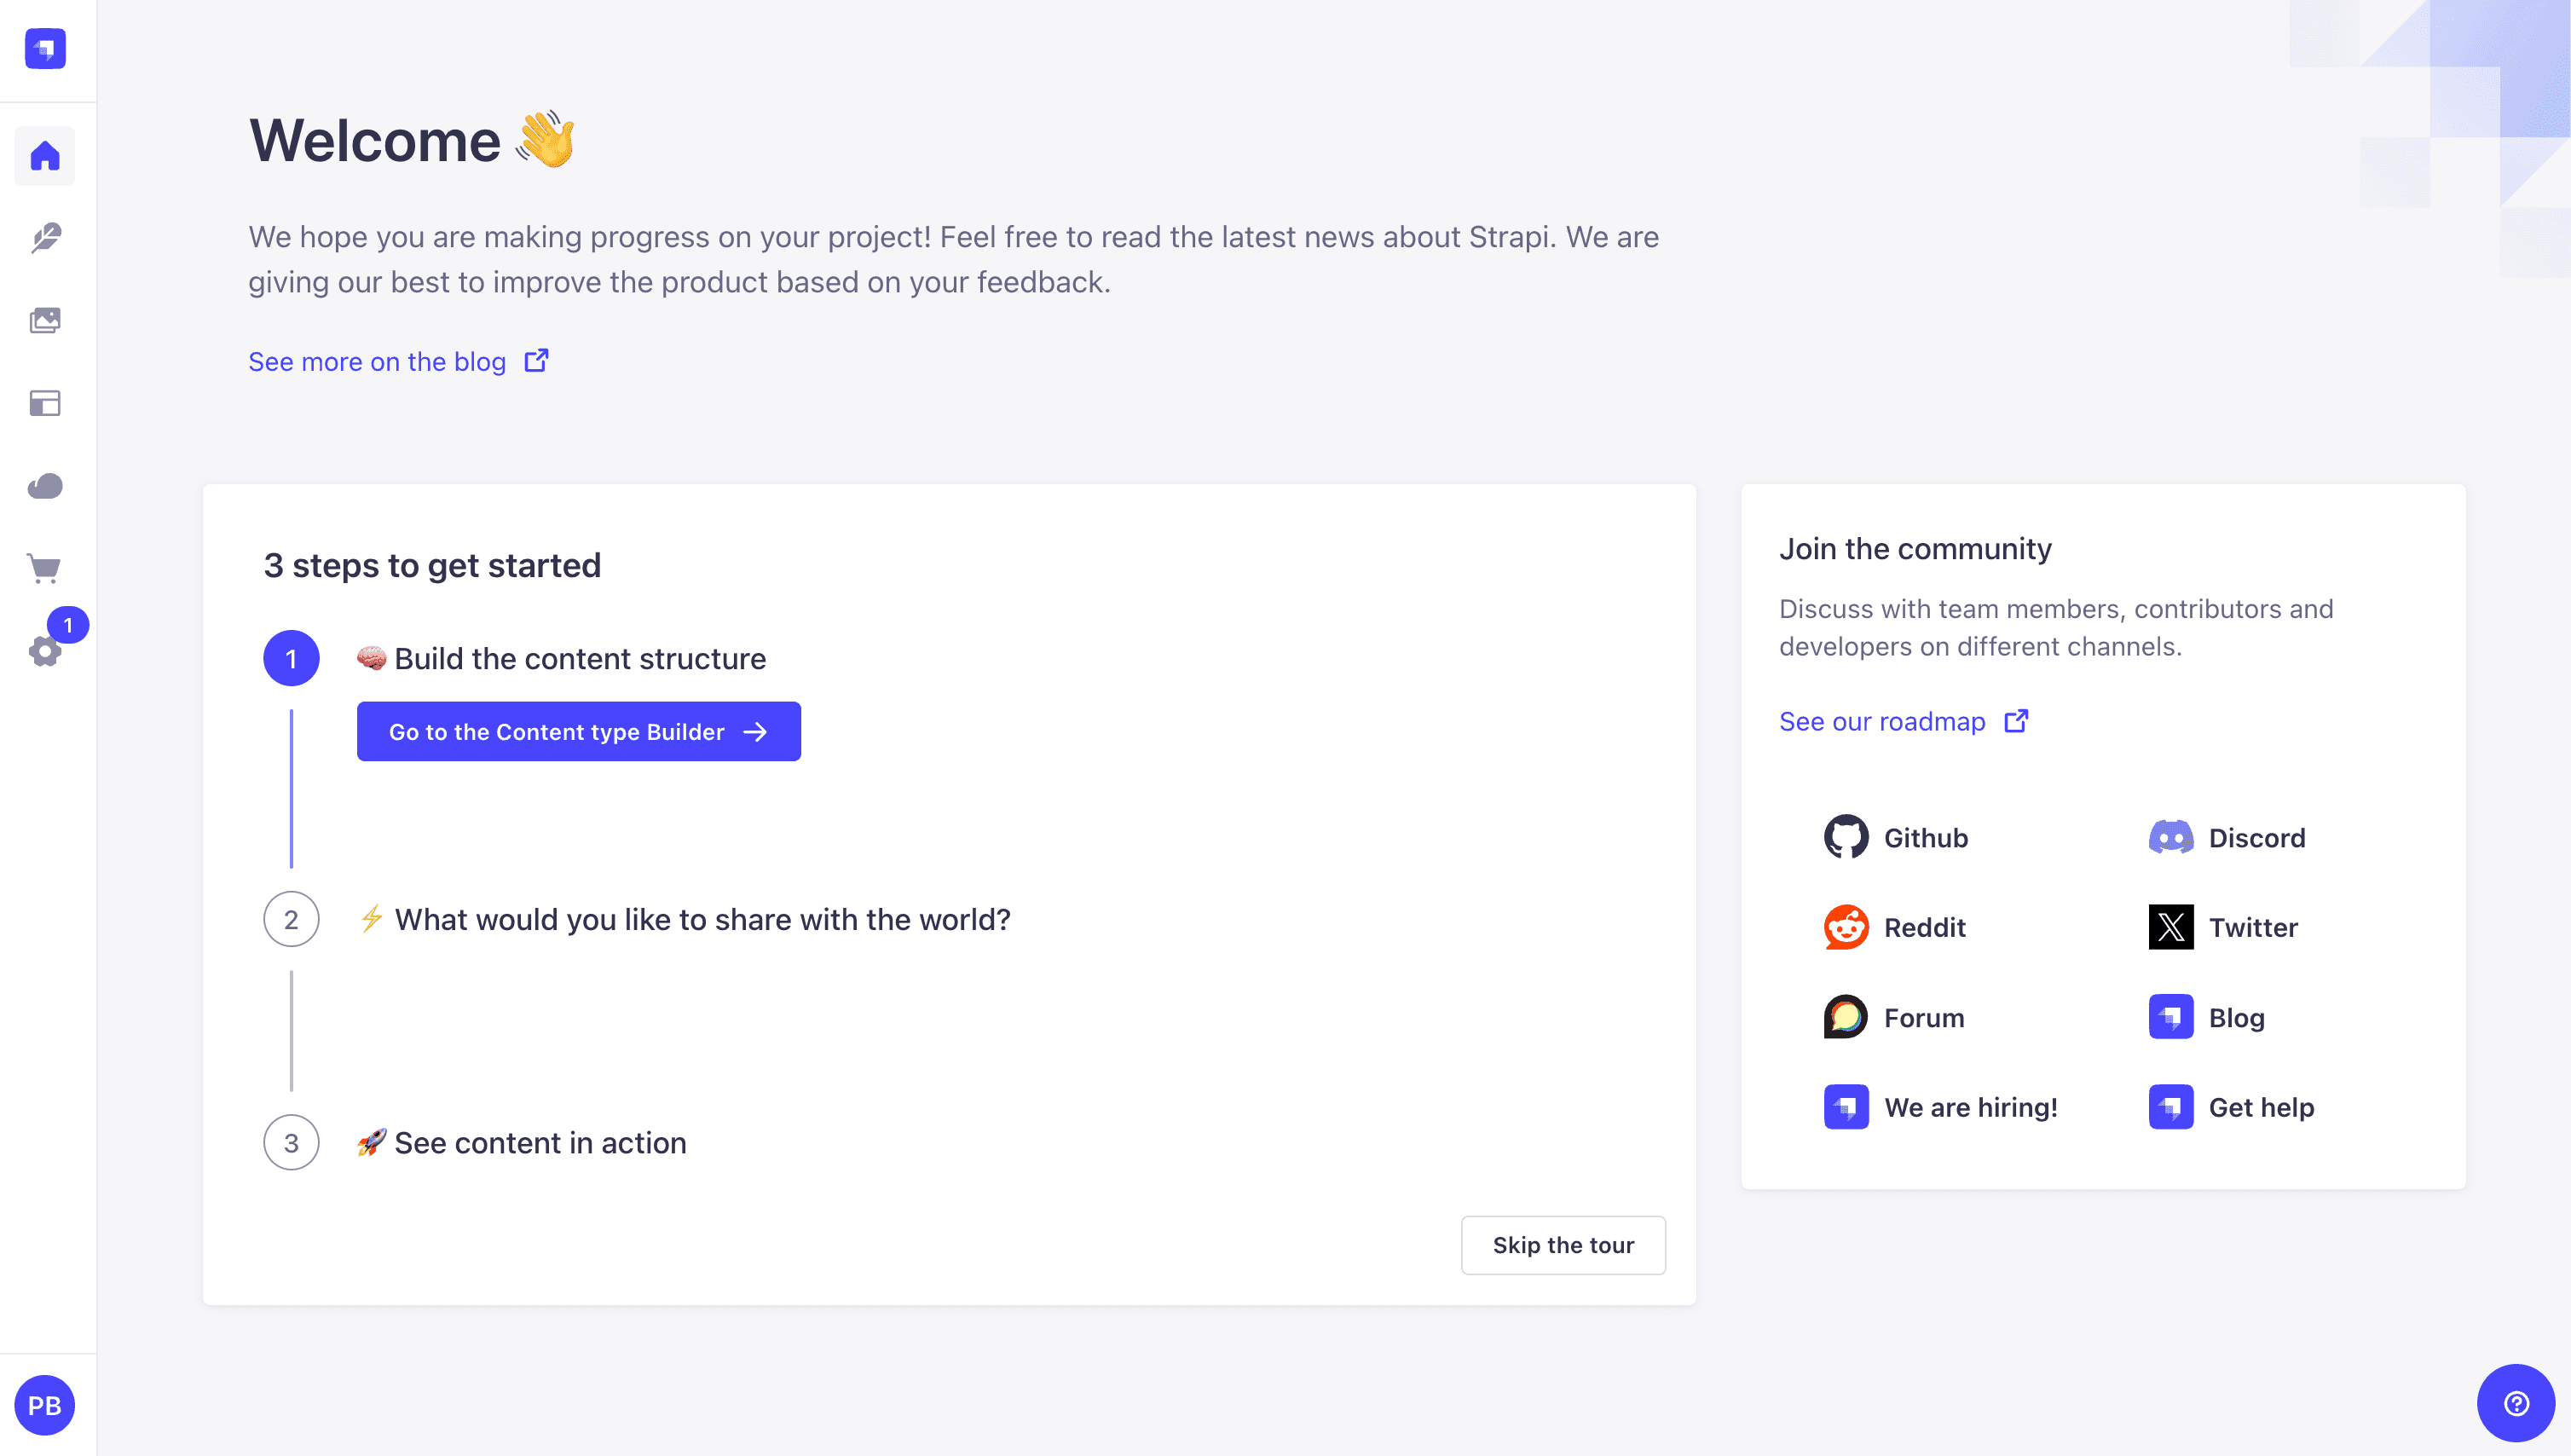
Publish Article Entries
Since we created our app with the example data, you should be able to navigate to your Article collection and see the data that was created for us.
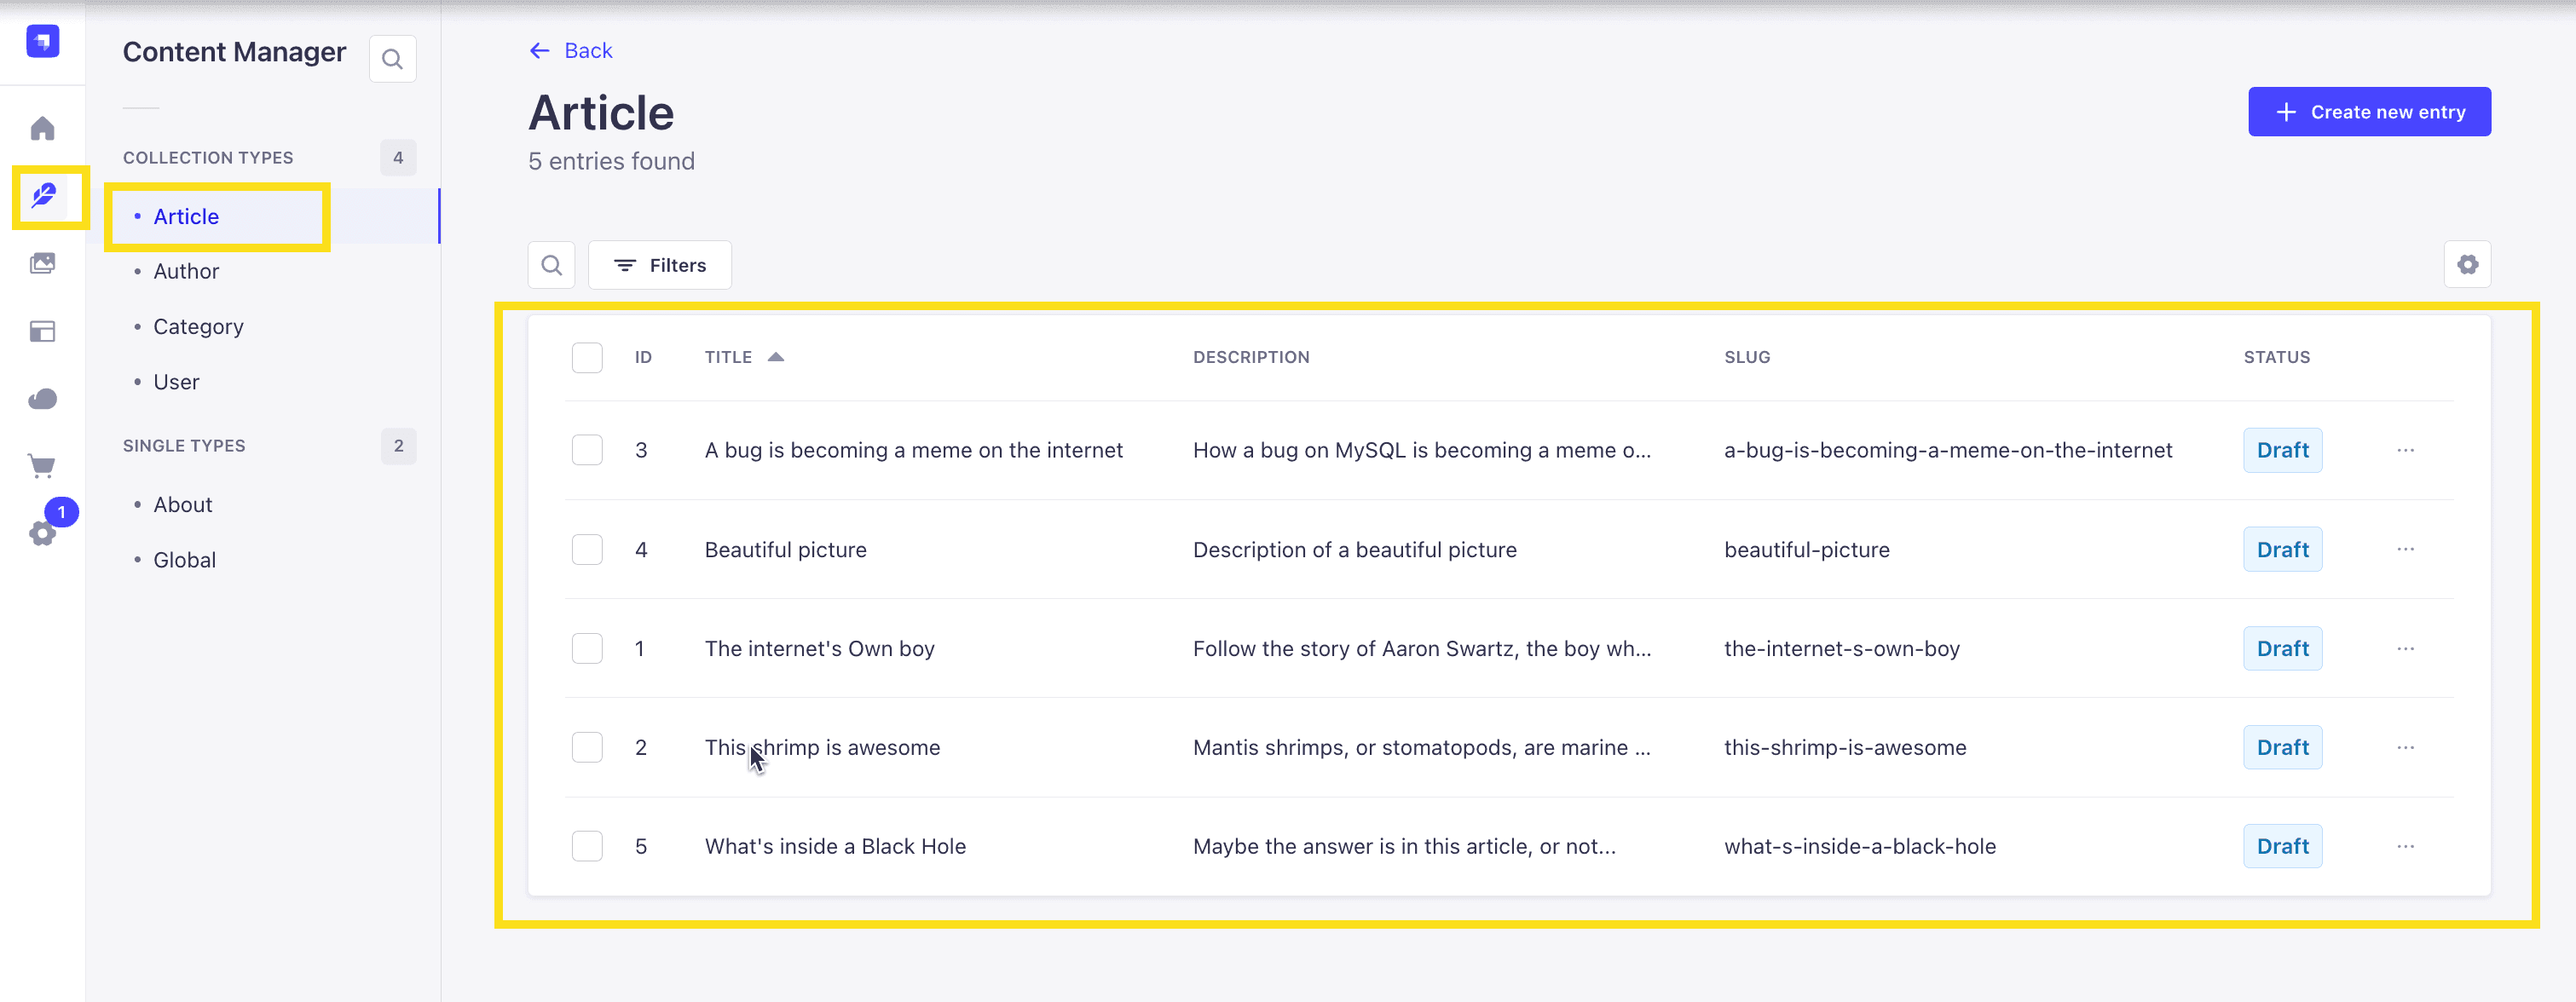
Now, let's make sure that all of the data is published. If not, you can select all items via the checkbox and then click the Publish button.
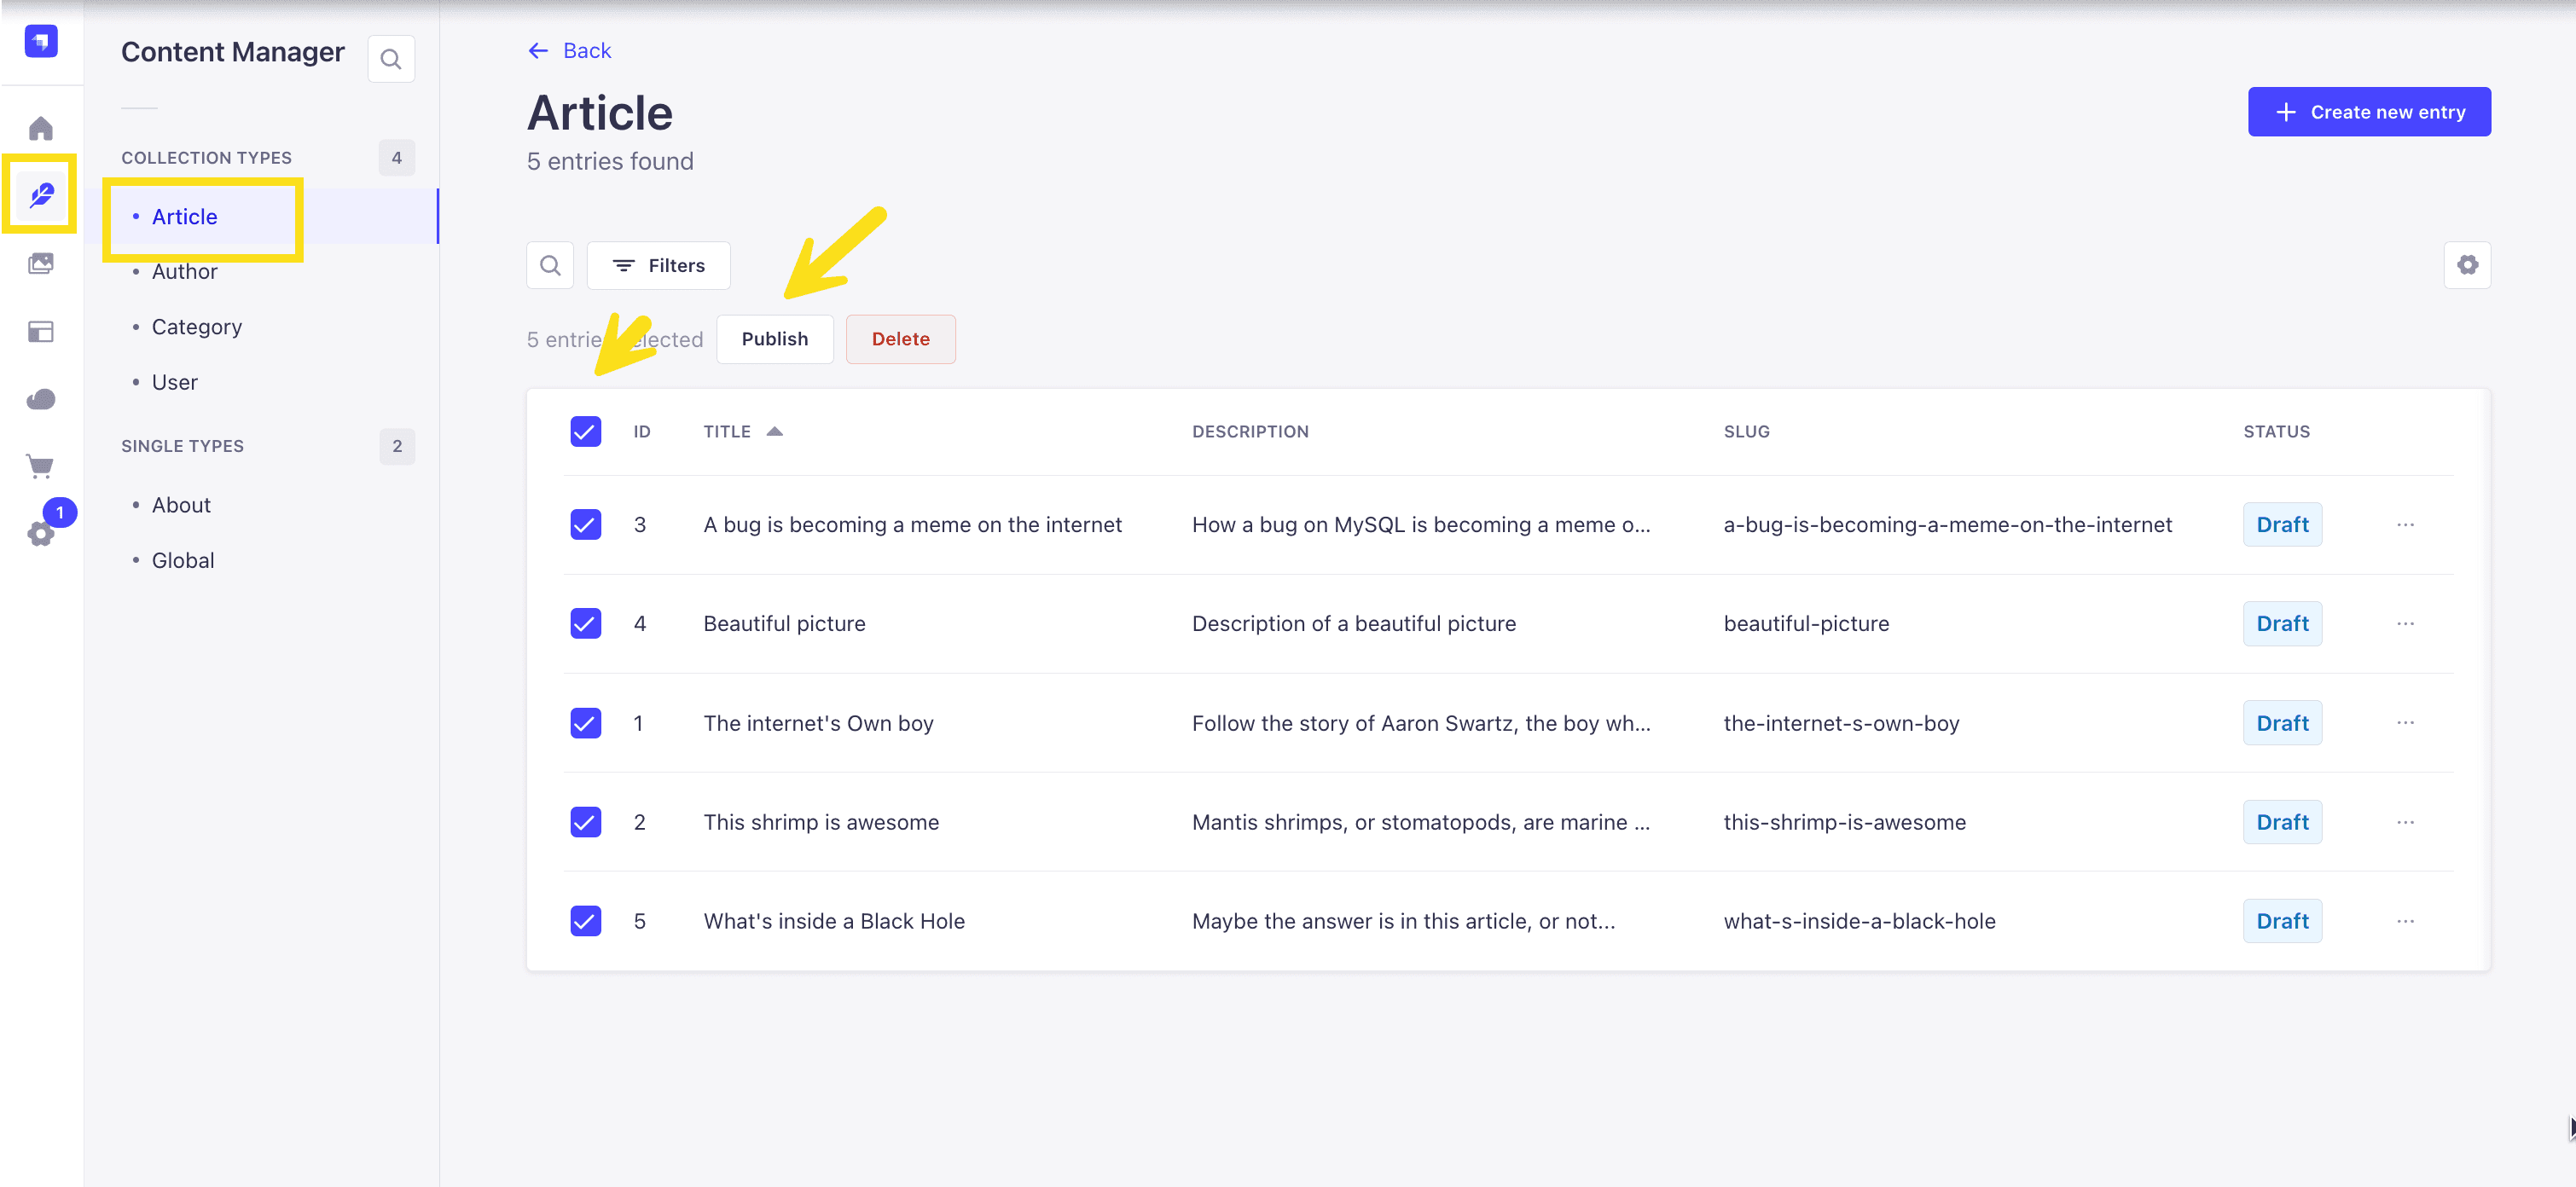
Enable API Access
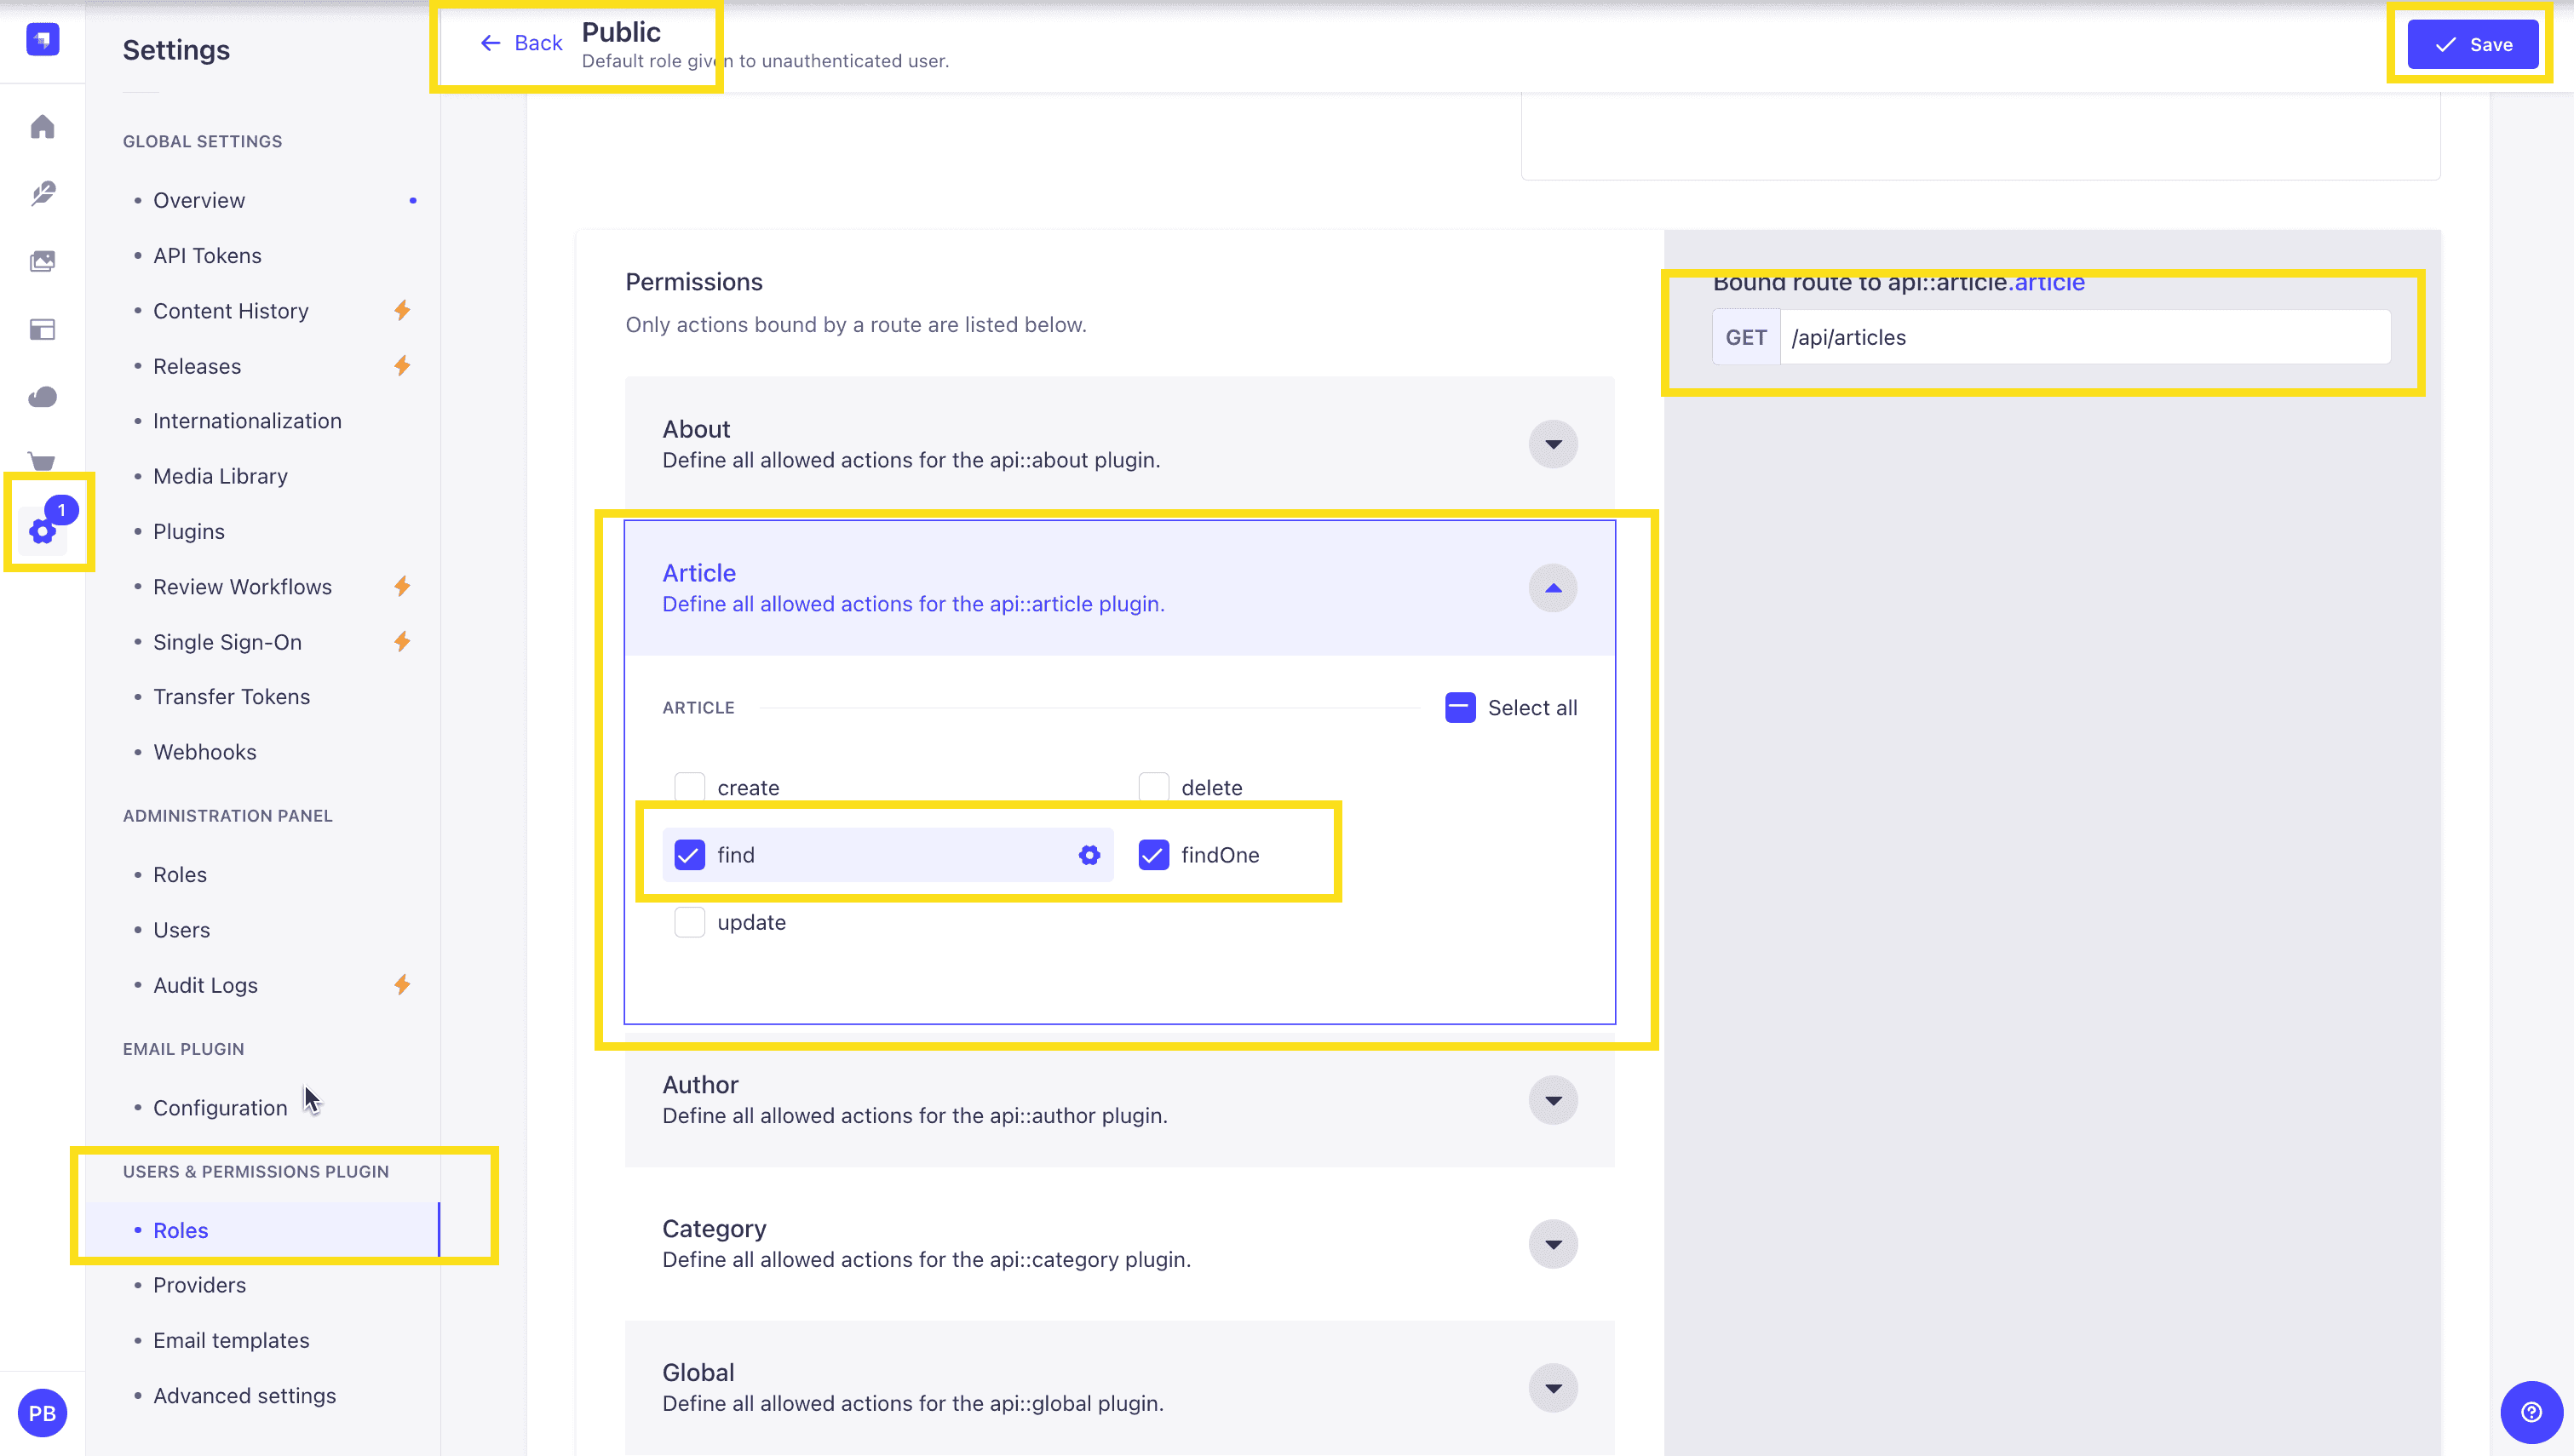
Once all your articles are published, we will expose our Strapi API for the Articles Collection. This can be done in Settings -> Users & Permissions plugin -> Roles -> Public -> Article.
You should have find and findOne selected. If not, go ahead and select them.
Test API
Now, if we make a GET request to http://localhost:1337/api/articles, we should see the following data for our articles.
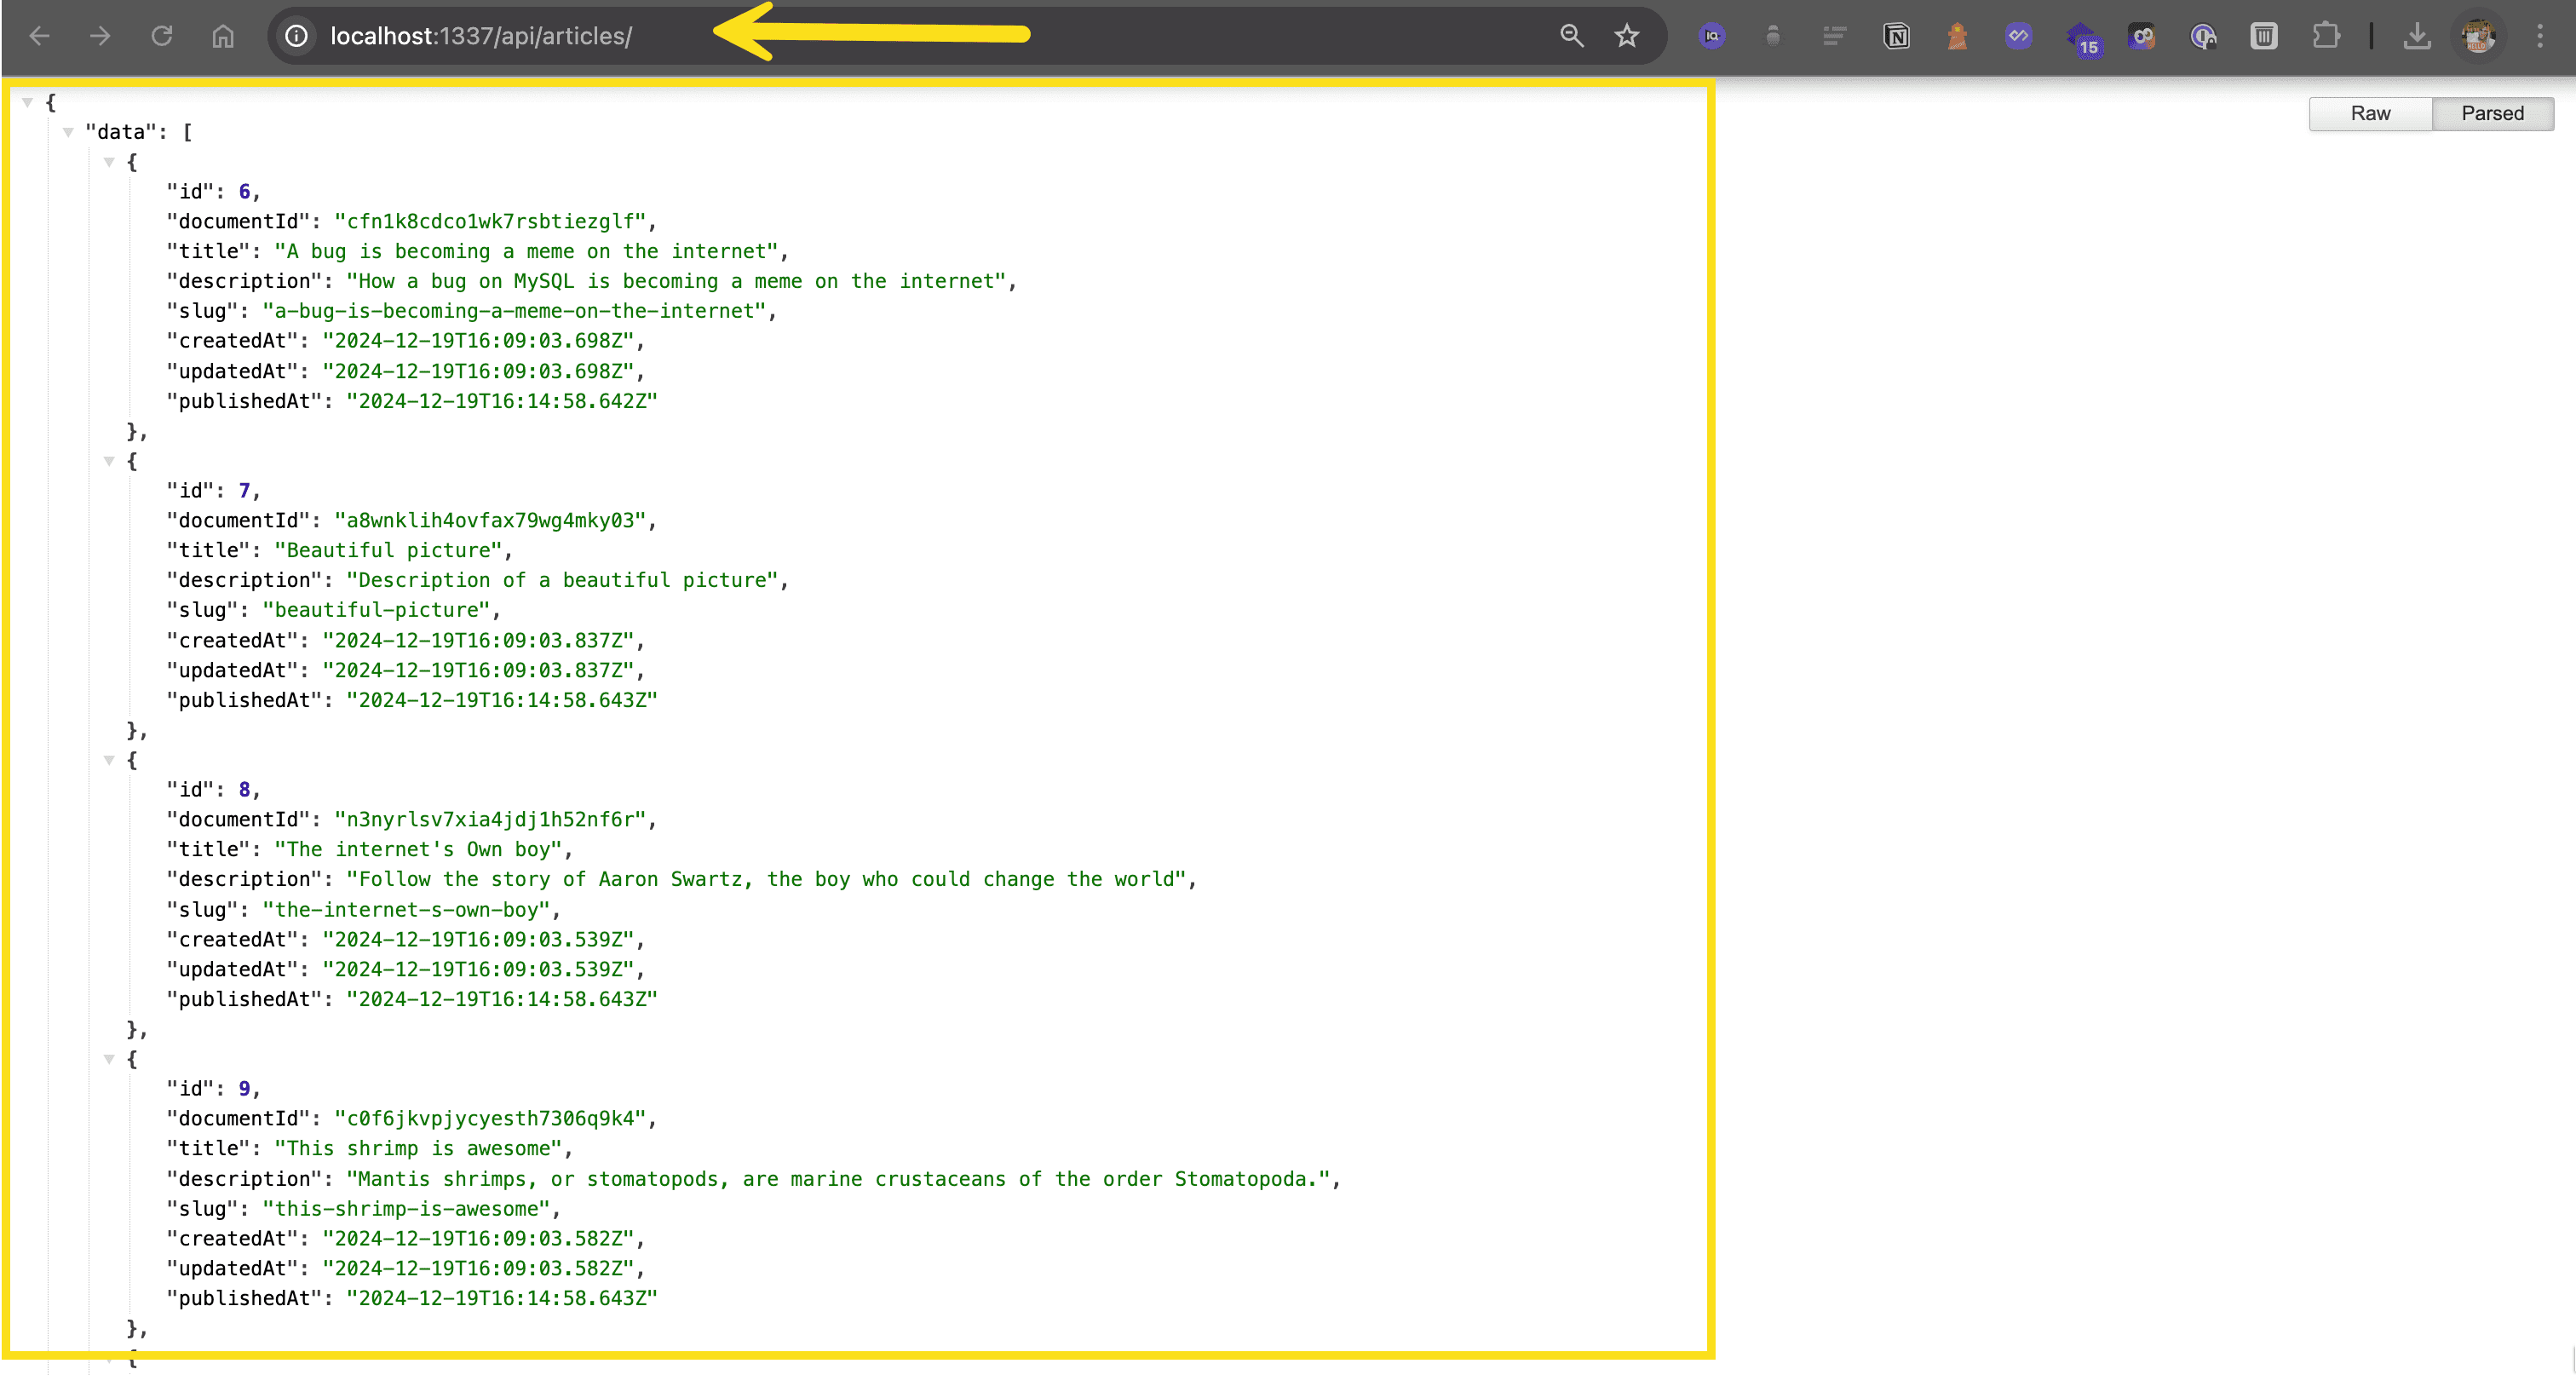
🖐️ Note: The article covers (images) are not returned. This is because the REST API by default does not populate any relations, media fields, components, or dynamic zones.. Learn more about REST API: Population & Field Selection.
So, let's get the article covers by using the populate=* parameter: http://localhost:1337/api/articles?populate=*
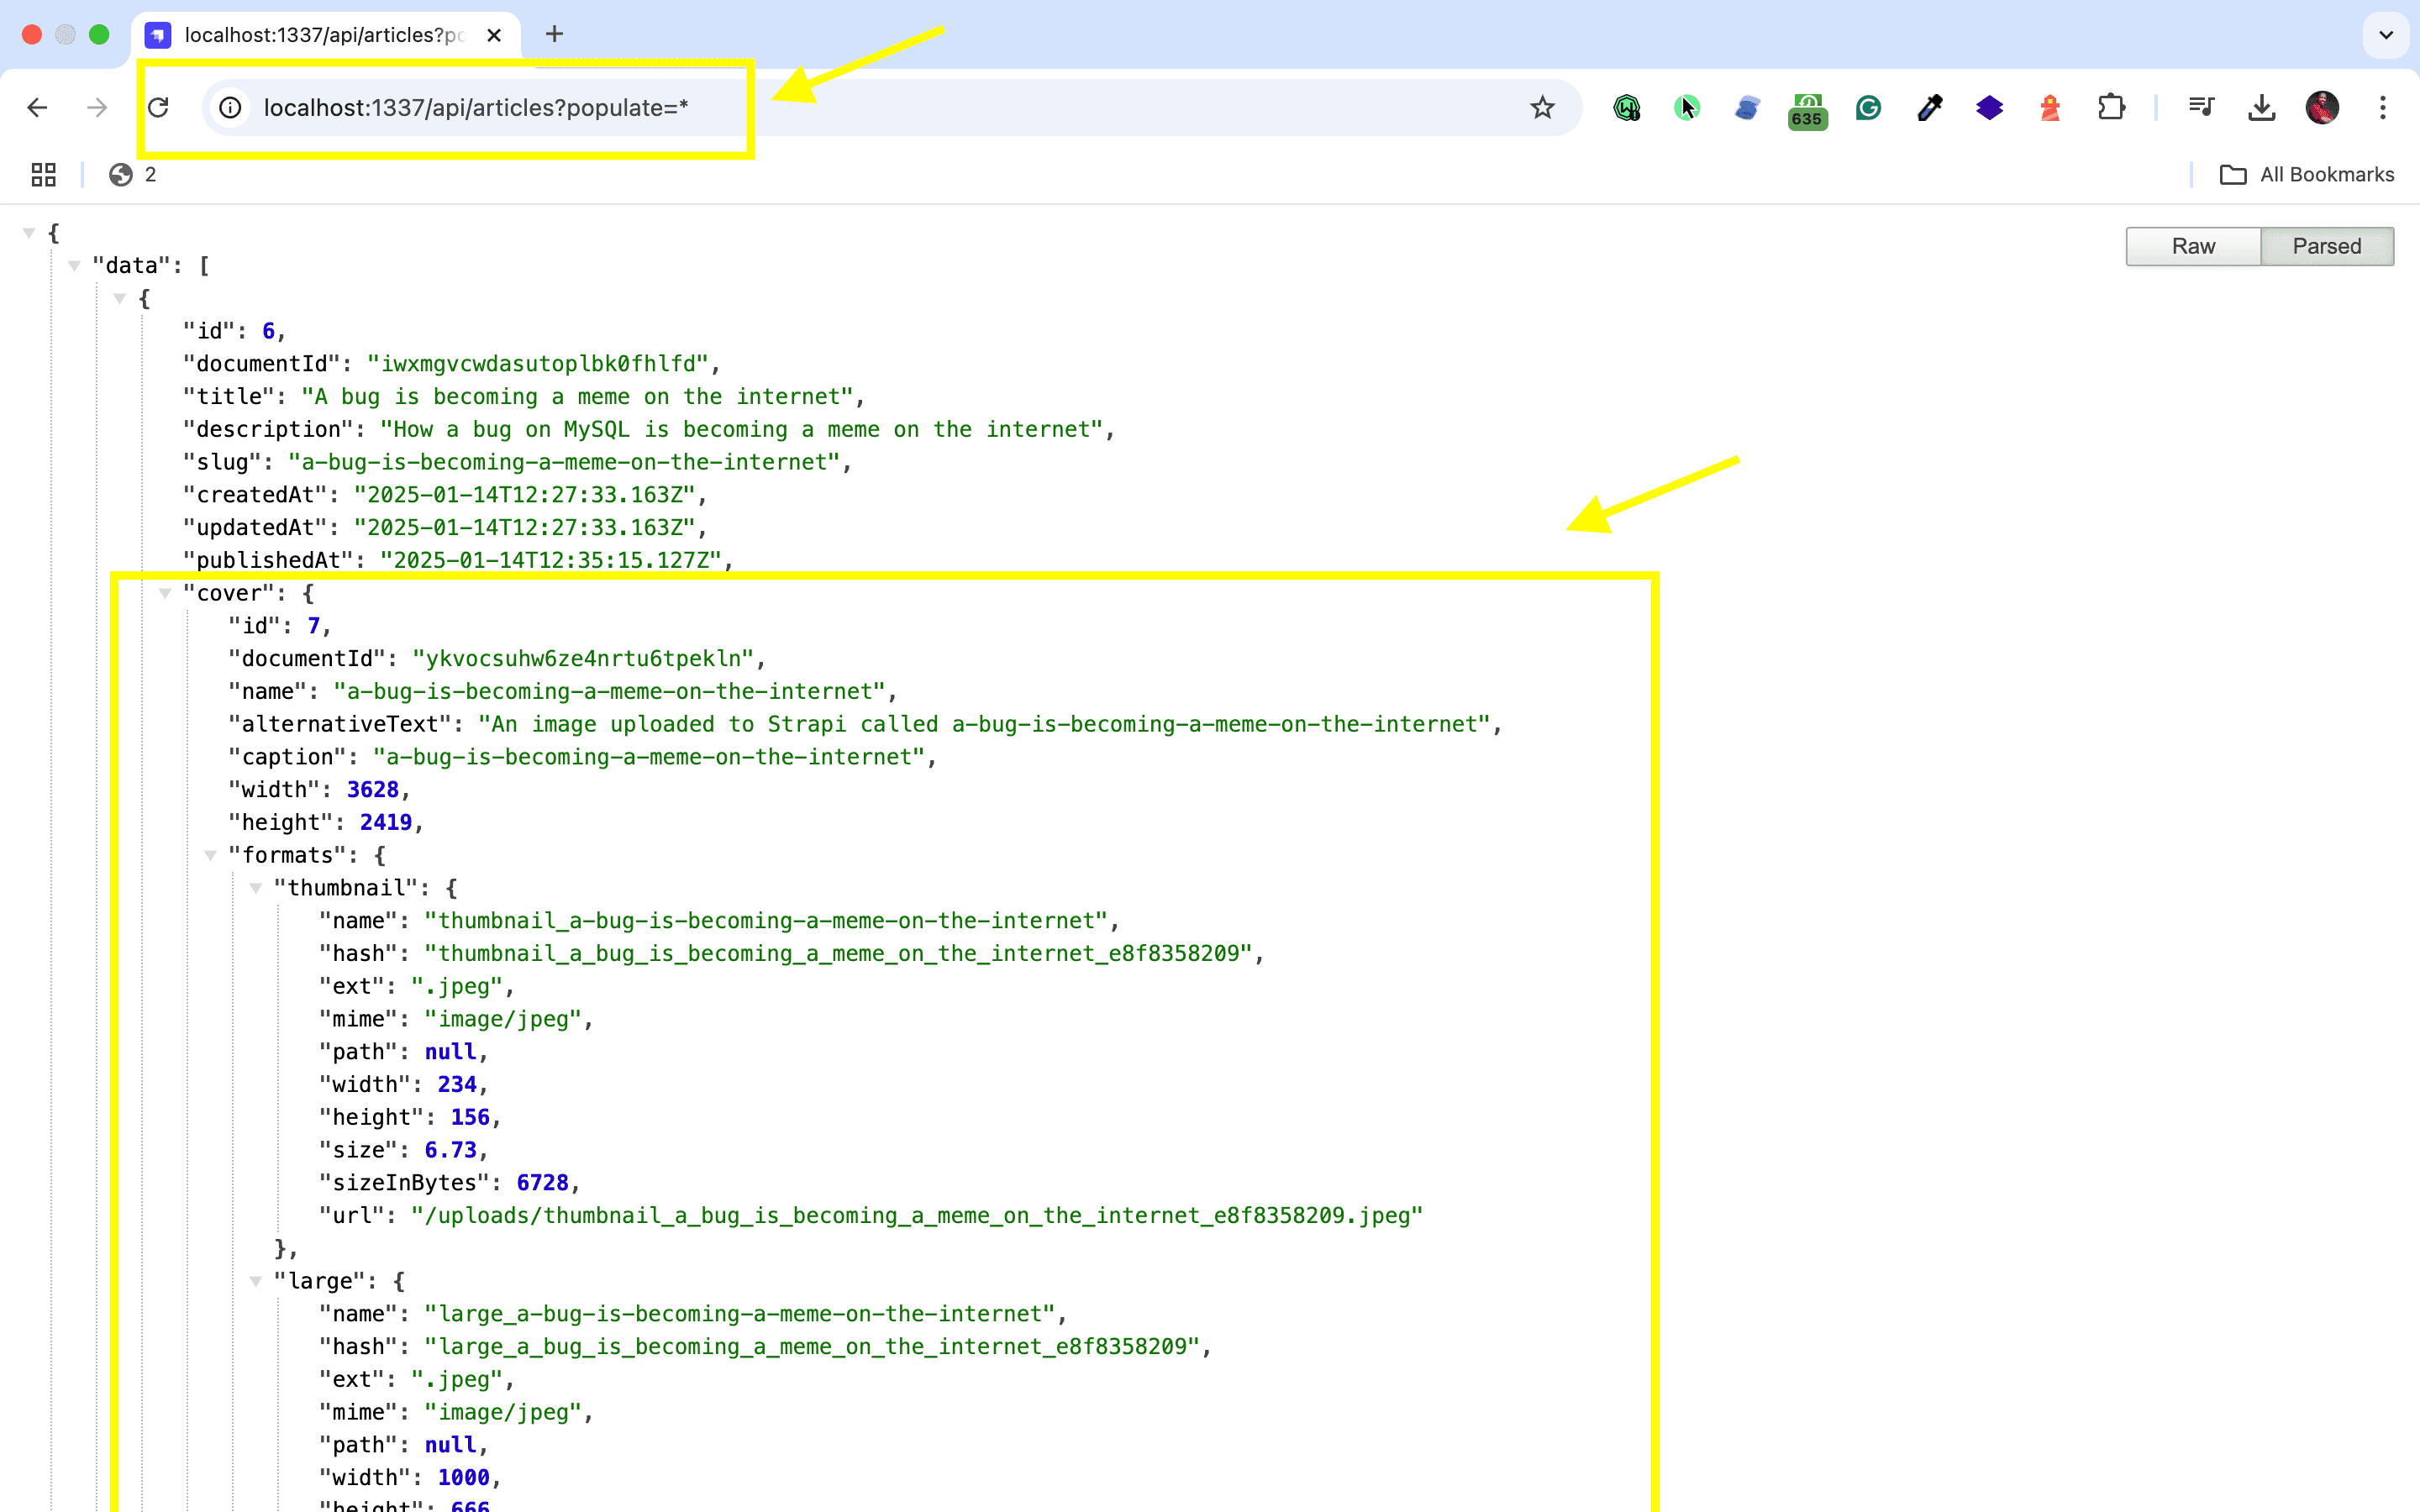
Nice, now that we have our Strapi 5 server setup, we can start to setup our React Native application.
Getting Started With React Native
We will use Expo Dev for this integration. Expo Dev is an open-source development environment provided by Expo that allows developers to build native mobile apps for Android and iOS using JavaScript.
Prerequisites
Consider having the following tools to get started:
- X-Code or Android Studio
- Android Emulator or iOS Emulator
- Optionally, a physical device.
See expo docs for more setup instructions.
Install React Native
Install React Native using any of the package managers below:
- Using
npm:
npx create-expo-app@latest react-native-project --template blank- Using
yarn:
yarn create expo-app- Using
pnpm:
pnpm create expo-app- Using
bun:
bun create expoFor this example, I will be using npm. Feel free to use any package manager of your choice.
Start a Development Server
To start the development server, run the following command:
npx expo startIf successful, this is what you will see in your terminal:
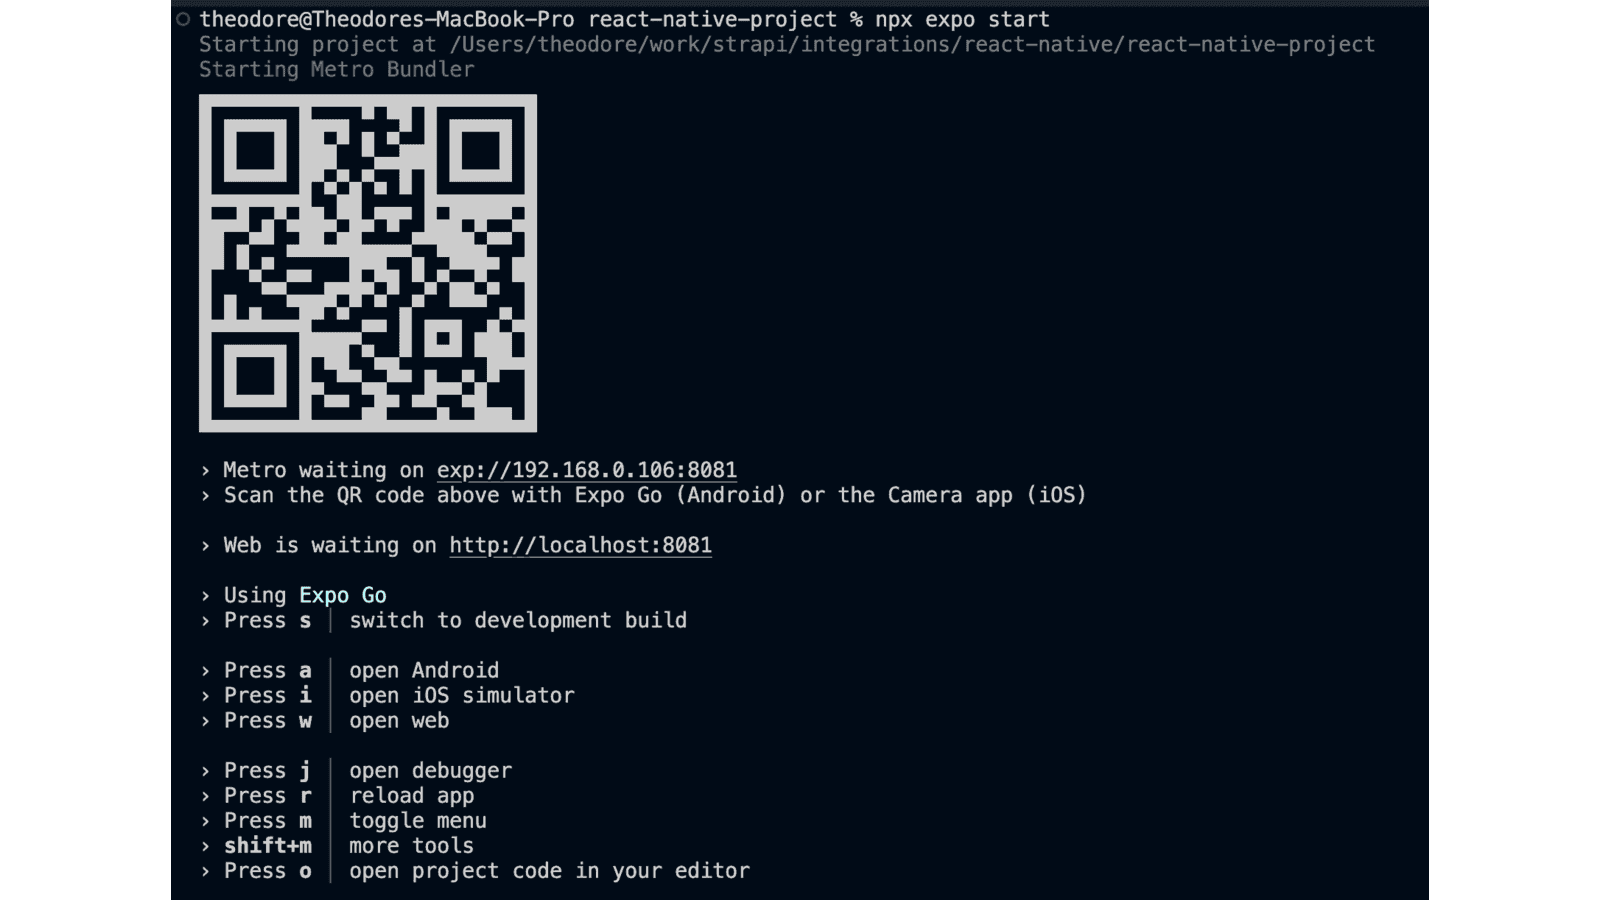
Running Your App on a Device
To test and run your app on a device, you can do it in the following ways:
- Web: Press
win your terminal to open the app on your web browser. - Android Emulator: Press
ain your terminal to start your Android emulator. - iOS Simulator: Type
iin your terminal to start your iOS simulator. - Physical Device: Ensure you have the Expo Go app installed on your physical device.
See more about setting up your environment.
🖐️ NOTE: For this integration, we will make use of the Android emulator and the iOS simulator.
After setting up your environment, here is what your application should look like:
Android Emulator
 Android Emulator
iOS Emulator
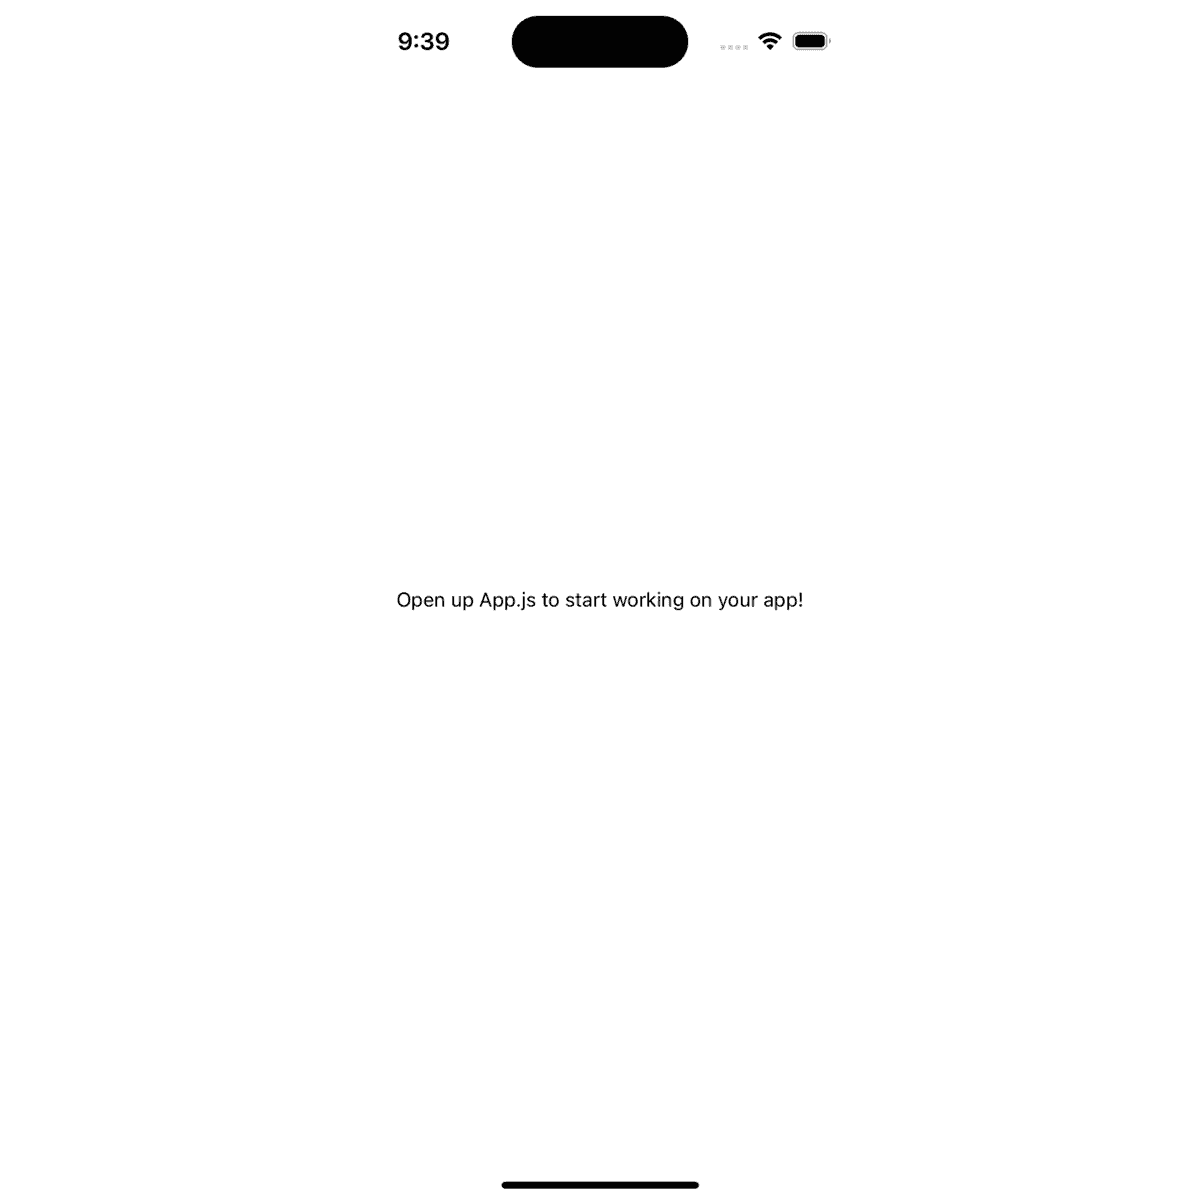 iOS Emulator
Use an HTTP Client For Requests
Many HTTP clients are available, but on this integration page, we'll use Axios and Fetch.
Using Axios
Install Axios by running any of the commands below:
# npm
npm i axios
Or:
# yarn
yarn add axios
Using Fetch
No installation is needed.
Fetch Articles from Strapi Backend
Execute a GET request on the Article collection type in order to fetch all your articles.
Be sure that you activated the find permission for the Article collection type.
🖐️ NOTE: We want to also fetch covers (images) of articles, so we have to use the populate parameter as seen below.
Using Axios
const response = await fetch("http://localhost:1337/api/articles?populate=*");
const data = await response.json();
console.log(data.data);
Using Fetch
const response = await fetch("http://localhost:1337/api/articles?populate=*");
const data = await response.json();
console.log(data.data);
Example Project
We will create an app that fetches articles from a Strapi backend and displays them in a grid layout.
Navigate to your React Native entry file ./App.js and carry out the steps below:
Step 1: Import Required Dependencies
import {
  View,
  Text,
  Image,
  FlatList,
  StyleSheet,
} from "react-native";
import axios from "axios";
import { useEffect, useState } from "react";View,Text,Image,FlatList, andStyleSheetare core React Native components used for structuring the layout, displaying text, images, and styling the app.useEffectanduseStateare React hooks which manages component state and handles side effects respectively.
Step 2: Create Variables
Create a constant variable, STRAPI_URL, that defines the base URL for the Strapi backend and another variable, articles that will hold the list of articles fetched from the Strapi API.
...

// replace with Strapi Production URL
const STRAPI_URL = "http://localhost:1337";

// State to store articles
const [articles, setArticles] = useState([]);

..
Step 3: Create a Function to Fetch Articles
Create a function fetchArticles to fetch articles from the Strapi backend and fetch articles once the component is mounted.
...

// fetch articles from Strapi
const fetchArticles = async () => {
  try {
    // Fetch articles along with their covers
    const response = await axios.get(`${STRAPI_URL}/api/articles?populate=*`);
    setArticles(response.data.data);
  } catch (error) {
    console.error("Error fetching articles:", error);
  }
};

// Fetch articles on component mount
useEffect(() => {
  fetchArticles();
}, []);

...
Step 4: Create a Function to Format Published Dates of Articles
Create a formatDate function formats the publishedAt date of each article into a human-readable string (e.g., 01/14/2025). It should use the toLocaleDateStringmethod with options to display the year, month, and day in anMM/DD/YYYY` format.
...

// Format date
const formatDate = (date) => {
  const options = { year: "numeric", month: "2-digit", day: "2-digit" };
  return new Date(date).toLocaleDateString("en-US", options);
};

...
Step 5: Render Articles
Render individual articles as cards with an image, title, and formatted publication date using the formatDate utility function.
...

export default function App() {
  ...

  // Render article card
  const renderArticle = ({ item }) => (
    <View style={styles.card}>
      <Image
        source={{ uri: `${STRAPI_URL}${item.cover.url}` }}
        style={styles.image}
      />
      <Text style={styles.title}>{item.title}</Text>
      <Text style={styles.published}>
        Published: {formatDate(item.publishedAt)}
      </Text>
    </View>
  );

  return (
    <View style={styles.container}>
      <Text style={styles.heading}>React Native and Strapi Integration</Text>
      <FlatList
        title="Articles"
        data={articles}
        keyExtractor={(item) => item.id.toString()}
        renderItem={renderArticle}
        numColumns={2}
        contentContainerStyle={styles.container}
      />
    </View>
  );
}
In the code above, we render a list of articles fetched from Strapi, displayed as cards in a two-column grid using FlatList. Each card includes an image, title, and formatted publication date styled using the styles object. The renderArticle function defines how each article card is displayed.
Complete Code
// Path: ./App.js

export default function App() {
  // replace with Strapi Production URL
  const STRAPI_URL = "http://localhost:1337";

  // State to store articles
  const [articles, setArticles] = useState([]);

  // fetch articles from Strapi
  const fetchArticles = async () => {
    try {
      // Fetch articles along with their covers
      const response = await axios.get(`${STRAPI_URL}/api/articles?populate=*`);
      setArticles(response.data.data);
    } catch (error) {
      console.error("Error fetching articles:", error);
    }
  };

  // Format date
  const formatDate = (date) => {
    const options = { year: "numeric", month: "2-digit", day: "2-digit" };
    return new Date(date).toLocaleDateString("en-US", options);
  };

  // Render article card
  const renderArticle = ({ item }) => (
    <View style={styles.card}>
      <Image
        source={{ uri: `${STRAPI_URL}${item.cover.url}` }}
        style={styles.image}
      />
      <Text style={styles.title}>{item.title}</Text>
      <Text style={styles.published}>
        Published: {formatDate(item.publishedAt)}
      </Text>
    </View>
  );

  // Fetch articles on component mount
  useEffect(() => {
    fetchArticles();
  }, []);

  return (
    <View style={styles.container}>
      <Text style={styles.heading}>React Native and Strapi Integration</Text>
      <FlatList
        title="Articles"
        data={articles}
        keyExtractor={(item) => item.id.toString()}
        renderItem={renderArticle}
        numColumns={2}
        contentContainerStyle={styles.container}
      />
    </View>
  );
}
Here is a break-down of the code above:
- The
fetchArticlesfunction retrieves data from the Strapi API, including article covers, titles, and publication dates, and stores them in the articles state using useState. - The
renderArticlefunction renders individual articles as cards with an image, title, and formatted publication date using theformatDateutility function. - The
useEffecthook runsfetchArticleson component mount to ensure data is loaded when the app starts. - The
FlatListdisplays the articles in two columns, with the app styled using a custom StyleSheet for a clean, responsive layout. - This
StyleSheetdefines the layout and styling for your app. Thecontainerensures the main screen has proper padding and fills the space, whilecardstyles each item with a rounded, shadowed design. Theimage,title, andpublishedhandle the card's content, ensuring images are proportional, titles are bold, and dates are subtle. Theheadingstyles the main title to be bold, centered, and spaced from the top.
Here is how our app should look:

Awesome, great job!
Having Problems?
If you are unable to run your app on your device, here are a few solutions:
- For Android Simulator, change the
STRAPI_URLtohttp://10.0.2.2:1337. - For devices, make sure you are on the same Wi-Fi network.
See this Expo page for more information.
Github Project Repo
You can find the complete code for this project in this Github repo.
Video Resources
Get practical by building real-worlds application using the video resources below:
- React Native Project | Build Full Stack React Native App with Expo, & Strapi | AI Recipe Generator
- Build Your Own MASTERCLASS clone in React Native
Strapi Open Office Hours
If you have any questions about Strapi 5 or just would like to stop by and say hi, you can join us at Strapi's Discord Open Office Hours Monday through Friday at 12:30 pm - 1:30 pm CST: Strapi Discord Open Office Hours
For more details about the integration above, visit the following documentation: