Slate
Learn how to integrate Slate with Strapi

Why Use Slate
Integrating Slate with Strapi creates a powerful content management solution that combines the rich text editing capabilities of Slate with the flexibility of Strapi. Just as combining Solid.js and Strapi enhances application development, merging these two technologies allows you to build a seamless and efficient content editing experience tailored to your specific needs.
Using Slate, a highly customizable framework for building rich text editors in JavaScript, alongside Strapi, an open-source headless CMS, allows developers to create intuitive and robust applications. Developers can also explore using Strapi with Gatsby to build fast and modern websites. This integration not only enhances the user experience but also provides a strong backend infrastructure for managing and storing content. For more info, visit Slate's official documentation.
Why Use Strapi?
Strapi is the leading open-source headless CMS offering features, like customizable APIs, role-based permissions, multilingual support, etc. It simplifies content management and integrates effortlessly with modern frontend frameworks.
Explore the Strapi documentation for more details.
Strapi 5 Highlights
The out-of-the-box Strapi features allow you to get up and running in no time:
- Single types: Create one-off pages that have a unique content structure.
- Draft and Publish: Reduce the risk of publishing errors and streamline collaboration.
- 100% TypeScript Support: Enjoy type safety & easy maintainability
- Customizable API: With Strapi, you can just hop in your code editor and edit the code to fit your API to your needs.
- Integrations: Strapi supports integrations with Cloudinary, SendGrid, Algolia, and others.
- Editor interface: The editor allows you to pull in dynamic blocks of content.
- Authentication: Secure and authorize access to your API with JWT or providers.
- RBAC: Help maximize operational efficiency, reduce dev team support work, and safeguard against unauthorized access or configuration modifications.
- i18n: Manage content in multiple languages. Easily query the different locales through the API.
- Plugins: Customize and extend Strapi using plugins.
Learn more about Strapi 5 feature.
Setup Strapi 5 Headless CMS
We are going to start by setting up our Strapi 5 project with the following command:
🖐️ Note: make sure that you have created a new directory for your project.
You can find the full documentation for Strapi 5 here.
Install Strapi
npx create-strapi-app@latest serverYou will be asked to choose if you would like to use Strapi Cloud we will choose to skip for now.
 Strapi   v5.6.0 🚀 Let's create your new project

To deploy your project, create a new project on the Strapi Cloud dashboard.

? Please log in or sign up.
  Login/Sign up
❯ Skip
After that, you will be asked how you would like to set up your project. We will choose the following options:
? Do you want to use the default database (sqlite) ? Yes
? Start with an example structure & data? Yes <-- make sure you say yes
? Start with Typescript? Yes
? Install dependencies with npm? Yes
? Initialize a git repository? Yes
Once everything is set up and all the dependencies are installed, you can start your Strapi server with the following command:
cd server
npm run develop
You will be greeted with the Admin Create Account screen.
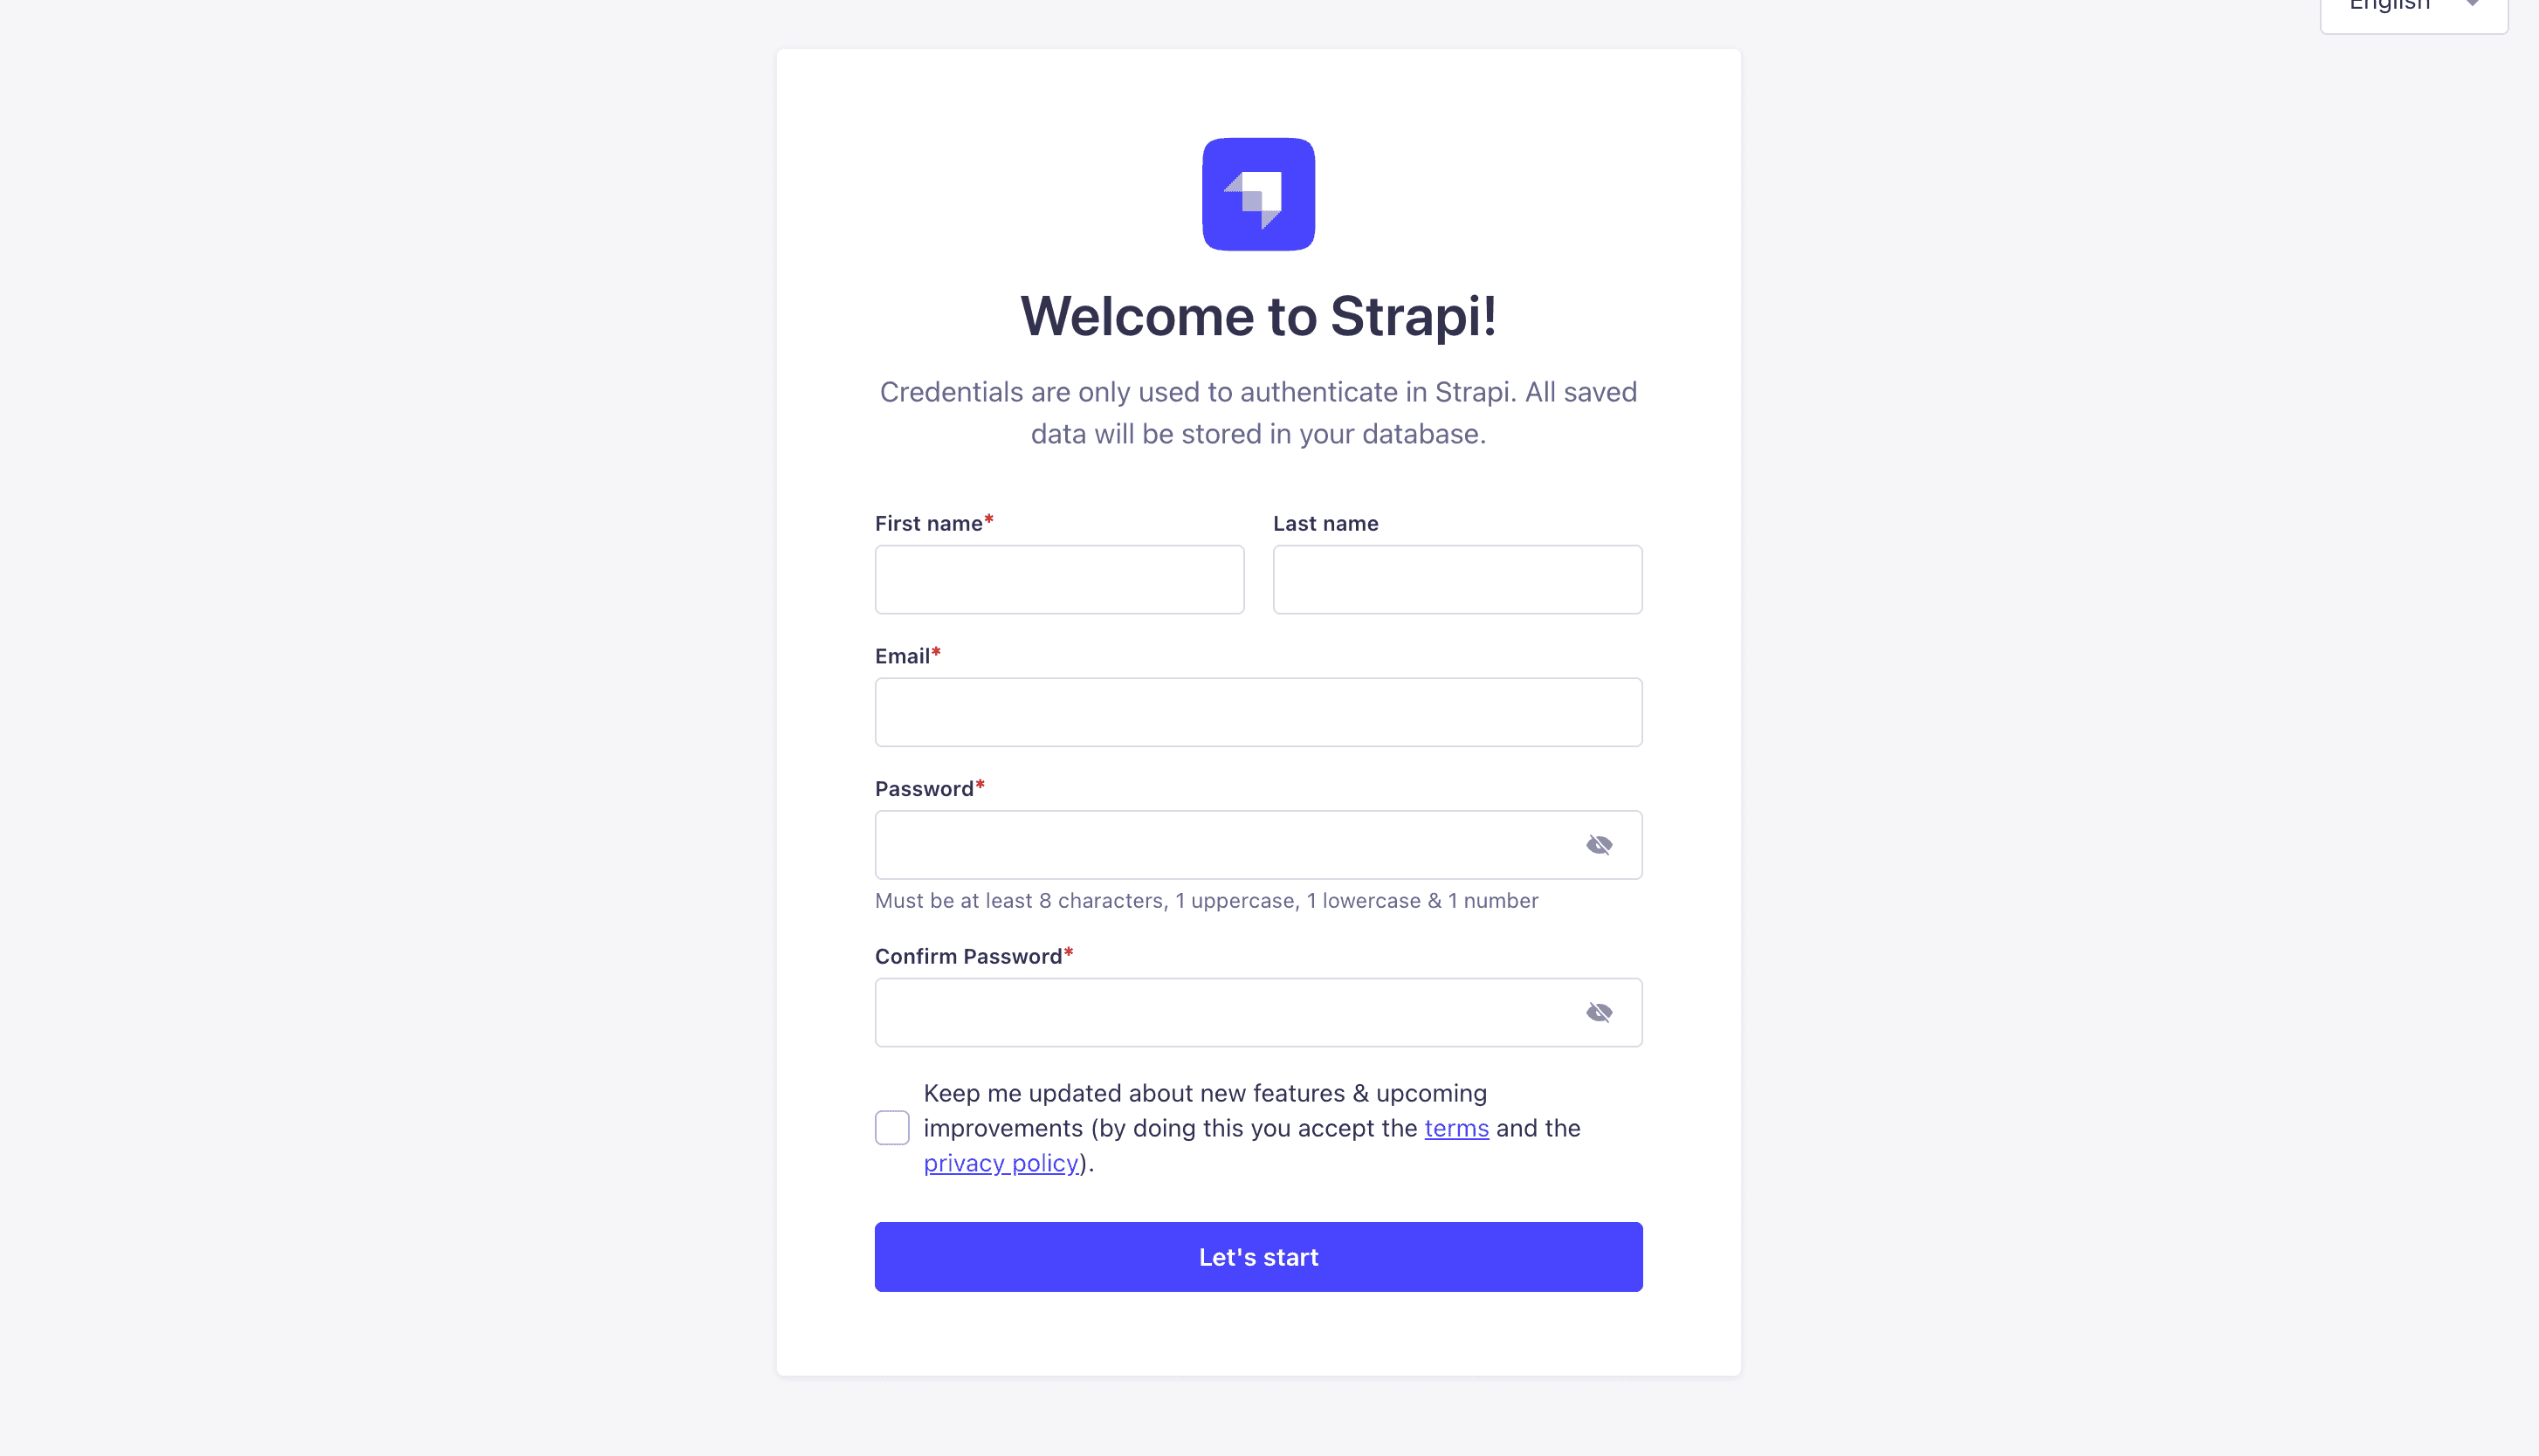
Go ahead and create your first Strapi user. All of this is local so you can use whatever you want.
Once you have created your user, you will be redirected to the Strapi Dashboard screen.
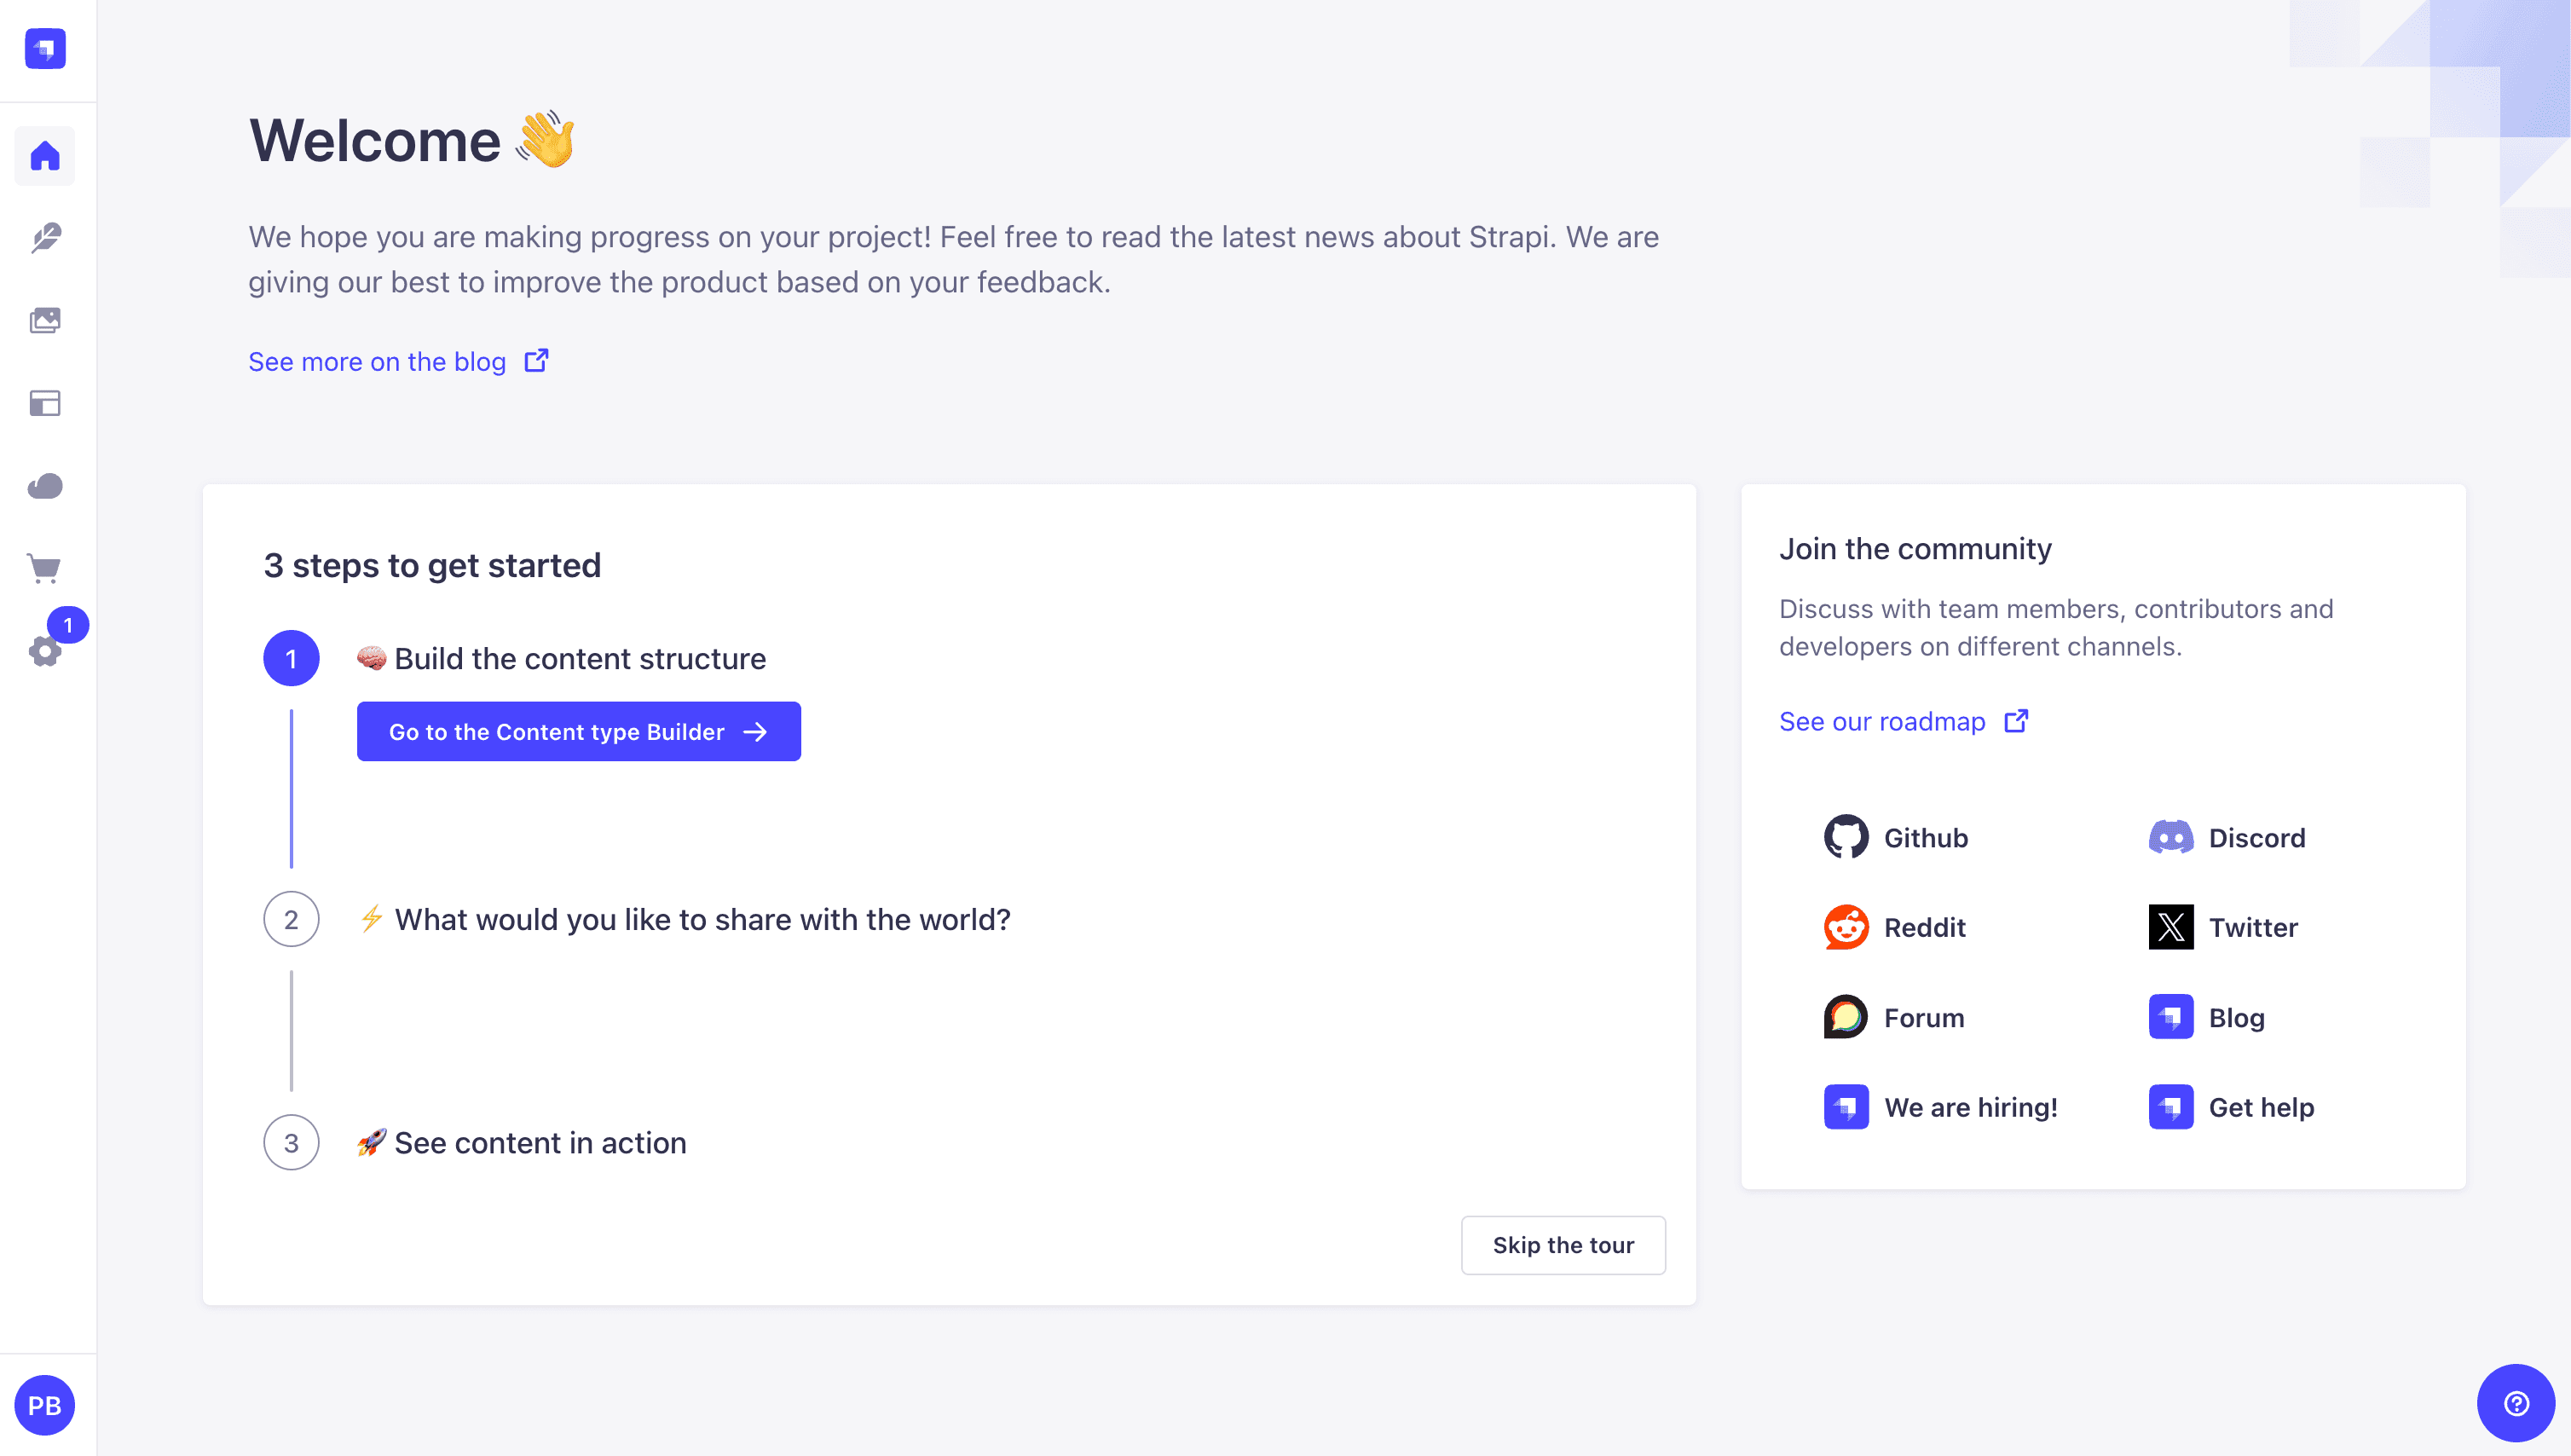
Publish Article Entries
Since we created our app with the example data, you should be able to navigate to your Article collection and see the data that was created for us.
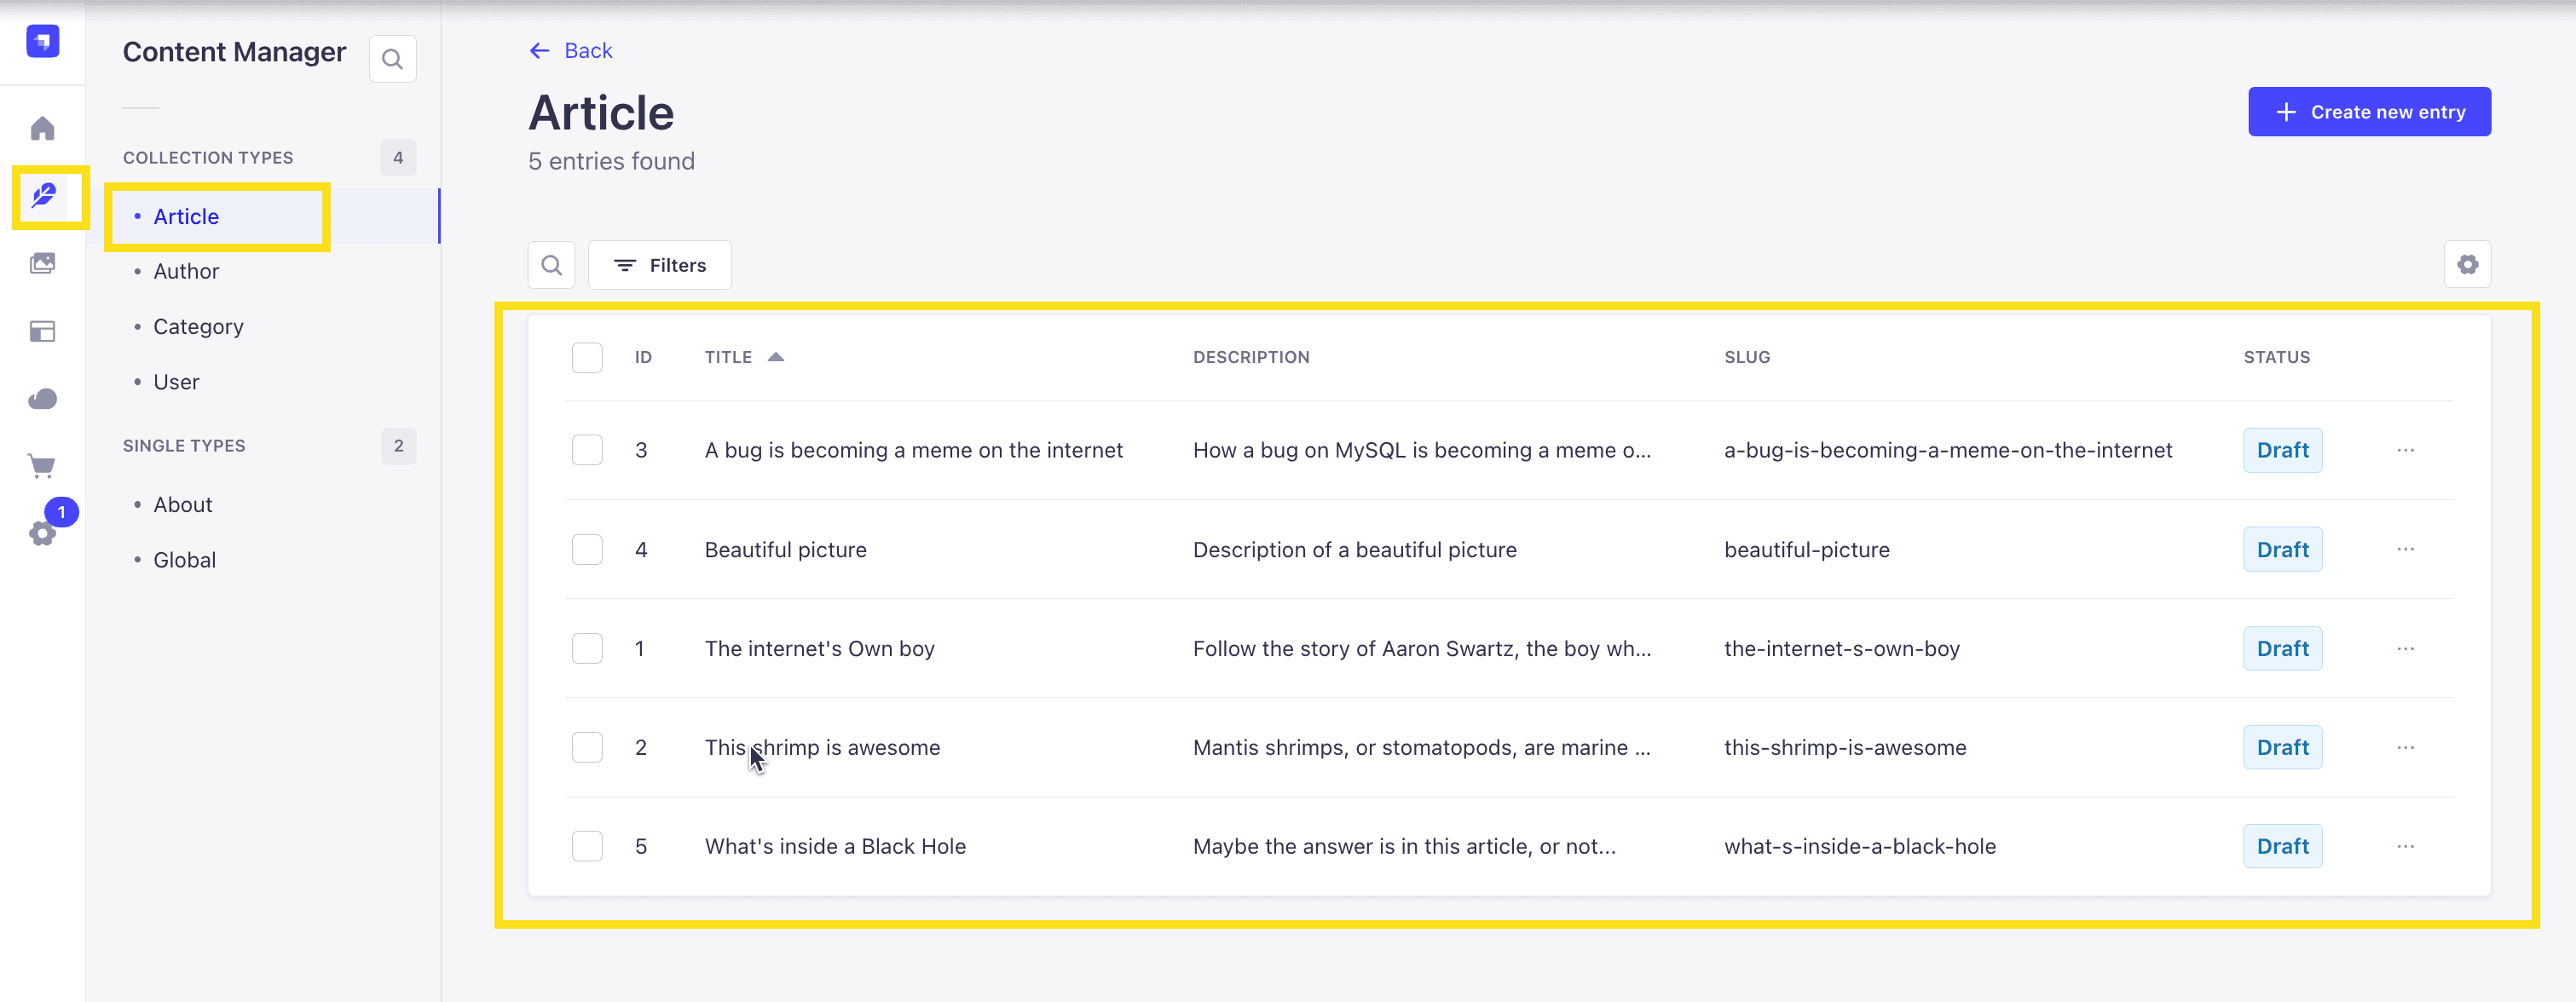
Now, let's make sure that all of the data is published. If not, you can select all items via the checkbox and then click the Publish button.
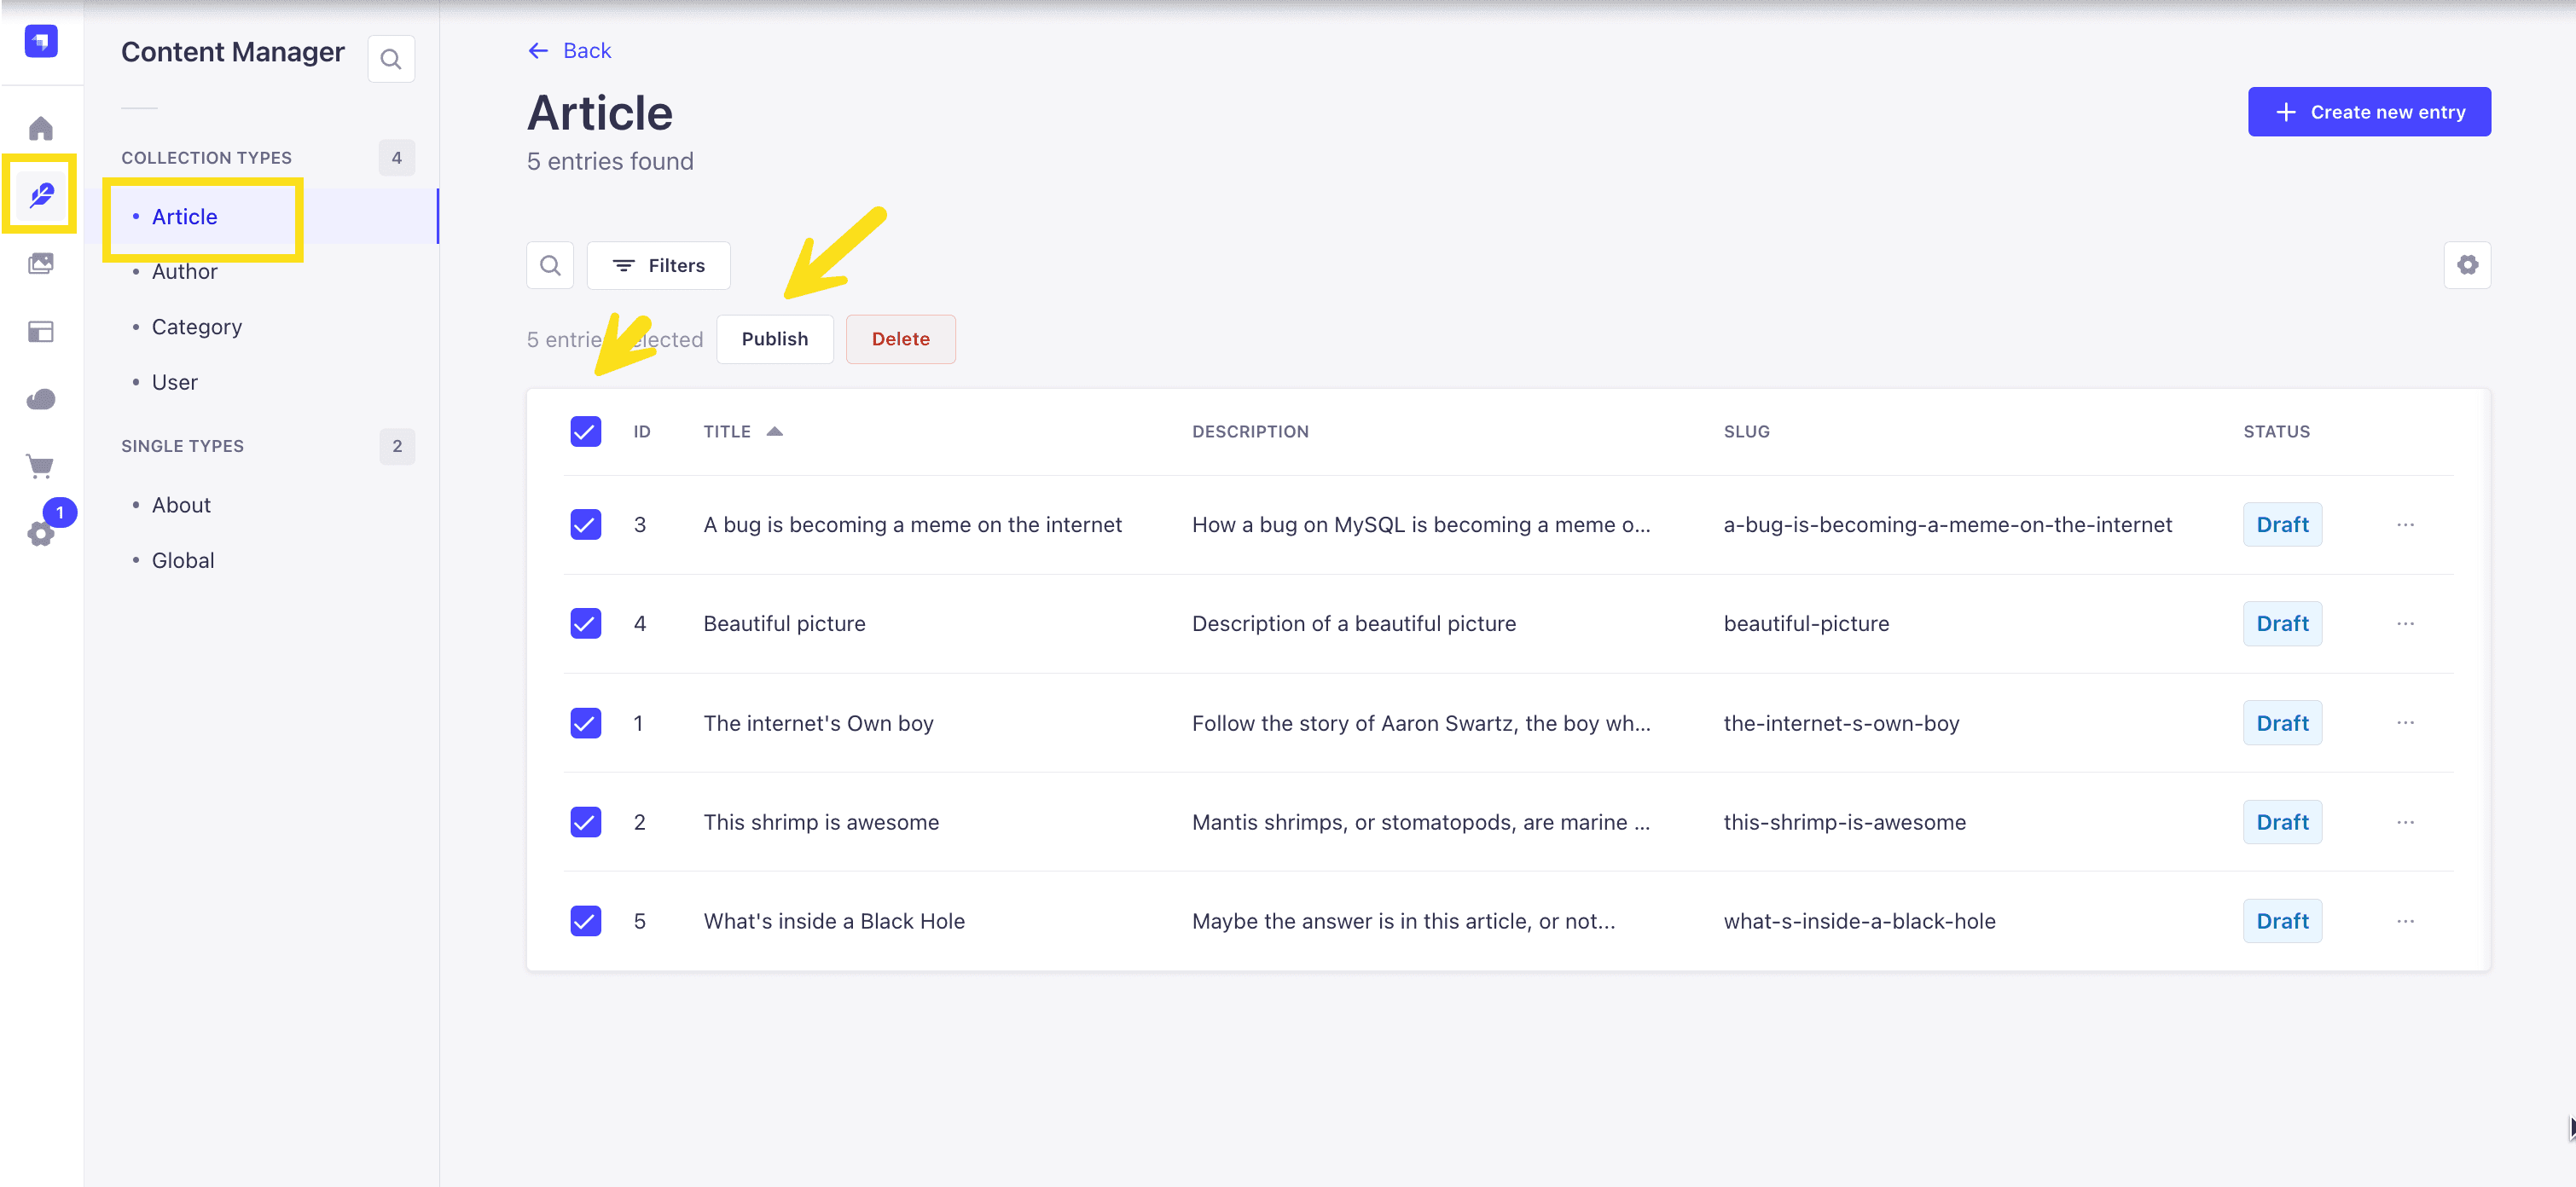
Enable API Access
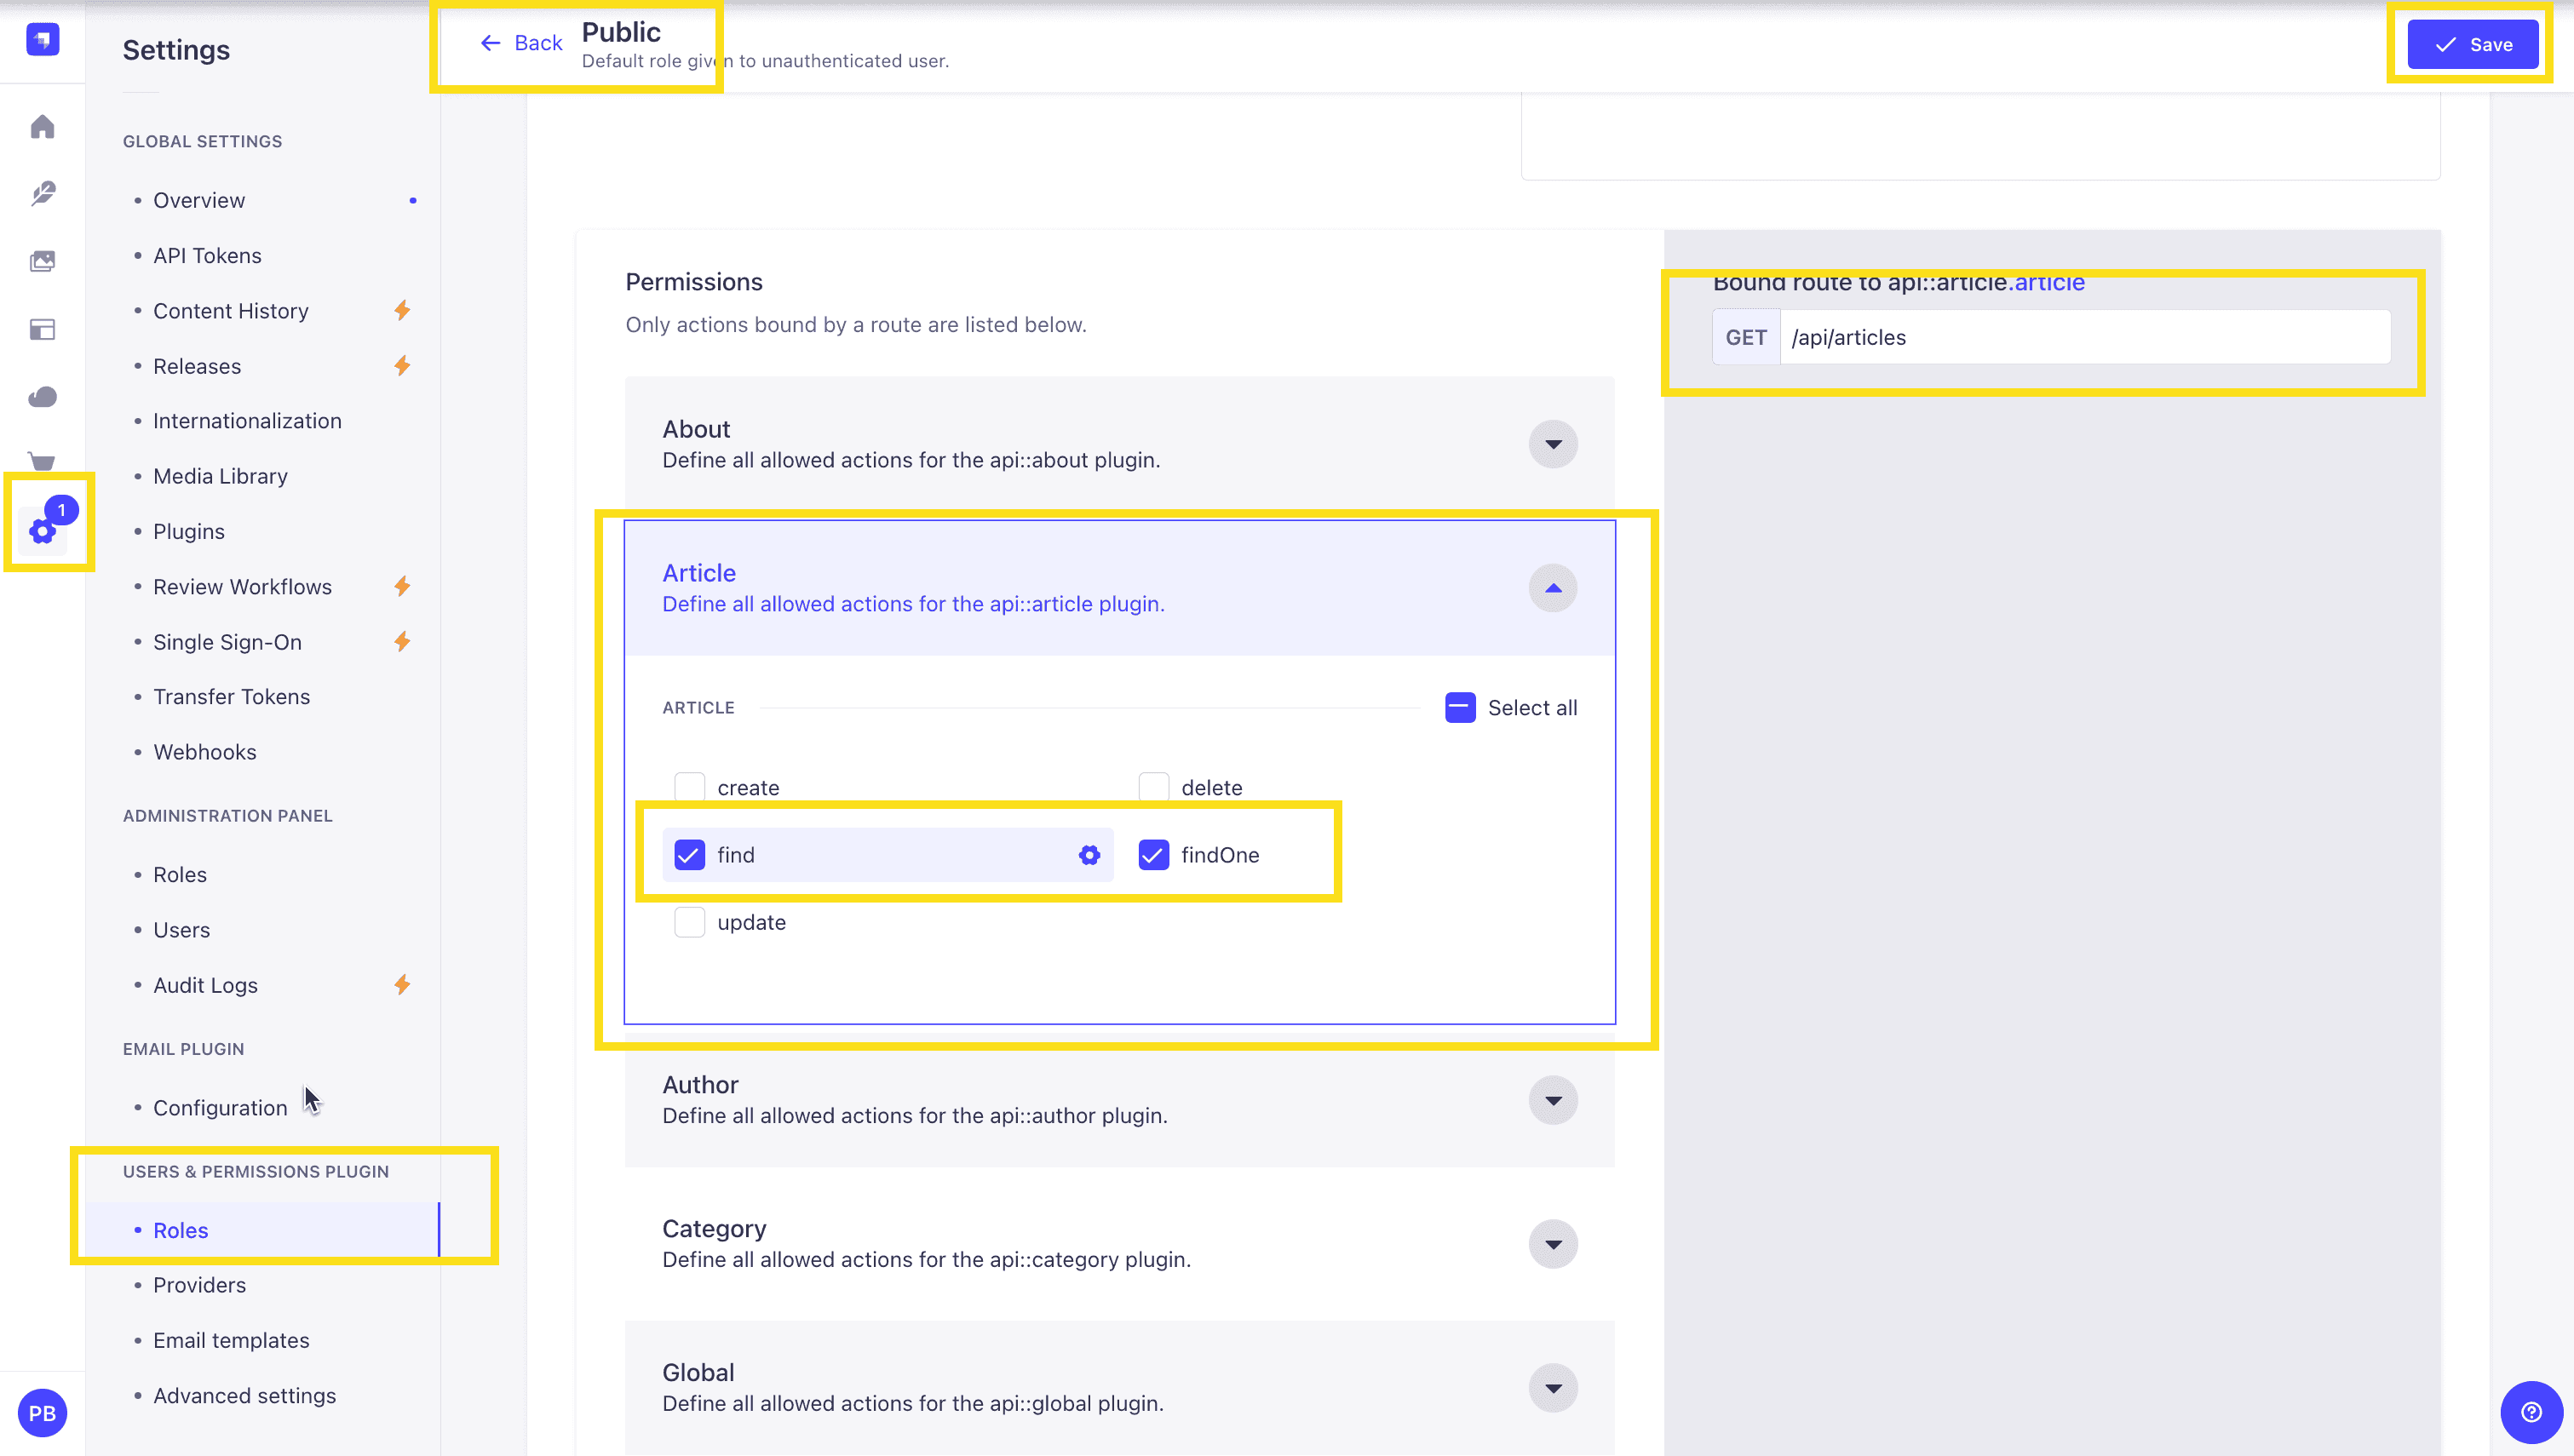
Once all your articles are published, we will expose our Strapi API for the Articles Collection. This can be done in Settings -> Users & Permissions plugin -> Roles -> Public -> Article.
You should have find and findOne selected. If not, go ahead and select them.
Test API
Now, if we make a GET request to http://localhost:1337/api/articles, we should see the following data for our articles.
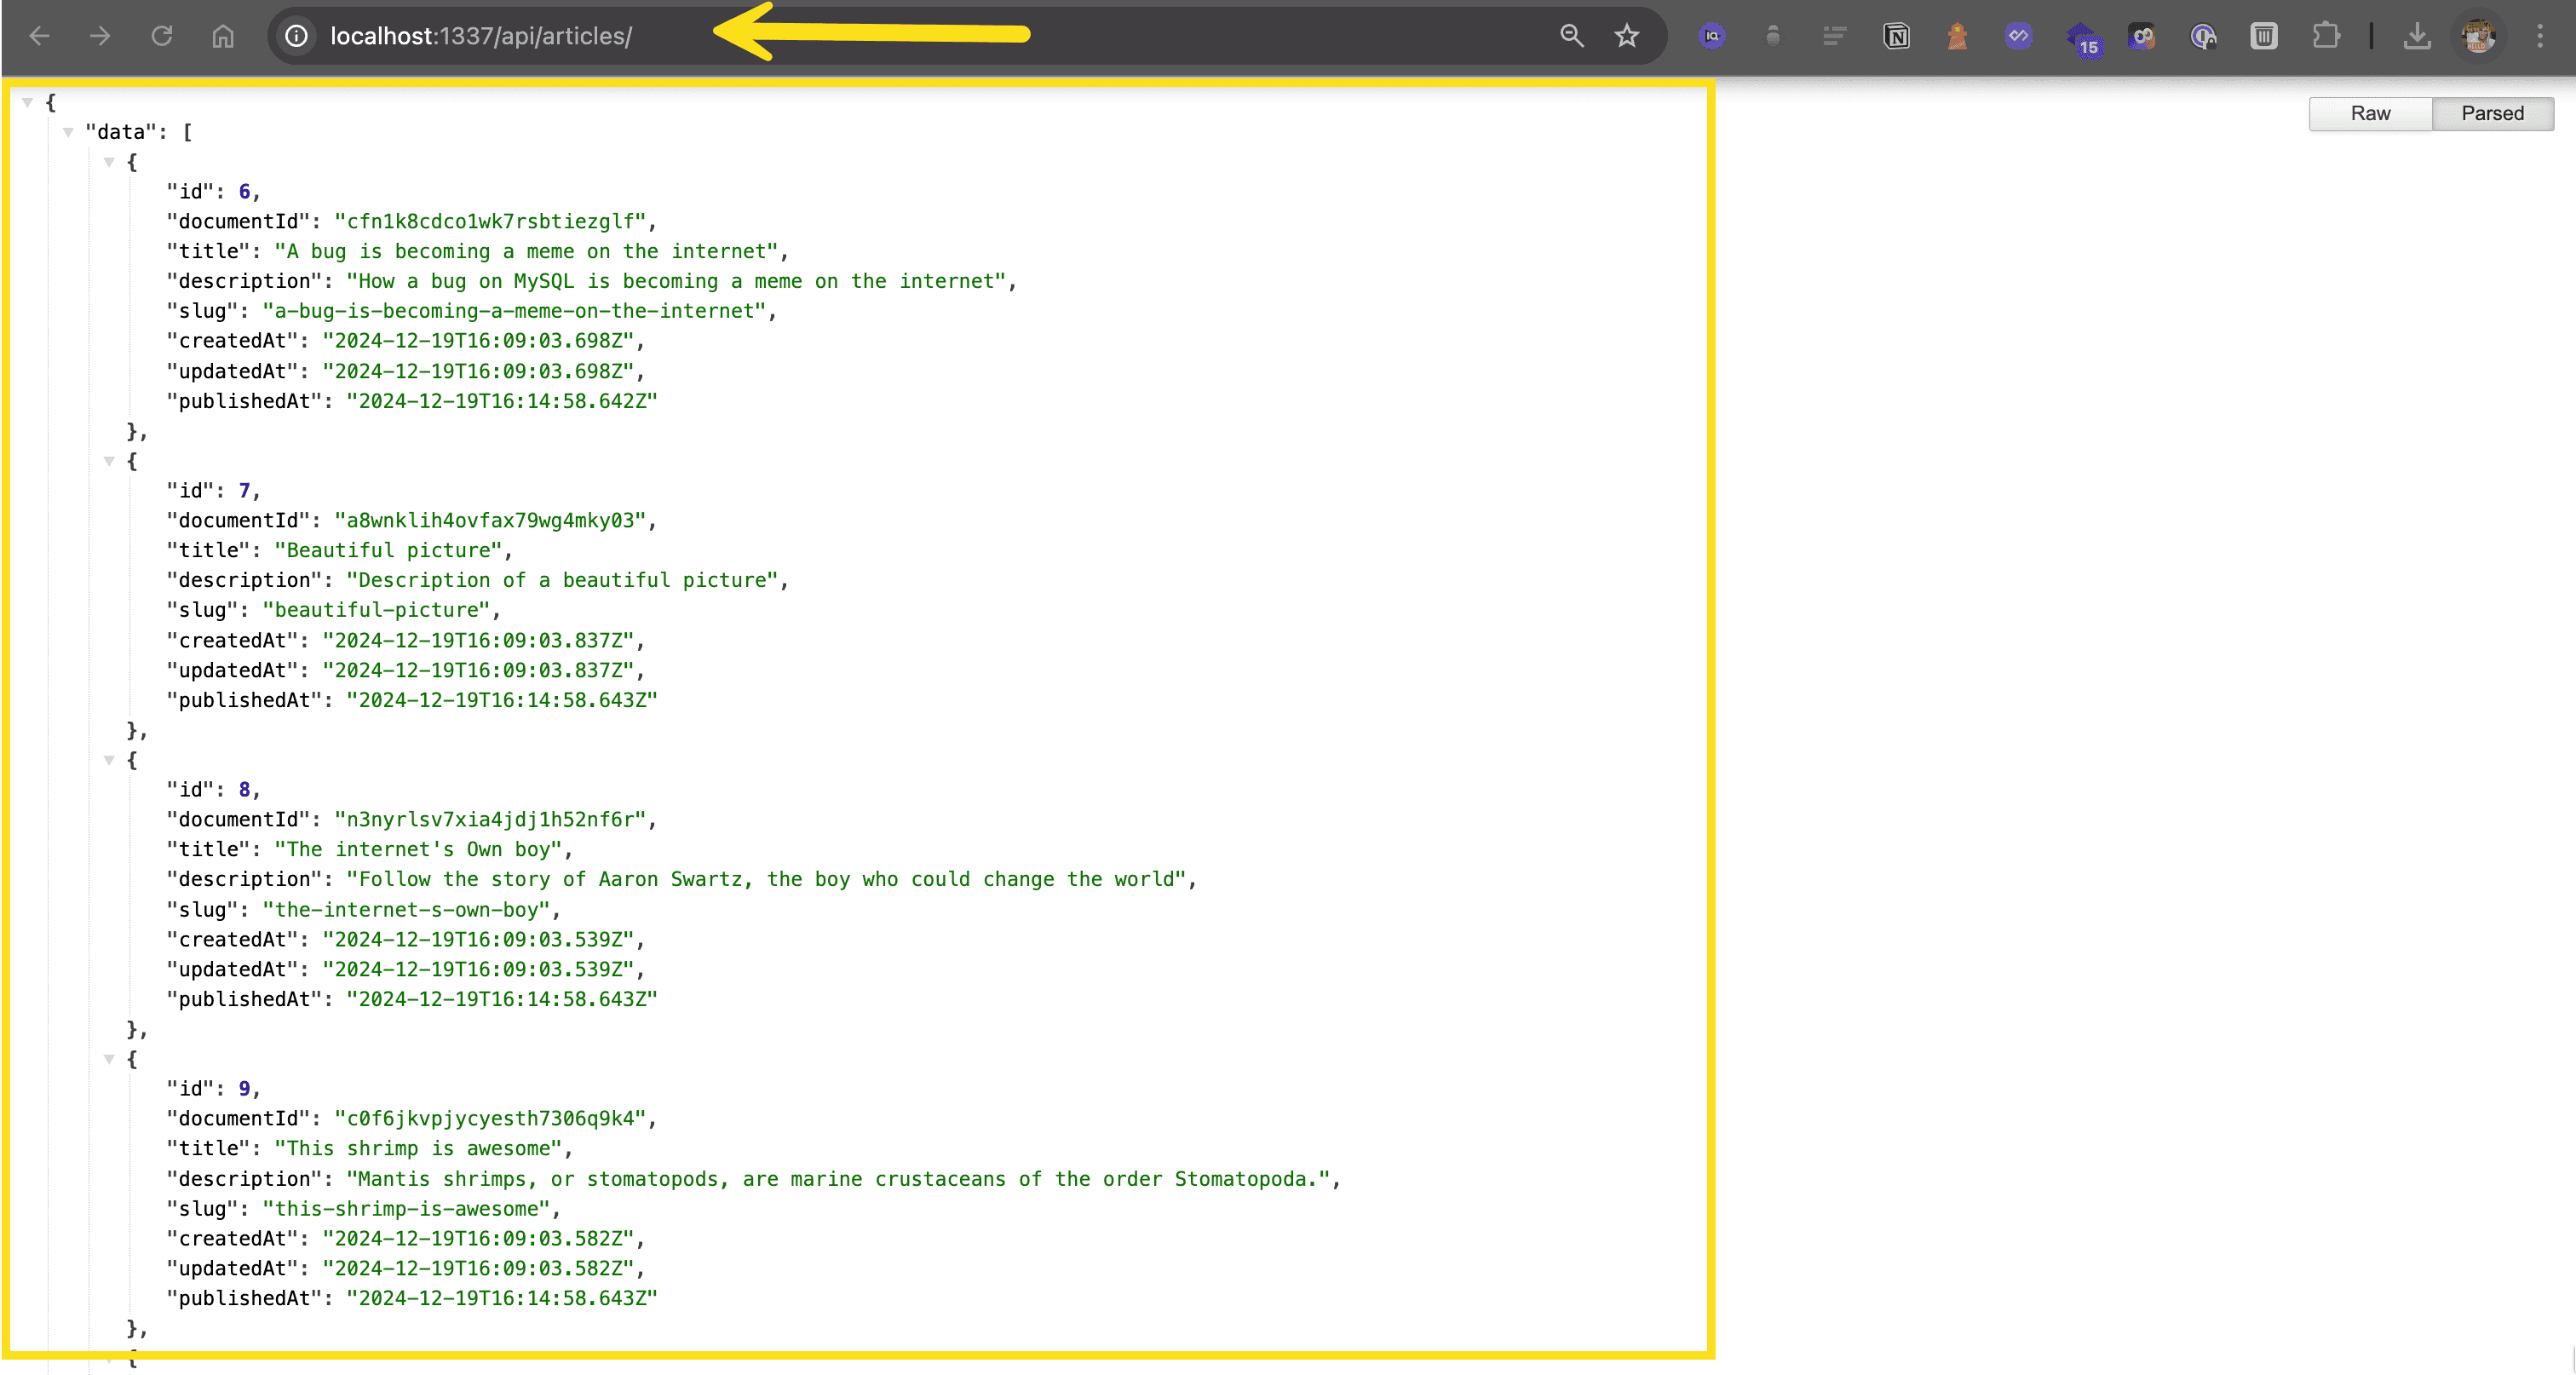
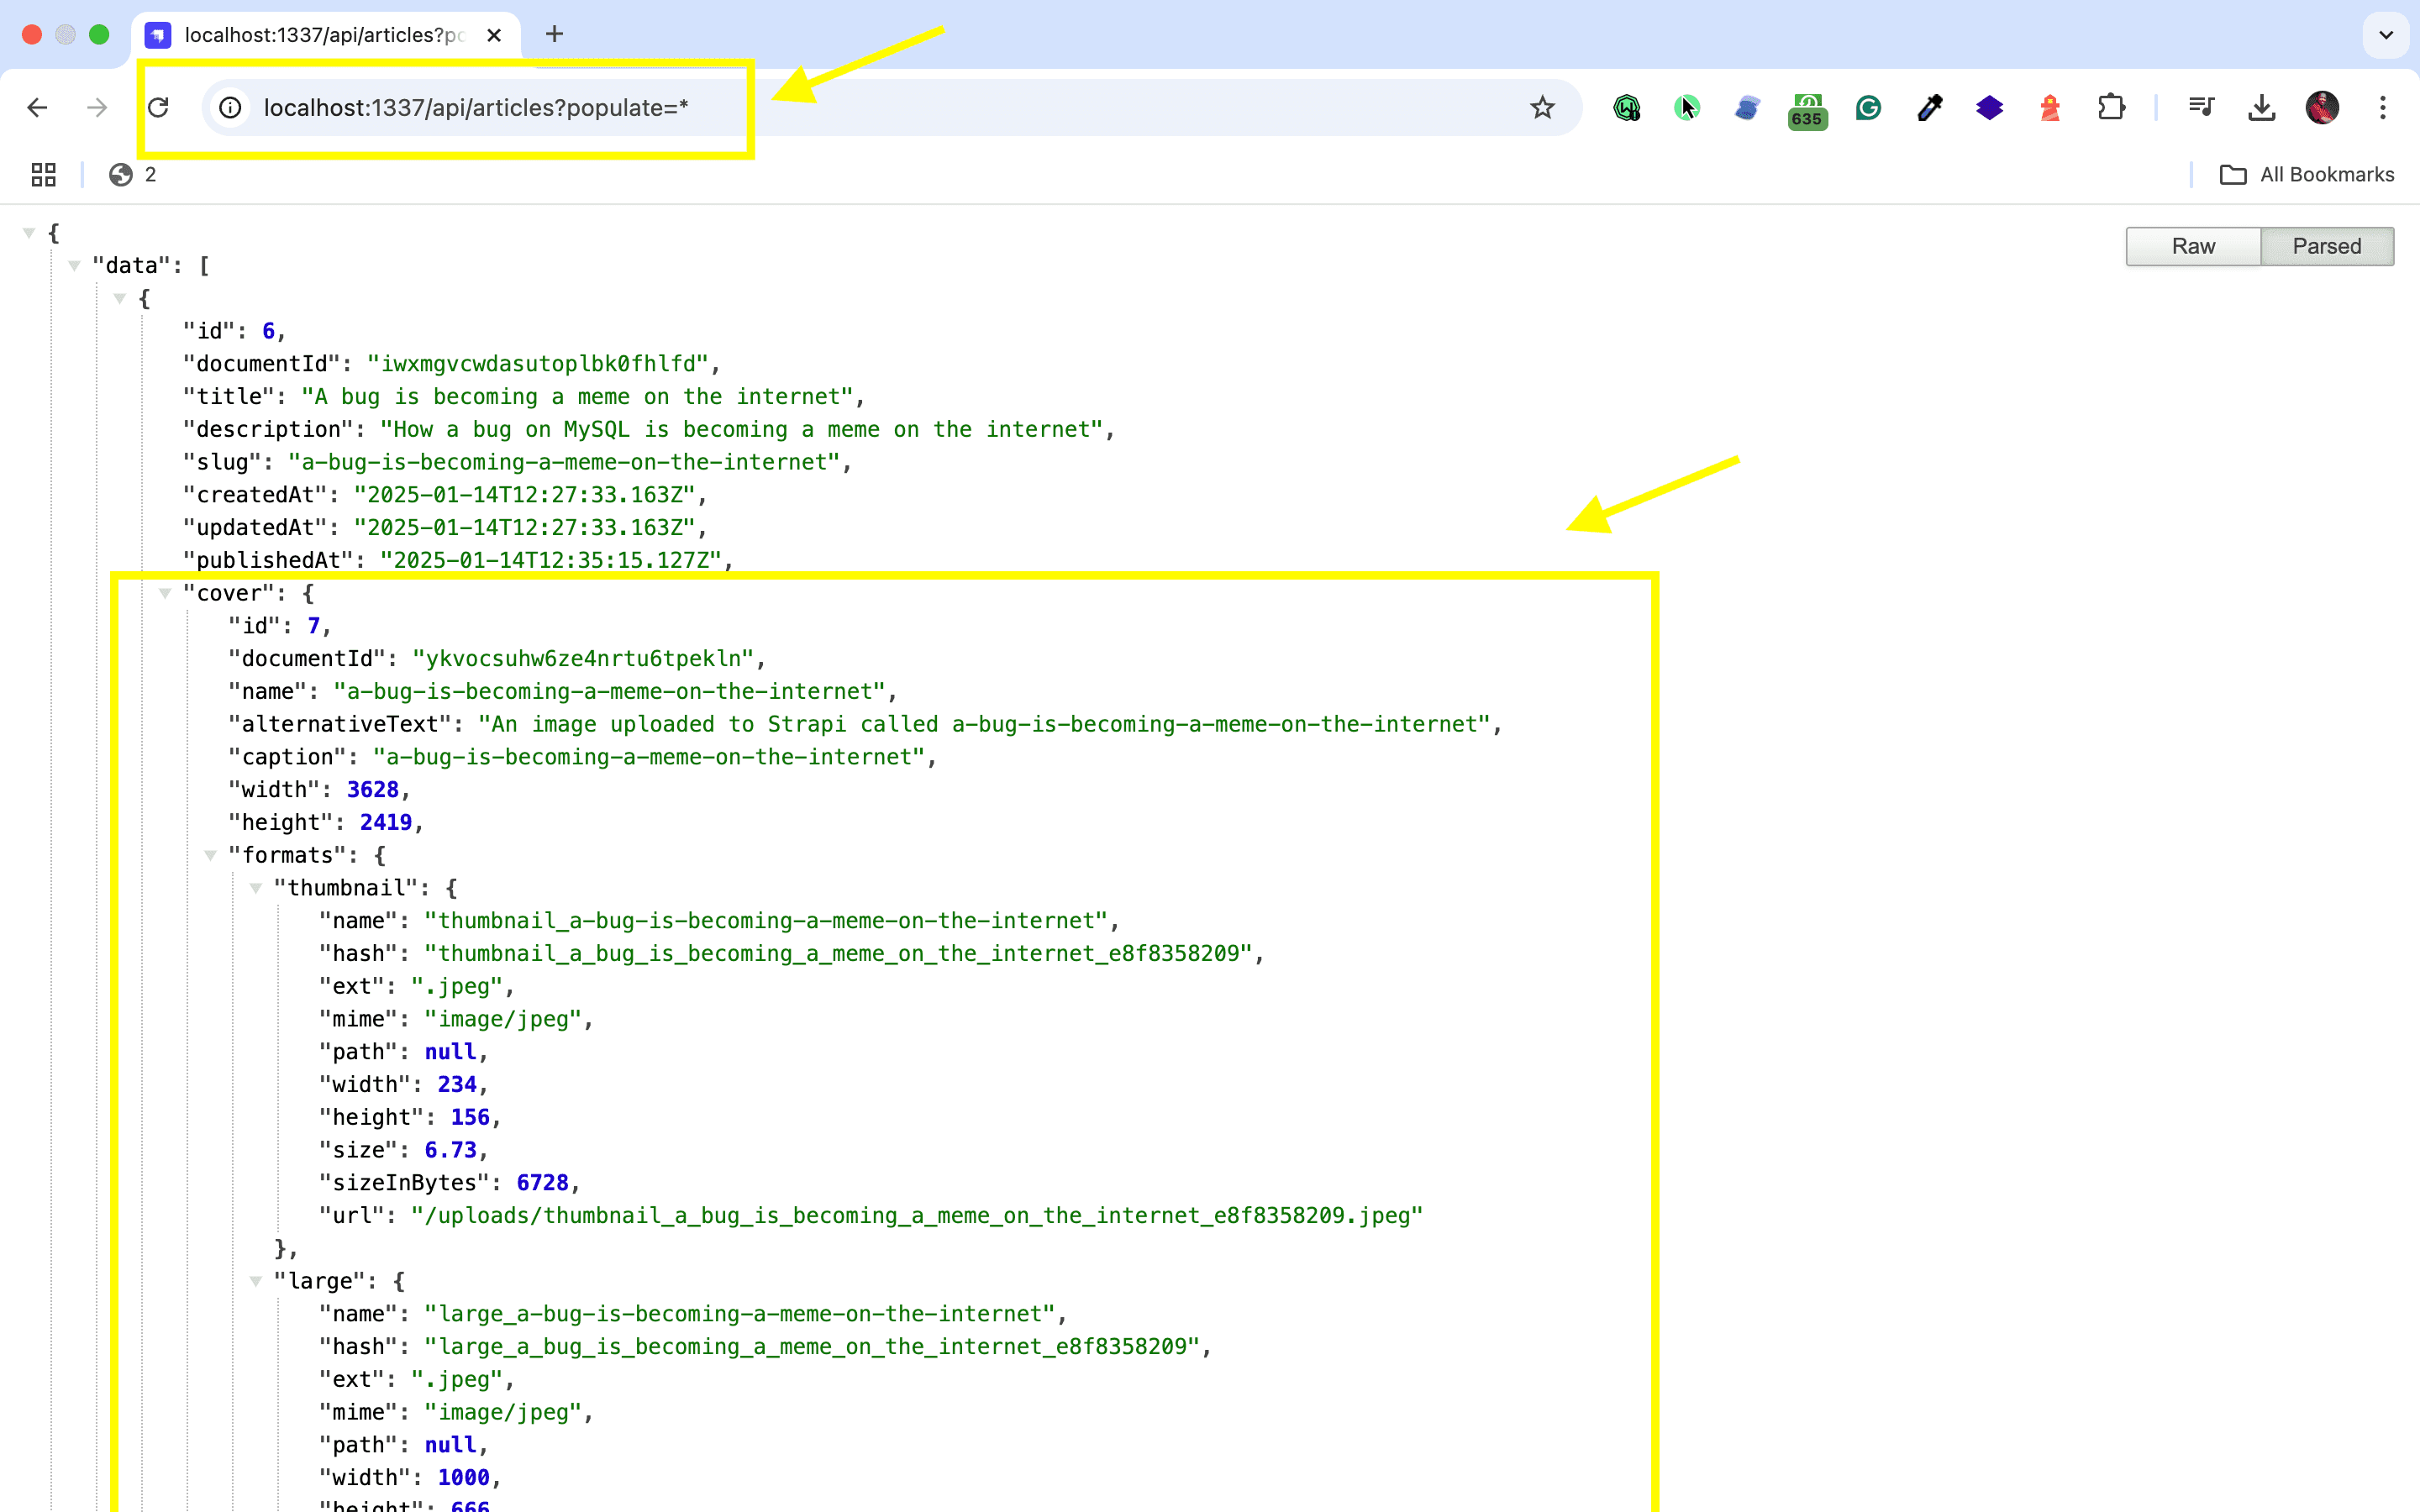
🖐️ Note: The article covers (images) are not returned. This is because the REST API by default does not populate any relations, media fields, components, or dynamic zones.. Learn more about REST API: Population & Field Selection.
So, let's get the article covers by using the populate=* parameter: http://localhost:1337/api/articles?populate=*
Getting Started with Slate
Combining Slate with Strapi creates a powerful rich text editing experience backed by solid content management. Here's how to set it up from scratch. Alternatively, you might consider using VitePress with Strapi to generate static sites with server-rendered content.
Installing and Configuring Dependencies
For your frontend, install these packages:
npm install slate slate-react
npm install @strapi/sdk
These packages provide the core Slate editor framework, React bindings for using Slate within React applications, and the Strapi SDK for interacting with your backend.
Set up the Strapi SDK in your project:
import Strapi from '@strapi/sdk';

const strapi = new Strapi({
  url: 'http://localhost:1337',
  prefix: '/api',
  store: {
    key: 'strapi_jwt',
    useLocalStorage: true,
    ttl: 86400, // 1 day
  },
});
This configuration is intended to connect your frontend application to the Strapi backend for authentication and API requests. When planning your API strategy with Strapi, consider whether REST or GraphQL suits your project's needs.
Implementing the Slate Editor Component
Here's a basic Slate editor component to get you started:
import React, { useMemo, useState } from 'react';
import { createEditor } from 'slate';
import { Slate, Editable, withReact } from 'slate-react';

const SlateEditor = () => {
  const editor = useMemo(() => withReact(createEditor()), []);
  const [value, setValue] = useState([
    {
      type: 'paragraph',
      children: [{ text: 'Start typing your content here...' }],
    },
  ]);

  return (
    <Slate editor={editor} value={value} onChange={(newValue) => setValue(newValue)}>
      <Editable placeholder="Enter some rich text..." />
    </Slate>
  );
};

export default SlateEditor;
This component initializes a basic Slate editor with an initial paragraph of text. The Editable component renders the editor's UI.
Fetching Content from Strapi
You'll need functions to fetch content from Strapi:
const fetchContent = async () => {
  try {
    const response = await strapi.find('articles', {
      populate: '*',
    });
    return response.data;
  } catch (error) {
    console.error('Error fetching content:', error);
  }
};
This function retrieves all articles from Strapi, including their content and related data.
Saving Content to Strapi
To save content back to Strapi, you can use the following function to create a new article, storing the editor content as a JSON string:
const saveContent = async (content) => {
  try {
    const response = await strapi.create('articles', {
      data: {
        content: JSON.stringify(content),
      },
    });
    return response;
  } catch (error) {
    console.error('Error saving content:', error);
  }
};
This approach utilizes the strapi.create method to achieve the desired outcome.
Connecting the Editor to Strapi
Now connect these functions to your editor:
import React, { useEffect, useMemo, useState } from 'react';
import { createEditor } from 'slate';
import { Slate, Editable, withReact } from 'slate-react';

const SlateEditorWithStrapi = () => {
  const editor = useMemo(() => withReact(createEditor()), []);
  const [value, setValue] = useState([]);

  useEffect(() => {
    const loadContent = async () => {
      const content = await fetchContent();
      if (content && content.length > 0) {
        setValue(JSON.parse(content[0].attributes.content));
      }
    };
    loadContent();
  }, []);

  const handleChange = (newValue) => {
    setValue(newValue);
    saveContent(newValue);
  };

  return (
    <Slate editor={editor} value={value} onChange={handleChange}>
      <Editable placeholder="Enter some rich text..." />
    </Slate>
  );
};

export default SlateEditorWithStrapi;
This component loads content from Strapi when it mounts and saves content whenever the editor's state changes.
Well done!
Strapi Open Office Hours
If you have any questions about Strapi 5 or just would like to stop by and say hi, you can join us at Strapi's Discord Open Office Hours Monday through Friday at 12:30 pm - 1:30 pm CST: Strapi Discord Open Office Hours
For more details, visit the Strapi documentation and Slate documentation.
Frequently Asked Questions
Slate is a completely customizable framework for building rich text editors. Unlike opinionated editors, Slate lets you define your exact editing experience from scratch.
Create a custom field plugin wrapping Slate's React components. Define your editor schema, plugins, and serialization format, then store content in Strapi's JSON fields.
Slate has a steeper learning curve than drop-in editors because you build everything from scratch. However, this enables editing experiences perfectly tailored to your needs.
Slate uses a JSON tree structure representing the document. Configure serialization to/from this format, and store the JSON in Strapi for flexible rendering across platforms.
Yes, Plate and other Slate-based editors provide pre-built functionality on top of Slate. They offer easier integration while maintaining Slate's customization capabilities.