TipTap
Integrate TipTap with Strapi

Strapi's built-in rich text editor works for basic content. But when your team needs a more polished editing experience — tables, task lists, preset-based toolbars, and fine-grained control — TipTap is the upgrade worth making.
What is TipTap
TipTap is an open-source, headless, ProseMirror-based rich text editor framework known for its extensibility and developer-friendly API. Mention that it powers editors across popular tools and is used by thousands of teams who need fine-grained control over the editing experience.
Why Use TipTap with Strapi?
Strapi's default rich text editor covers basic needs, but teams building content-heavy products often need more.
Here's what TipTap adds to the equation.
- Modern editing experience — Editors get a familiar, Word-like WYSIWYG with a clean toolbar, keyboard shortcuts, and inline controls.
- Preset-based configuration — Developers define named toolbar presets (e.g., minimal, standard, full) and assign them per field in the Content-Type Builder — no custom UI code needed.
- Deep content capabilities — Tables, task lists, headings with independent SEO tags, code blocks with syntax highlighting, text alignment, and image management via the Strapi Media Library.
- Frontend-ready JSON output — Content is stored as ProseMirror JSON and can be rendered with any frontend.
TipTap Key Features
Present as a scannable list or grid. Each item: feature name + one-line description.
- Rich text formatting — Bold, italic, underline, strikethrough, inline code, superscript, subscript — all with keyboard shortcuts.
- Headings (H1–H6) — Includes an independent SEO tag selector so editors can set visual style separately from the semantic HTML tag.
- Tables — Insert and edit tables with row/column controls, all from the toolbar.
- Images from Media Library — Pick images directly from Strapi's Media Library; set alt text, alignment (left, center, right), and dimensions with resize handle.
- Code blocks — Fenced code blocks with syntax highlighting for developer-facing content.
- Links — Inline link insertion with configurable HTML attributes (e.g., rel, target).
- Text & highlight colors — Brand-aware color pickers driven by your theme config.
- Blockquotes & lists — Ordered, unordered, and task lists with blockquote support.
- Custom CSS / theming — Inject a stylesheet URL or inline CSS to match the editor to your design system.
- Config validation — The plugin validates your preset config at startup and throws a readable error if a feature key is misspelled.
Bootstrap a new Strapi Project
Create a Strapi Project
Start by creating a new Strapi project.
npx create-strapi@latest tiptap-integrationEnsure you answer the prompts. Here are the ones for this integration:
? Please log in or sign up. Skip
? Do you want to use the default database (sqlite) ? Yes
? Start with an example structure & data? No
? Start with Typescript? Yes
? Install dependencies with npm? Yes
? Initialize a git repository? No
Start Your Strapi Development Server
Next, start your Strapi development server:
cd tiptap-integration
npm run dev
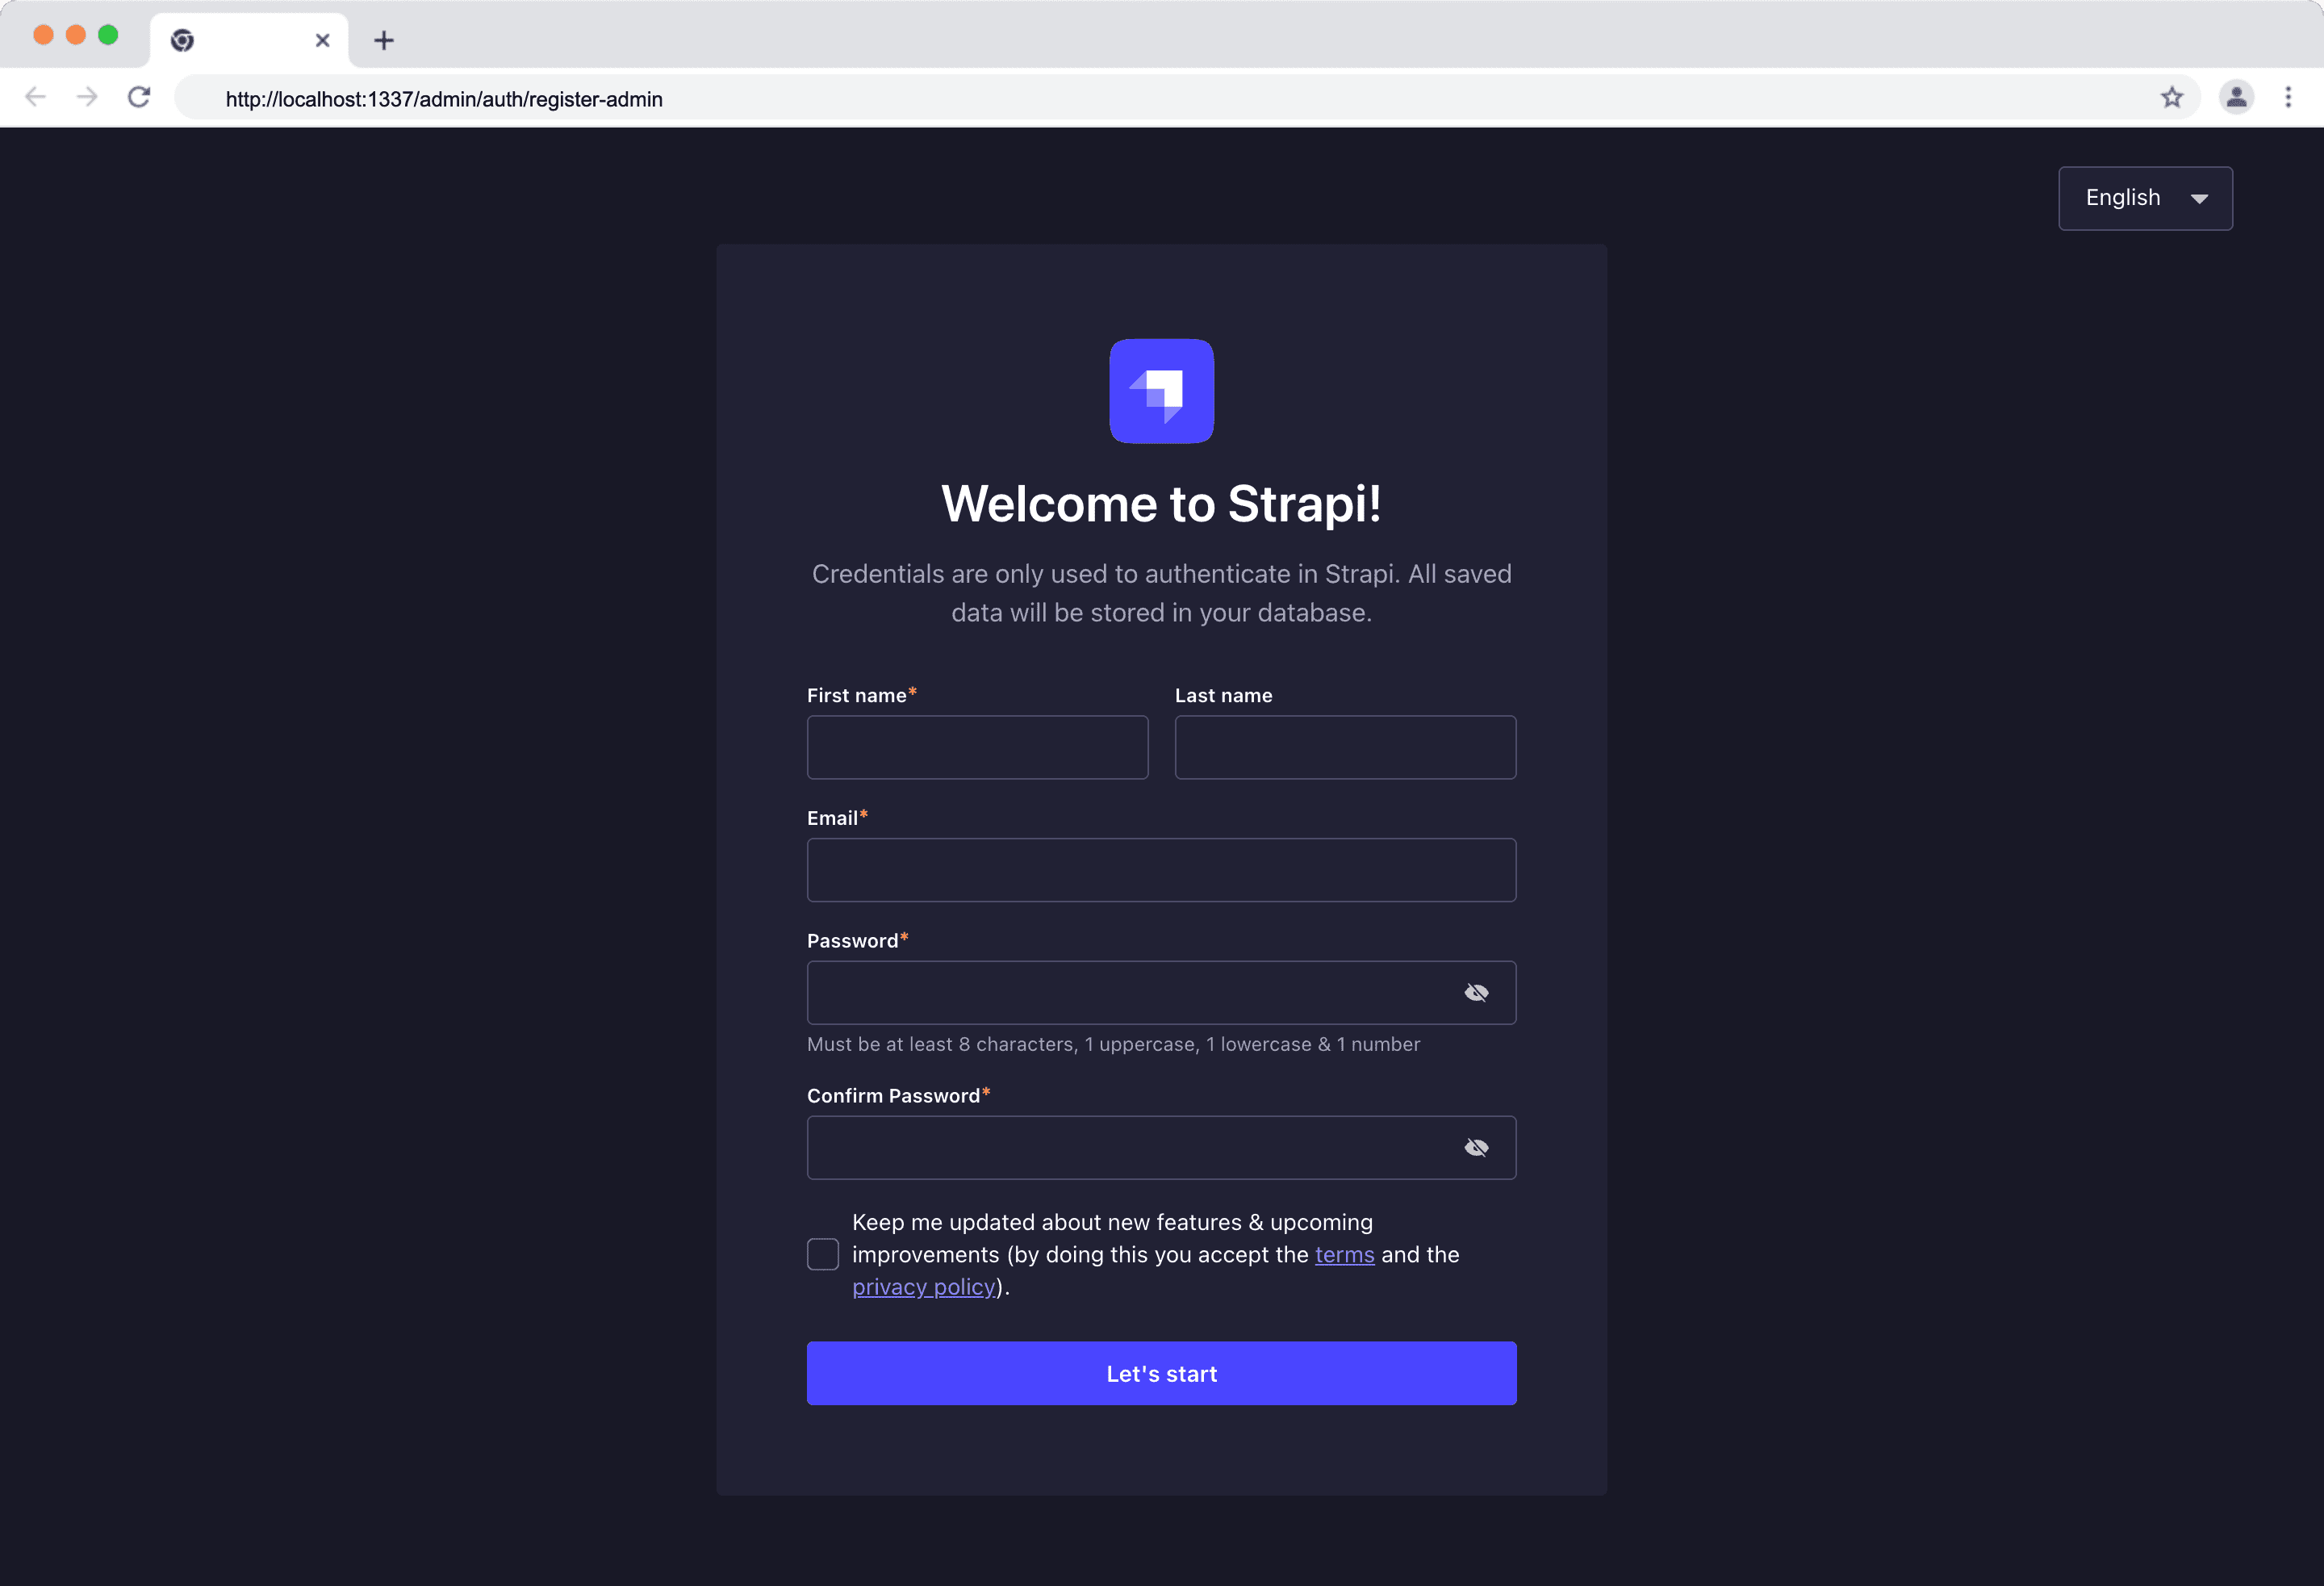
The command above will open an admin registration page. Fill in the admin user details and click the "Let's start" button.
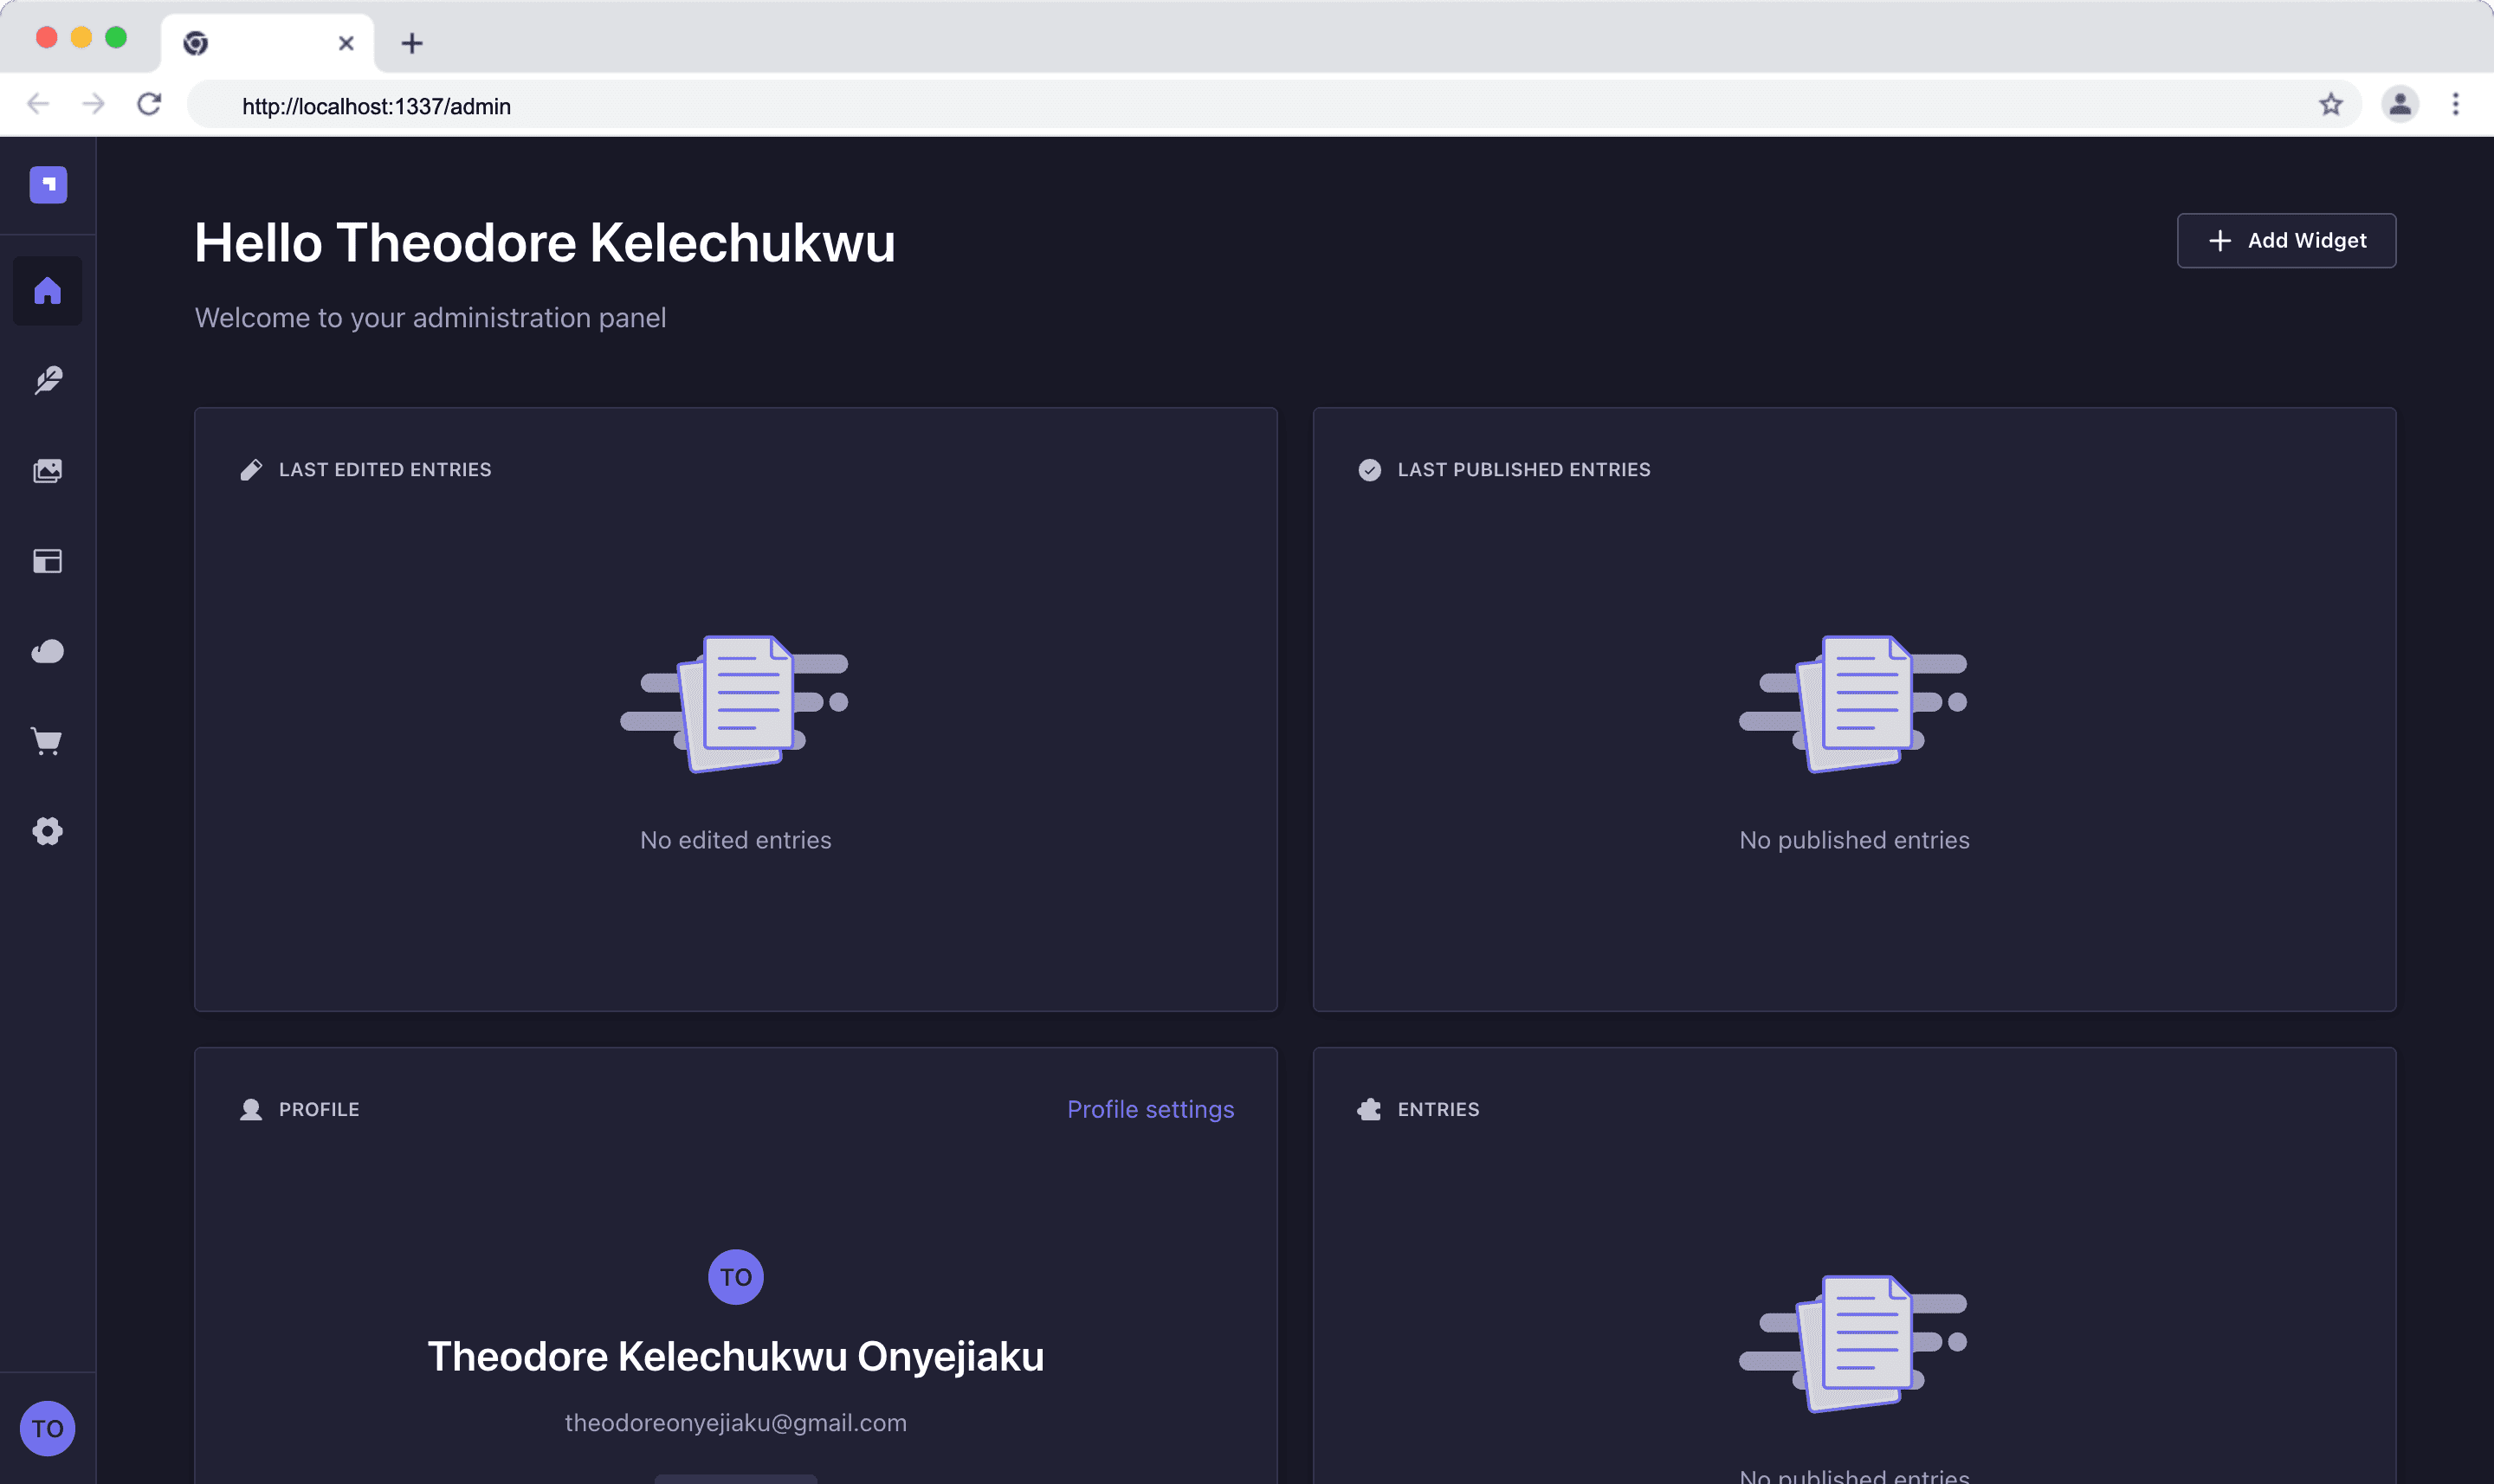
After admin registration, you should be redirected to your Strapi dashboard as shown below:
Install and Configure Strapi Tiptap Plugin
The Tiptap editor plugin for Strapi 5 is a drop-in TipTap WYSIWYG editor created by Notum Technologies. You can find more plugins developed by the Strapi community in the Plugin Marketplace.
npm install @notum-cz/strapi-plugin-tiptap-editorConfigure Strapi Tiptap Plugin
Inside your Strapi project backend code, navigate to the ./config/plugins.ts file and update it with the following:
// Path: ./config/plugins.ts

// config/plugins.ts

export default () => ({
  'tiptap-editor': {
    config: {
      presets: {
        // A minimal preset for short-form content like titles or captions
        minimal: {
          bold: true,
          italic: true,
          underline: true,
        },

        // A standard preset for blog posts and articles
        standard: {
          bold: true,
          italic: true,
          underline: true,
          strike: true,
          heading: true,
          bulletList: true,
          orderedList: true,
          blockquote: true,
          link: true,
        },

        // A full preset with every feature enabled
        full: {
          bold: true,
          italic: true,
          underline: true,
          strike: true,
          code: true,
          codeBlock: true,
          heading: true,
          blockquote: true,
          bulletList: true,
          orderedList: true,
          link: true,
          table: true,
          textAlign: true,
          superscript: true,
          subscript: true,
          mediaLibrary: true,
        },
      },
    },
  },
});
✋ NOTE: Every feature is opt-in, meaning nothing appears in the toolbar unless you explicitly set it to true in your preset.
You can define as many presets as you need.
Assign Tiptap to fields in Strapi
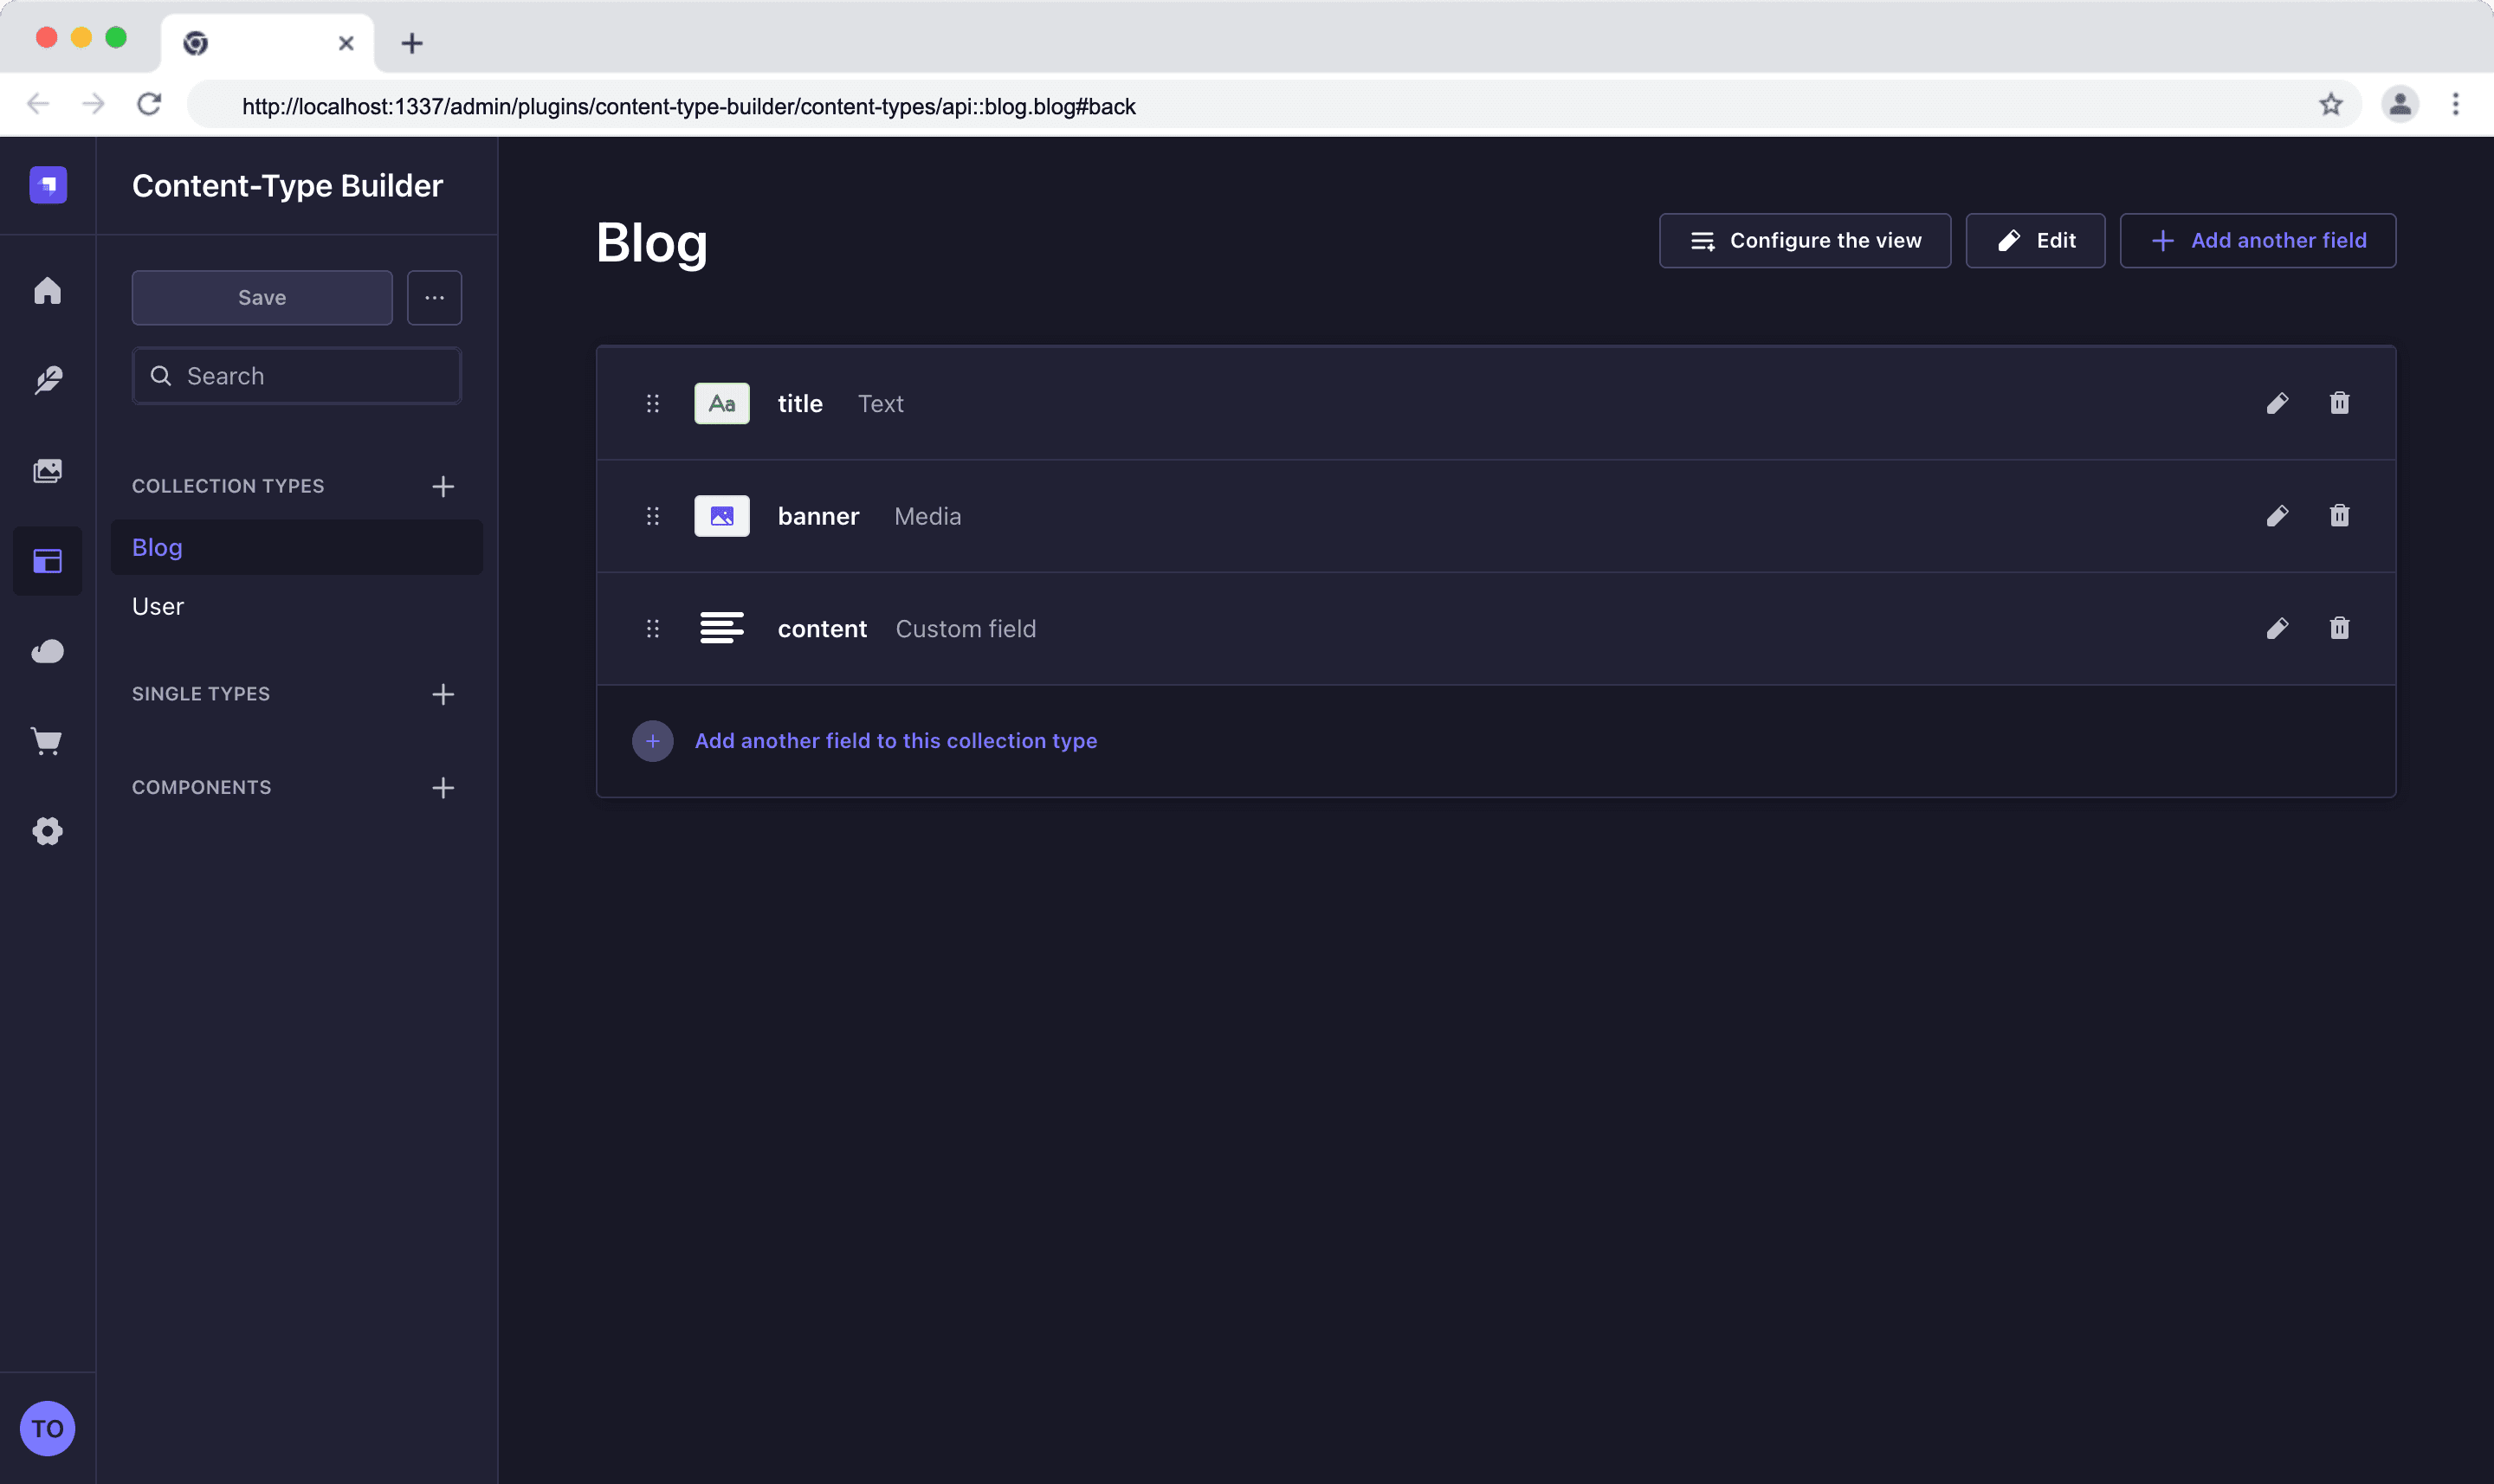
Create a collection type called Blog and add the following fields
| Name | Field |
|---|---|
title | Text (Short text) |
banner | Media (Single media) |
content | Rich Text (TipTap) |
For content which you want to use for the custom editor content, here is what you should do:
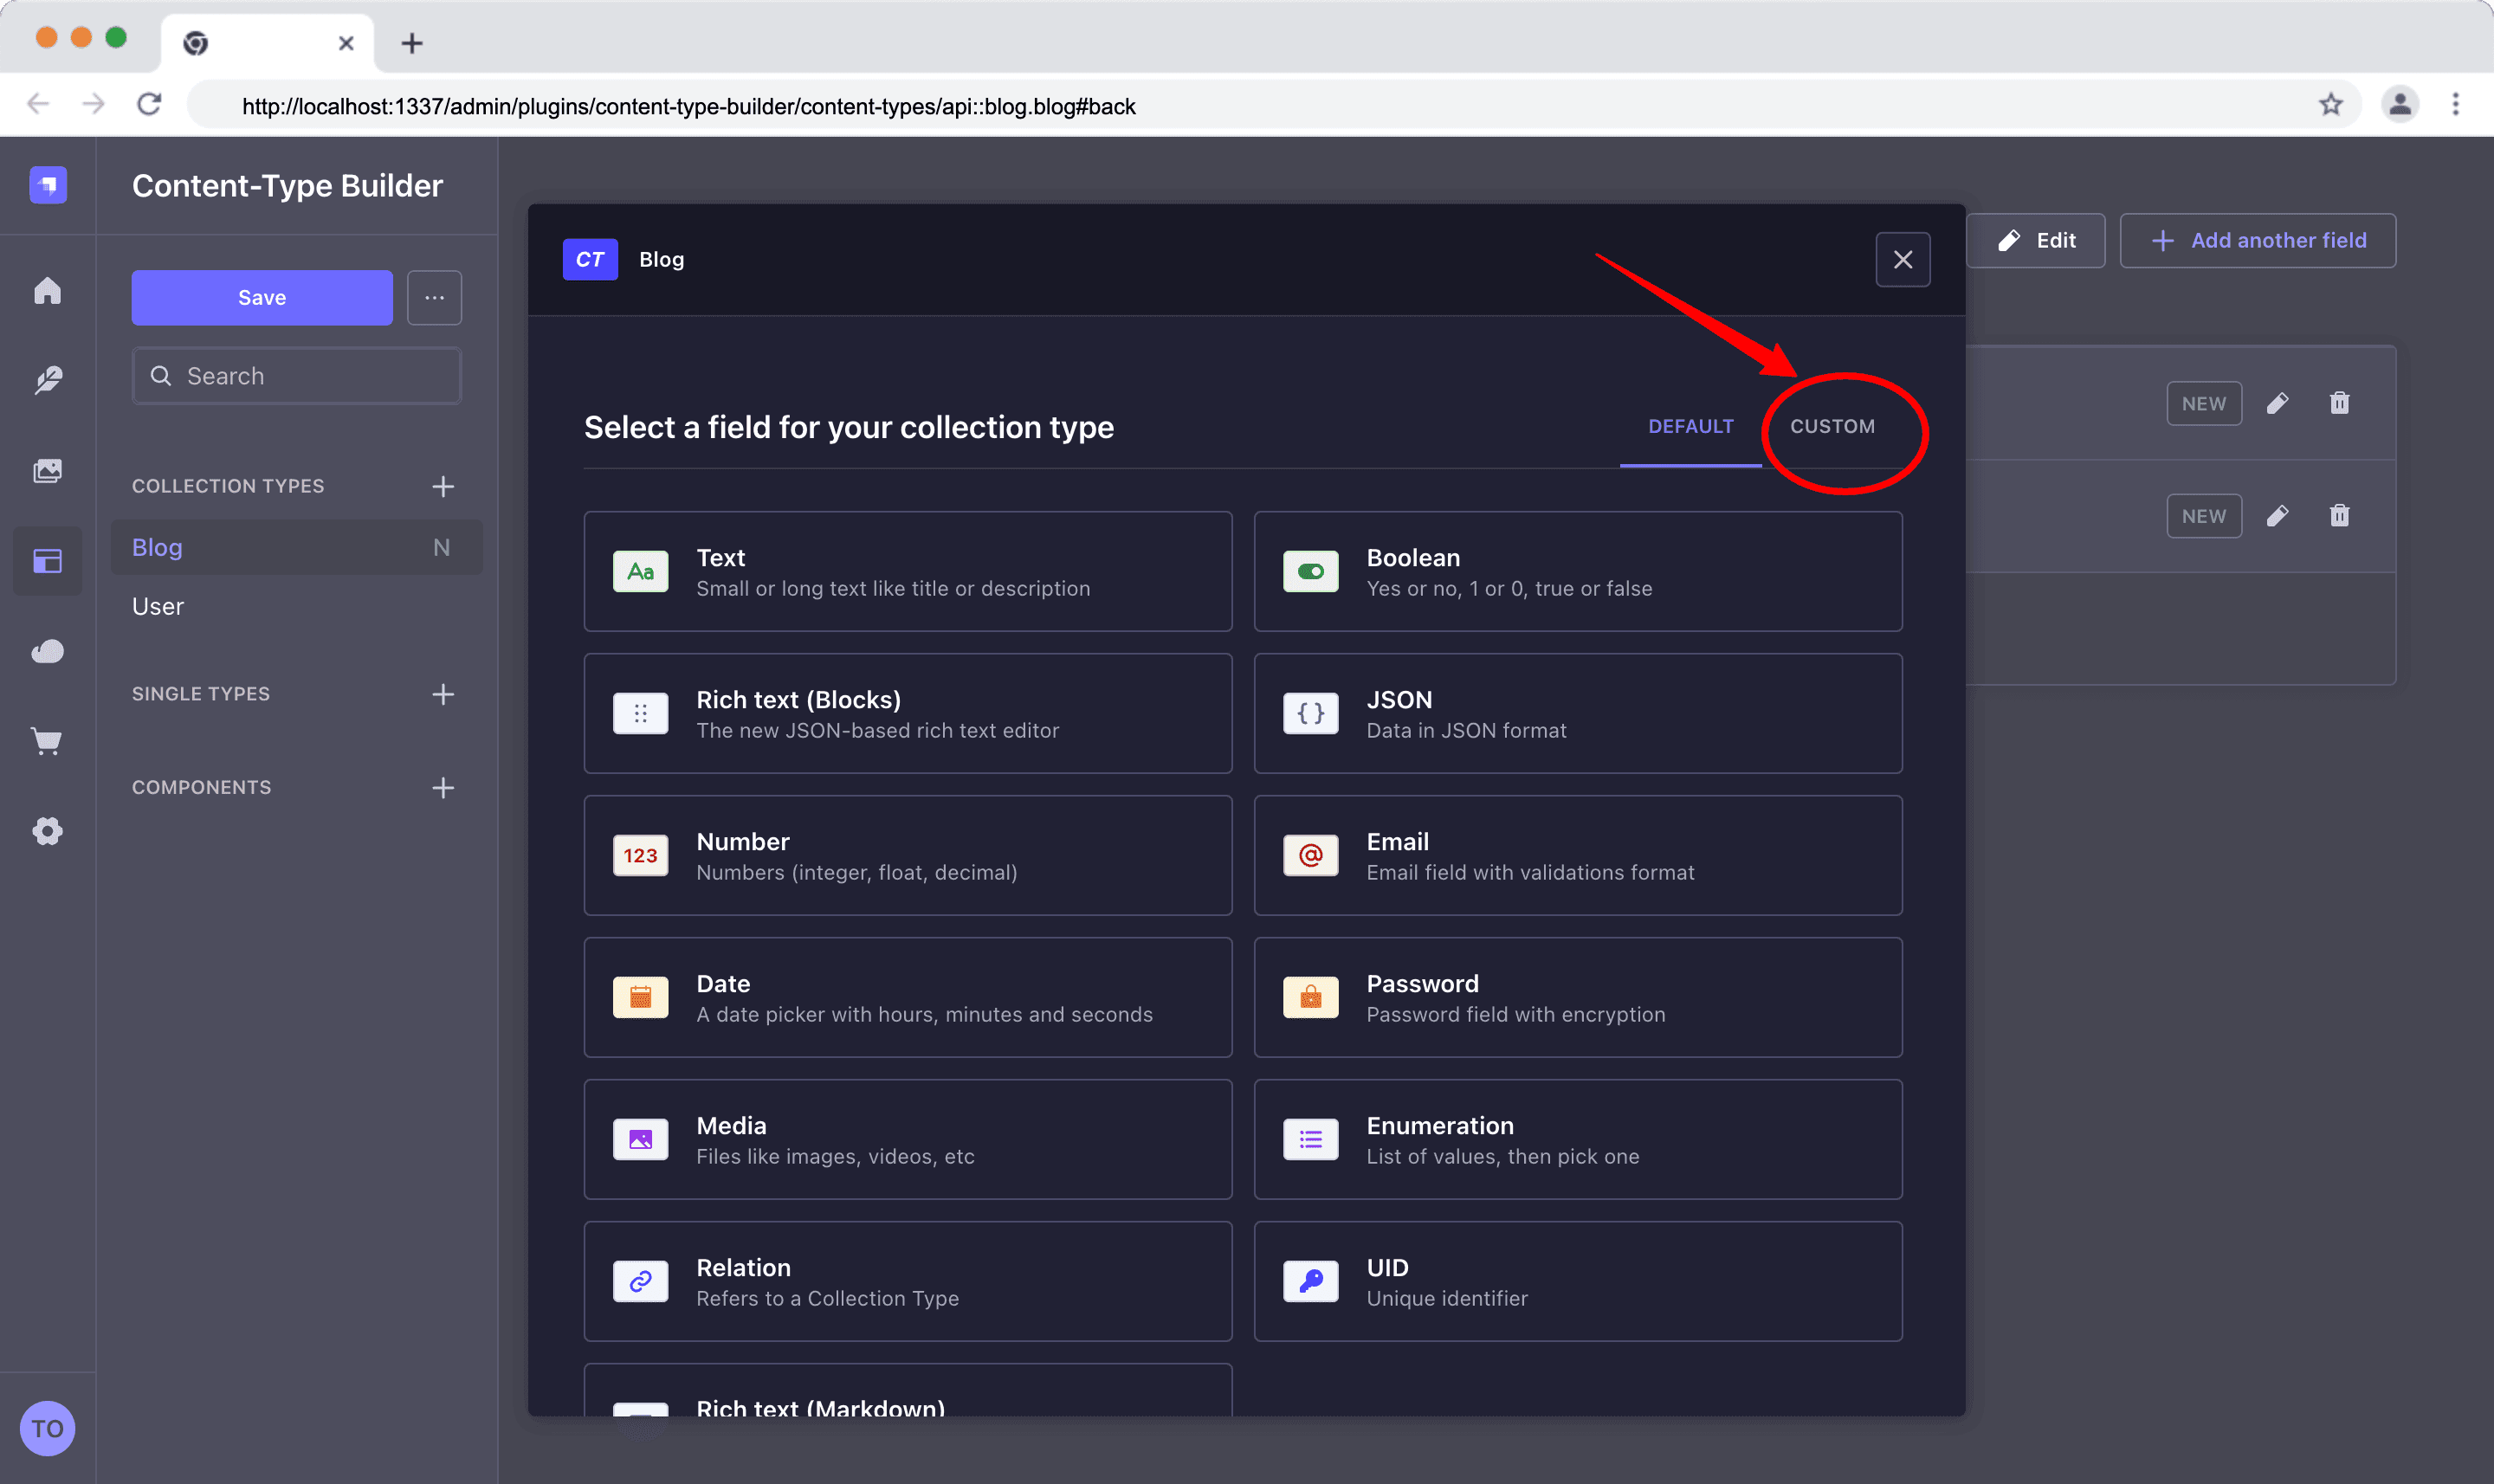
- Click the "Add another field" button.
- Ensure you click the "Custom" tab beside the "Default" tab.
- Select the "Rich Text (Tiptap)" field and give it the name
content.
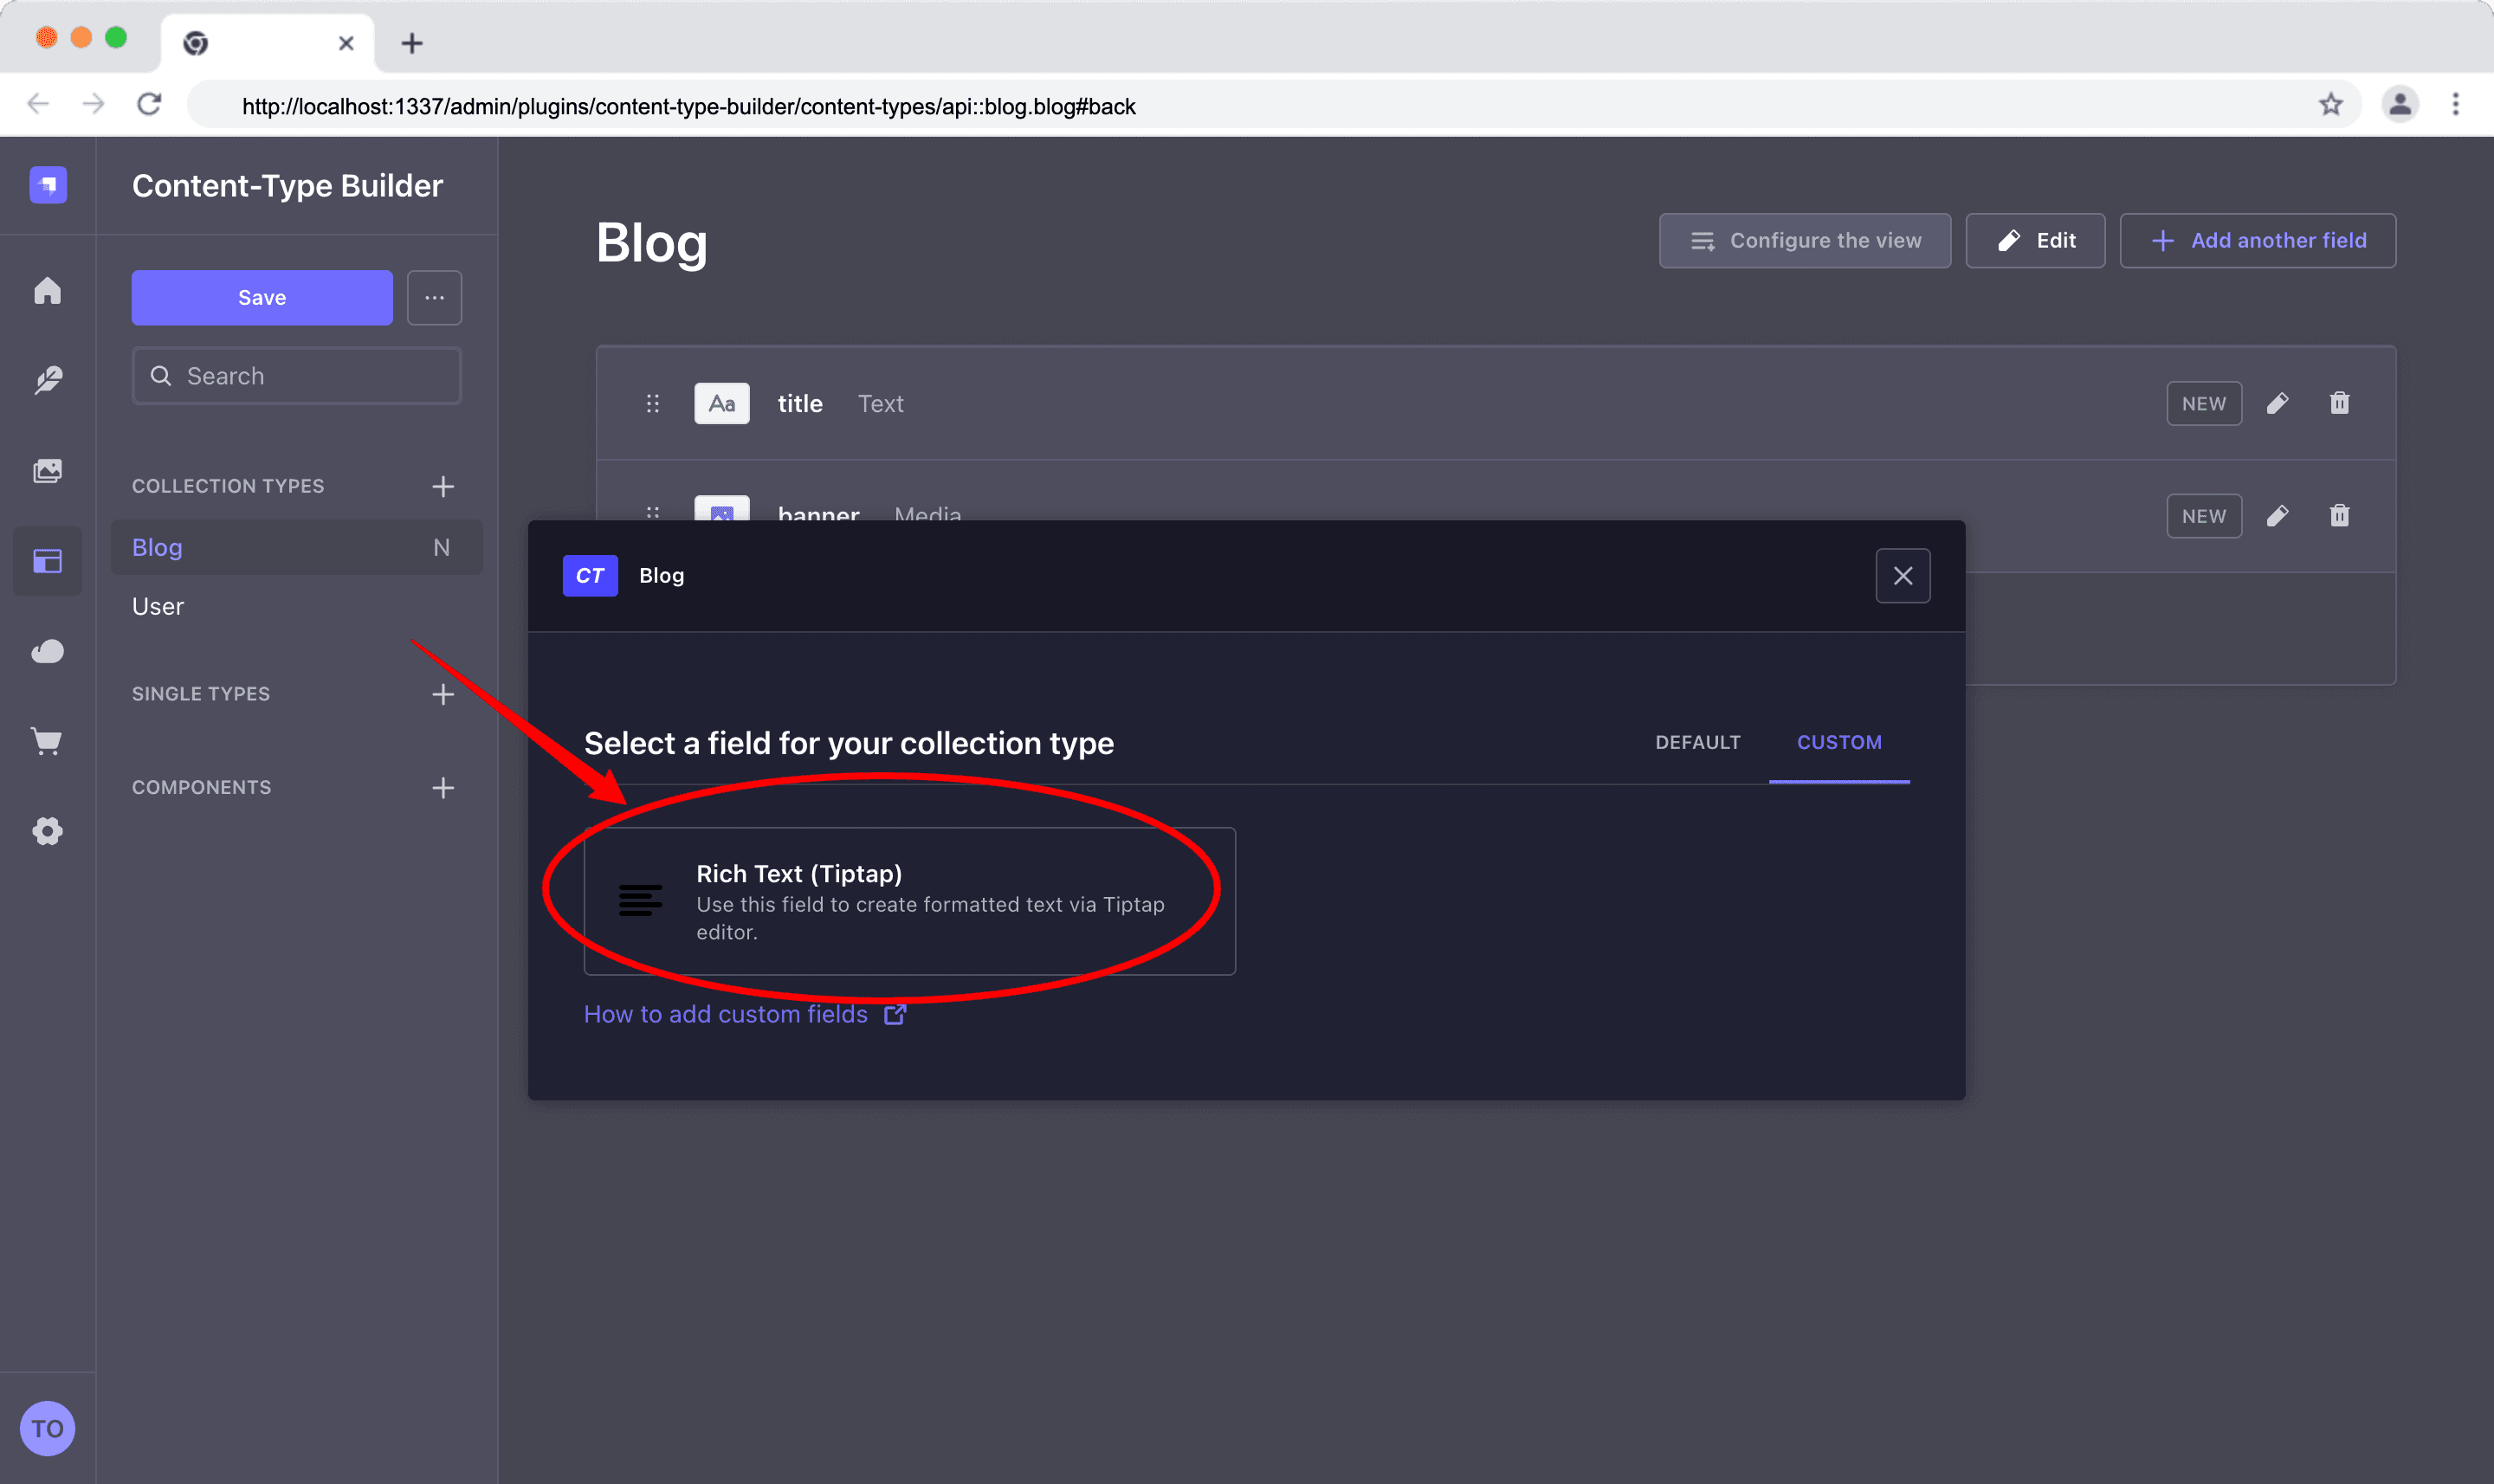
- Click the "finish" button after selecting the "Rich Text (Tiptap)" field.
- Finally, click the "Save" button to save the new collection type.
This is what your new collection type should look like.
Testing Tiptap Custom Editor in Strapi
Head over to your Blog collection type and create a new entry.
Enable Tiptap Pretexts in Strapi
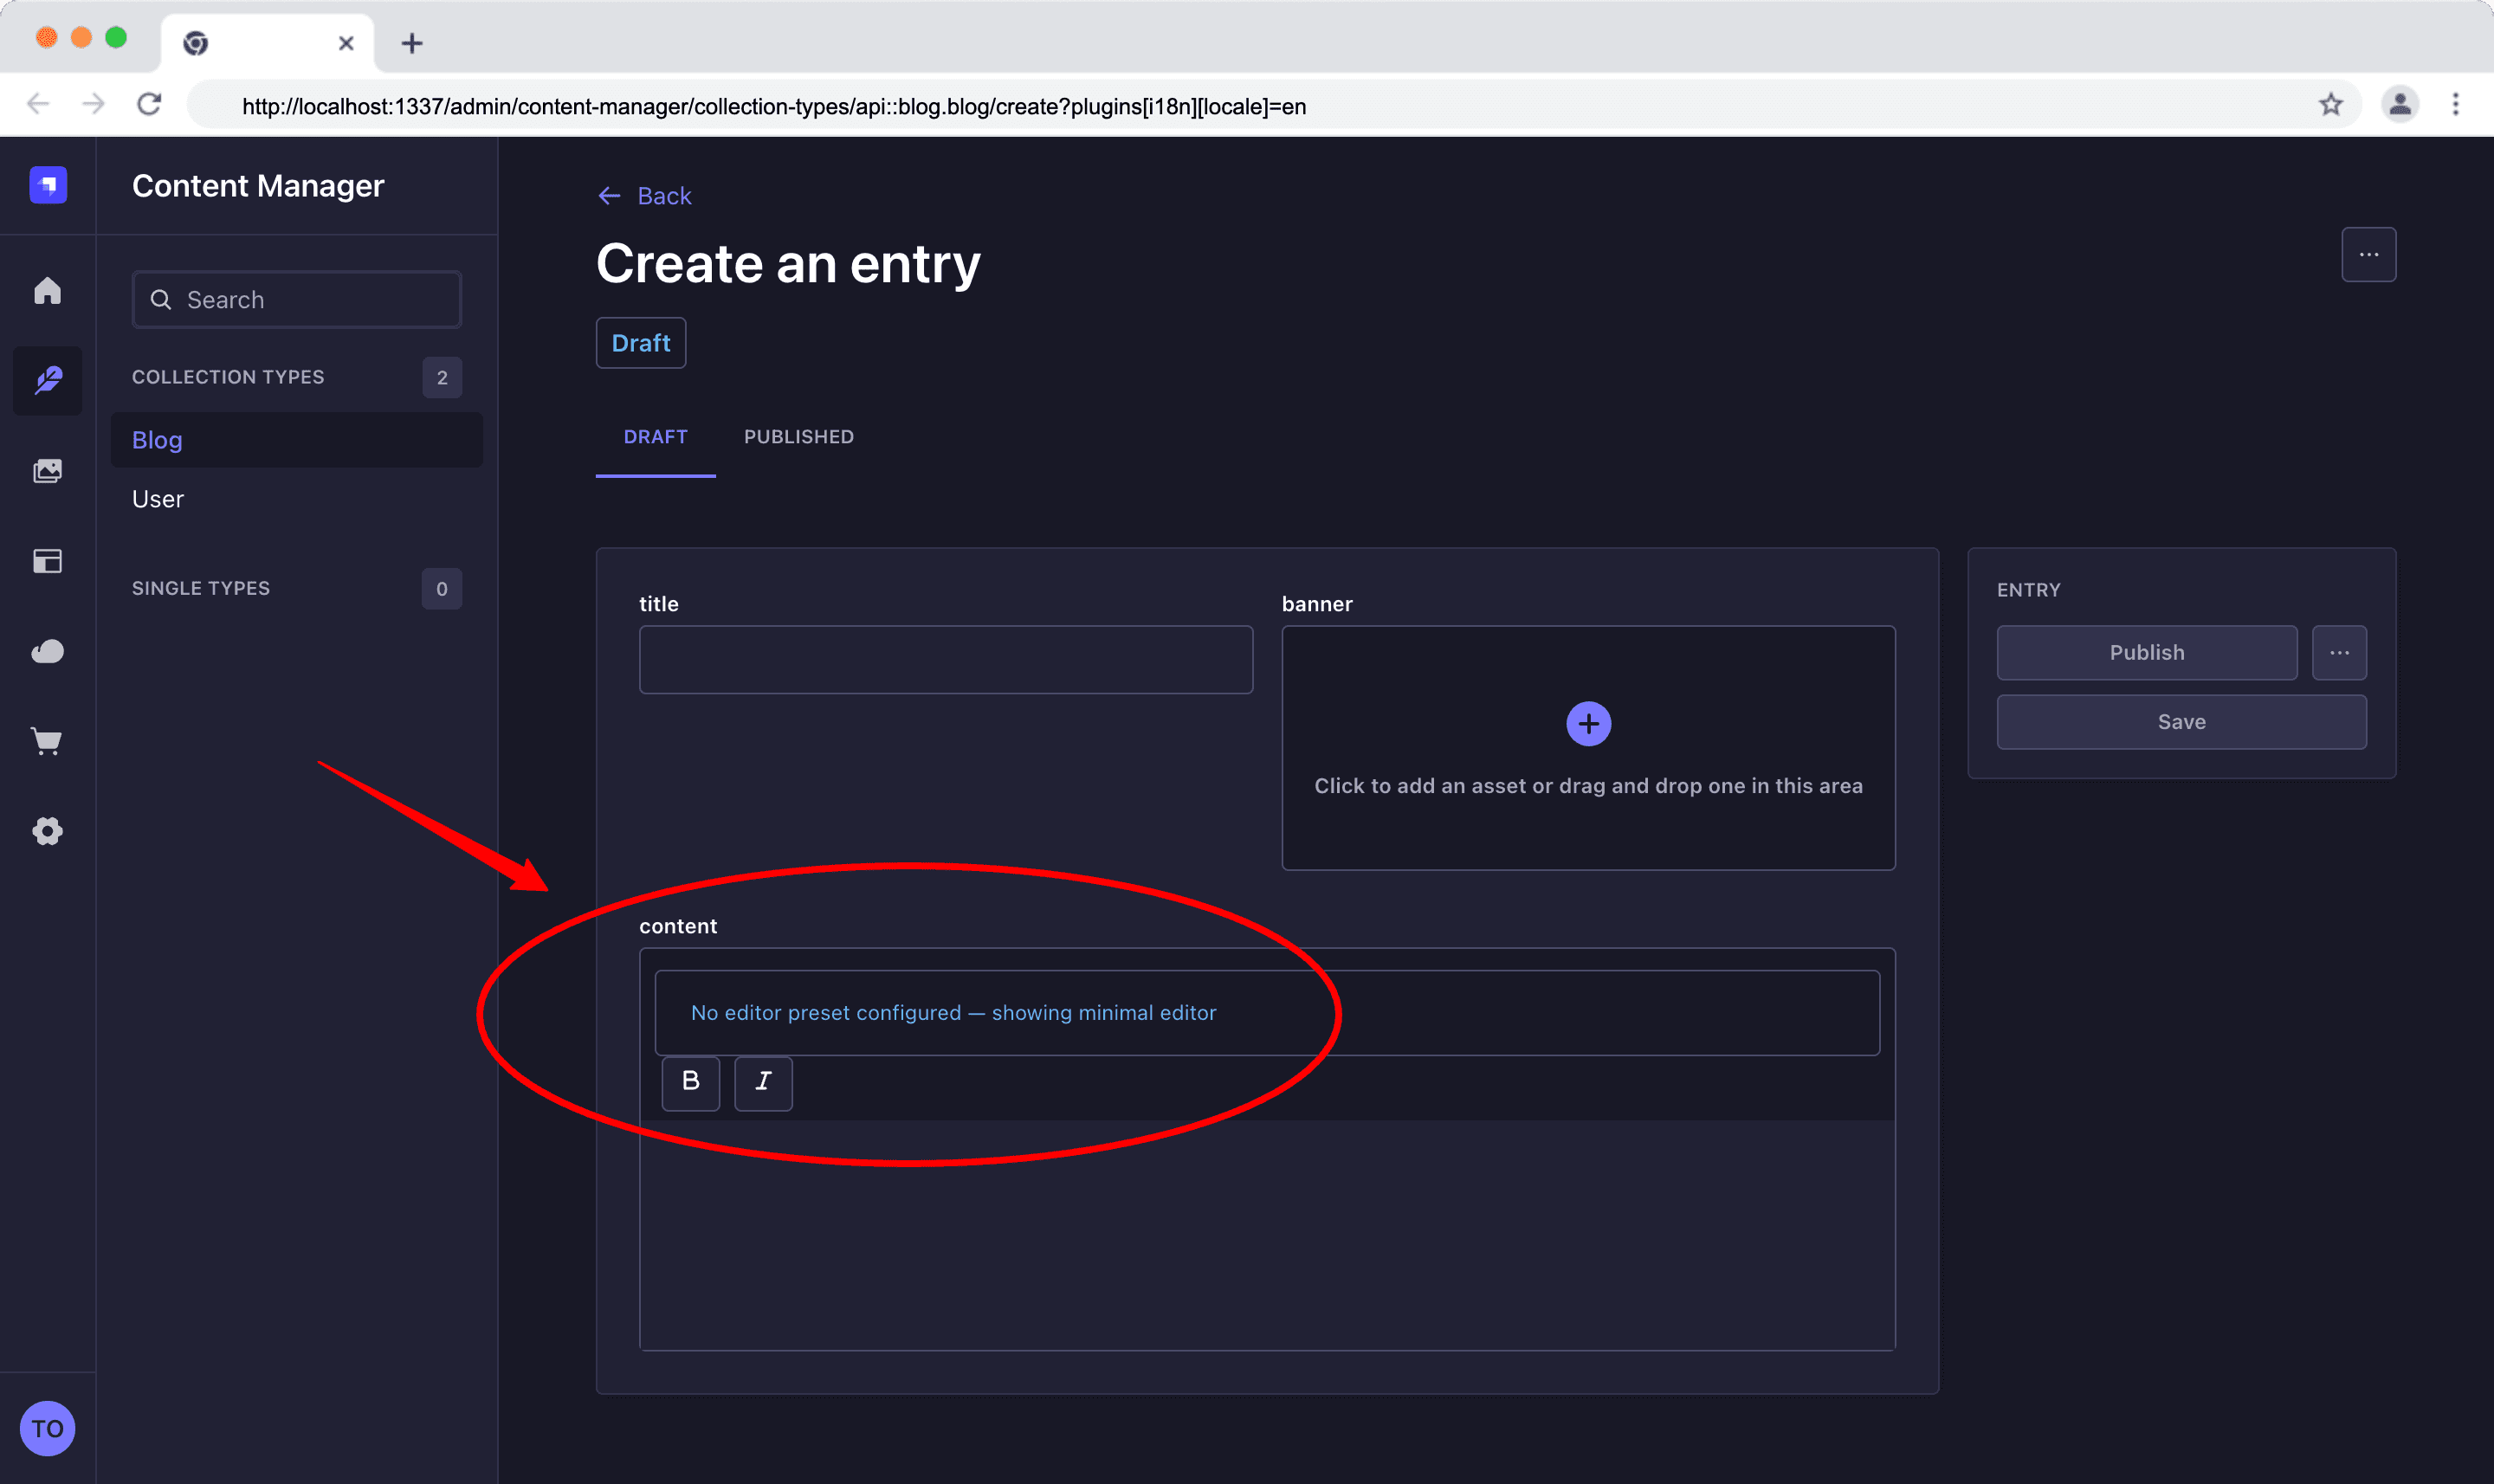
Notice that the editor is minimal, showing only "bold" and "italics" features. This is because you haven't selected the preset you configured above.
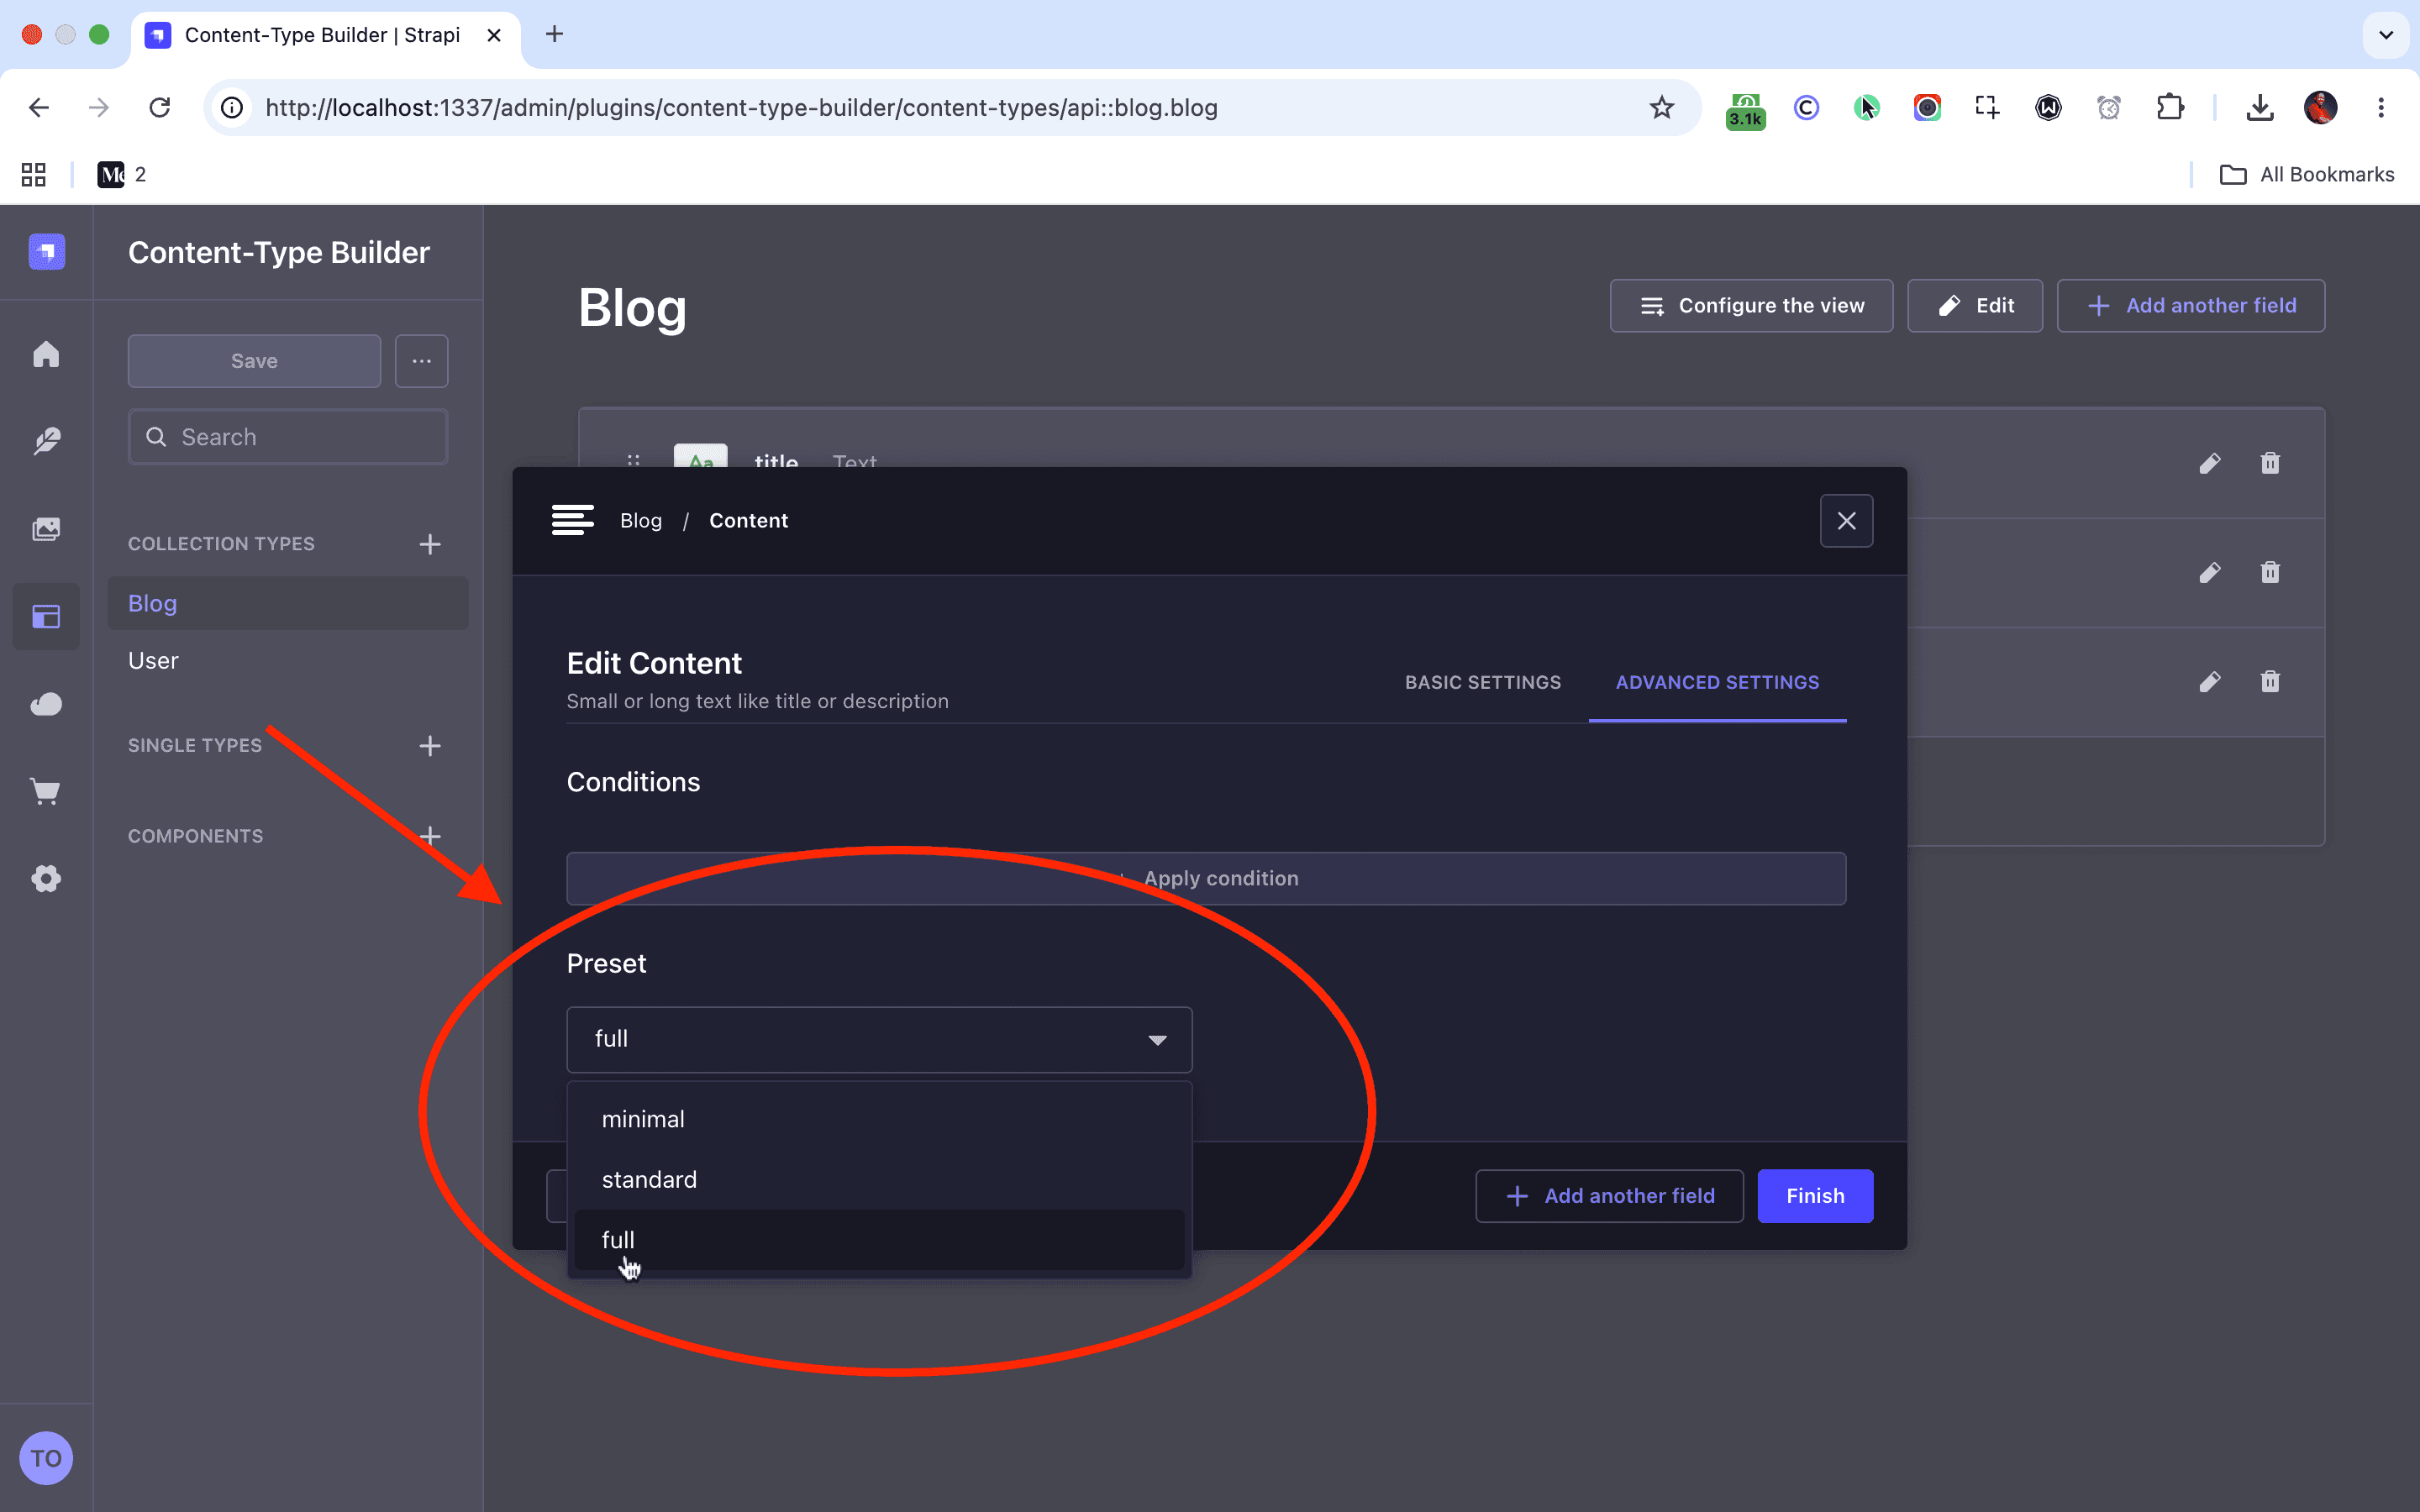
- Head over to the Content-Type Builder and click the Blog collection type.
- Click the
contentfield, which contains the Tiptap editor. - Click the "ADVANCED SETTINGS" tab and select the pretext you want.
- Ensure you click the "Save" button to save changes.
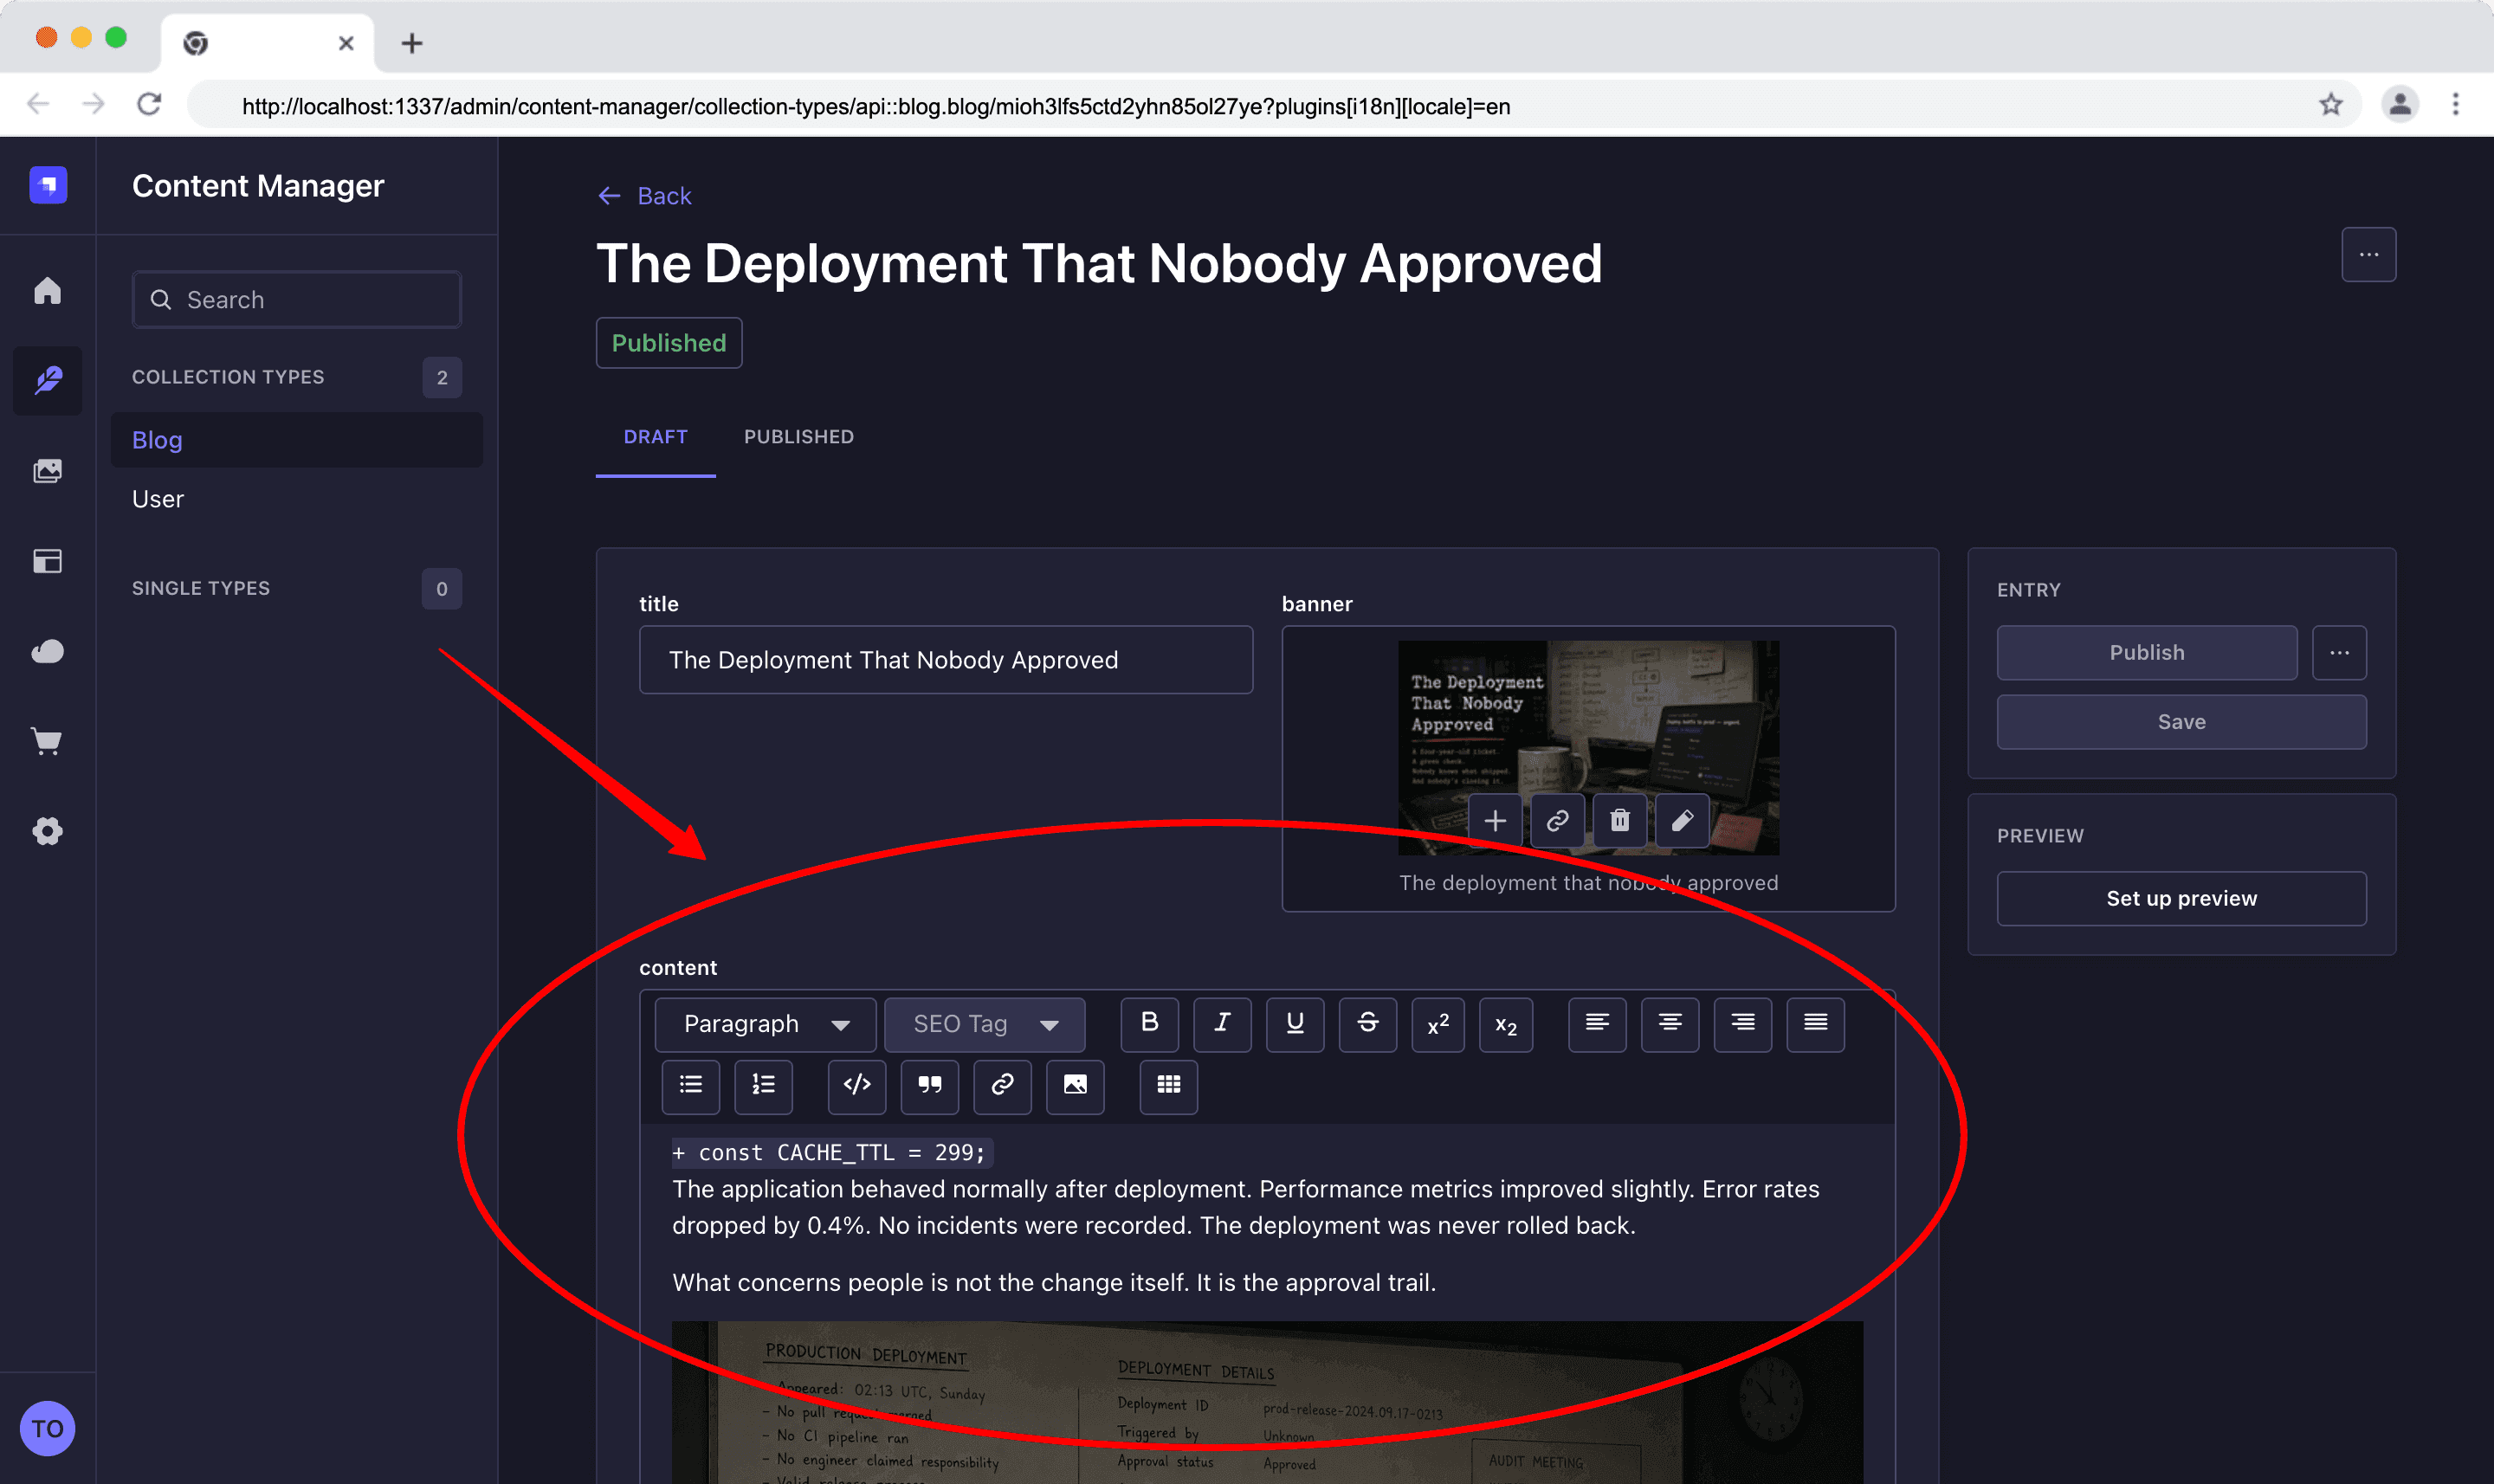
Now, proceed to the Content Manager and create new blog entries. You should see the integrated Tiptap editor.
Fetch Tiptap Content
When you visit the Blog collection type, you should see the way the Tiptap content field values are displayed.
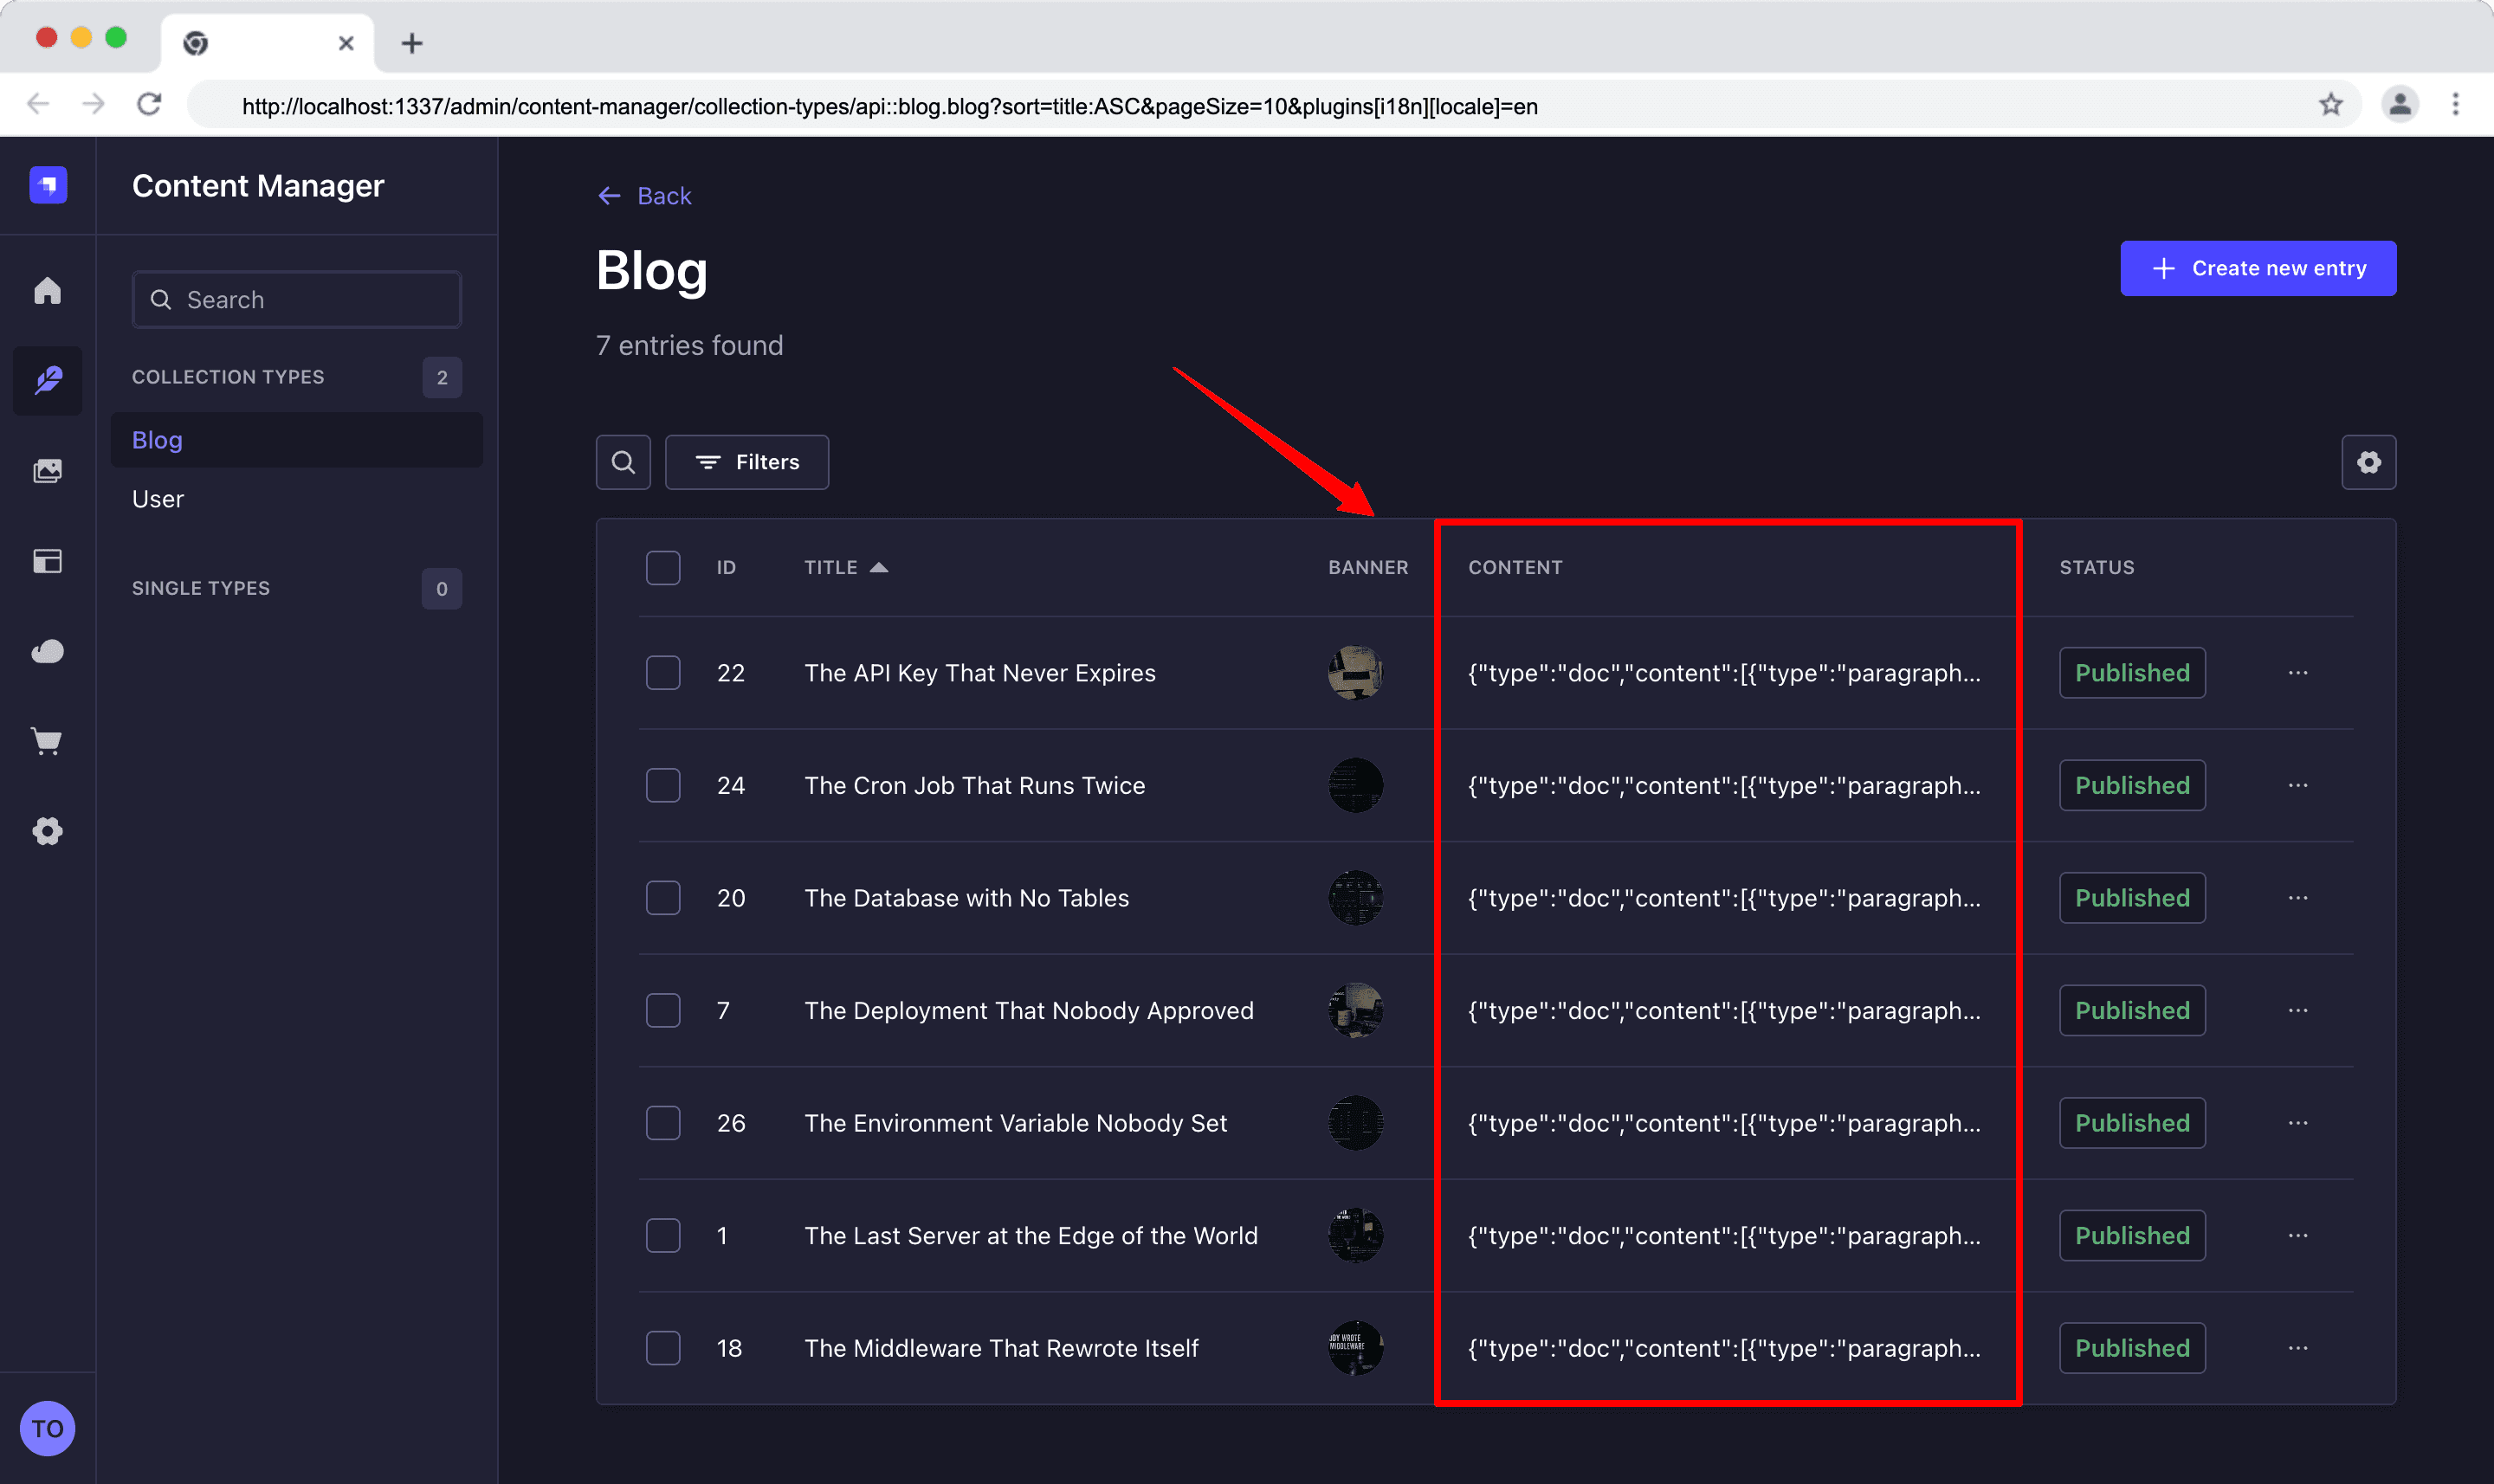
This is stored as a JSON document, which is a tree of ProseMirror nodes. And when you fetch Blog entries, you should see the JSON of each entry:
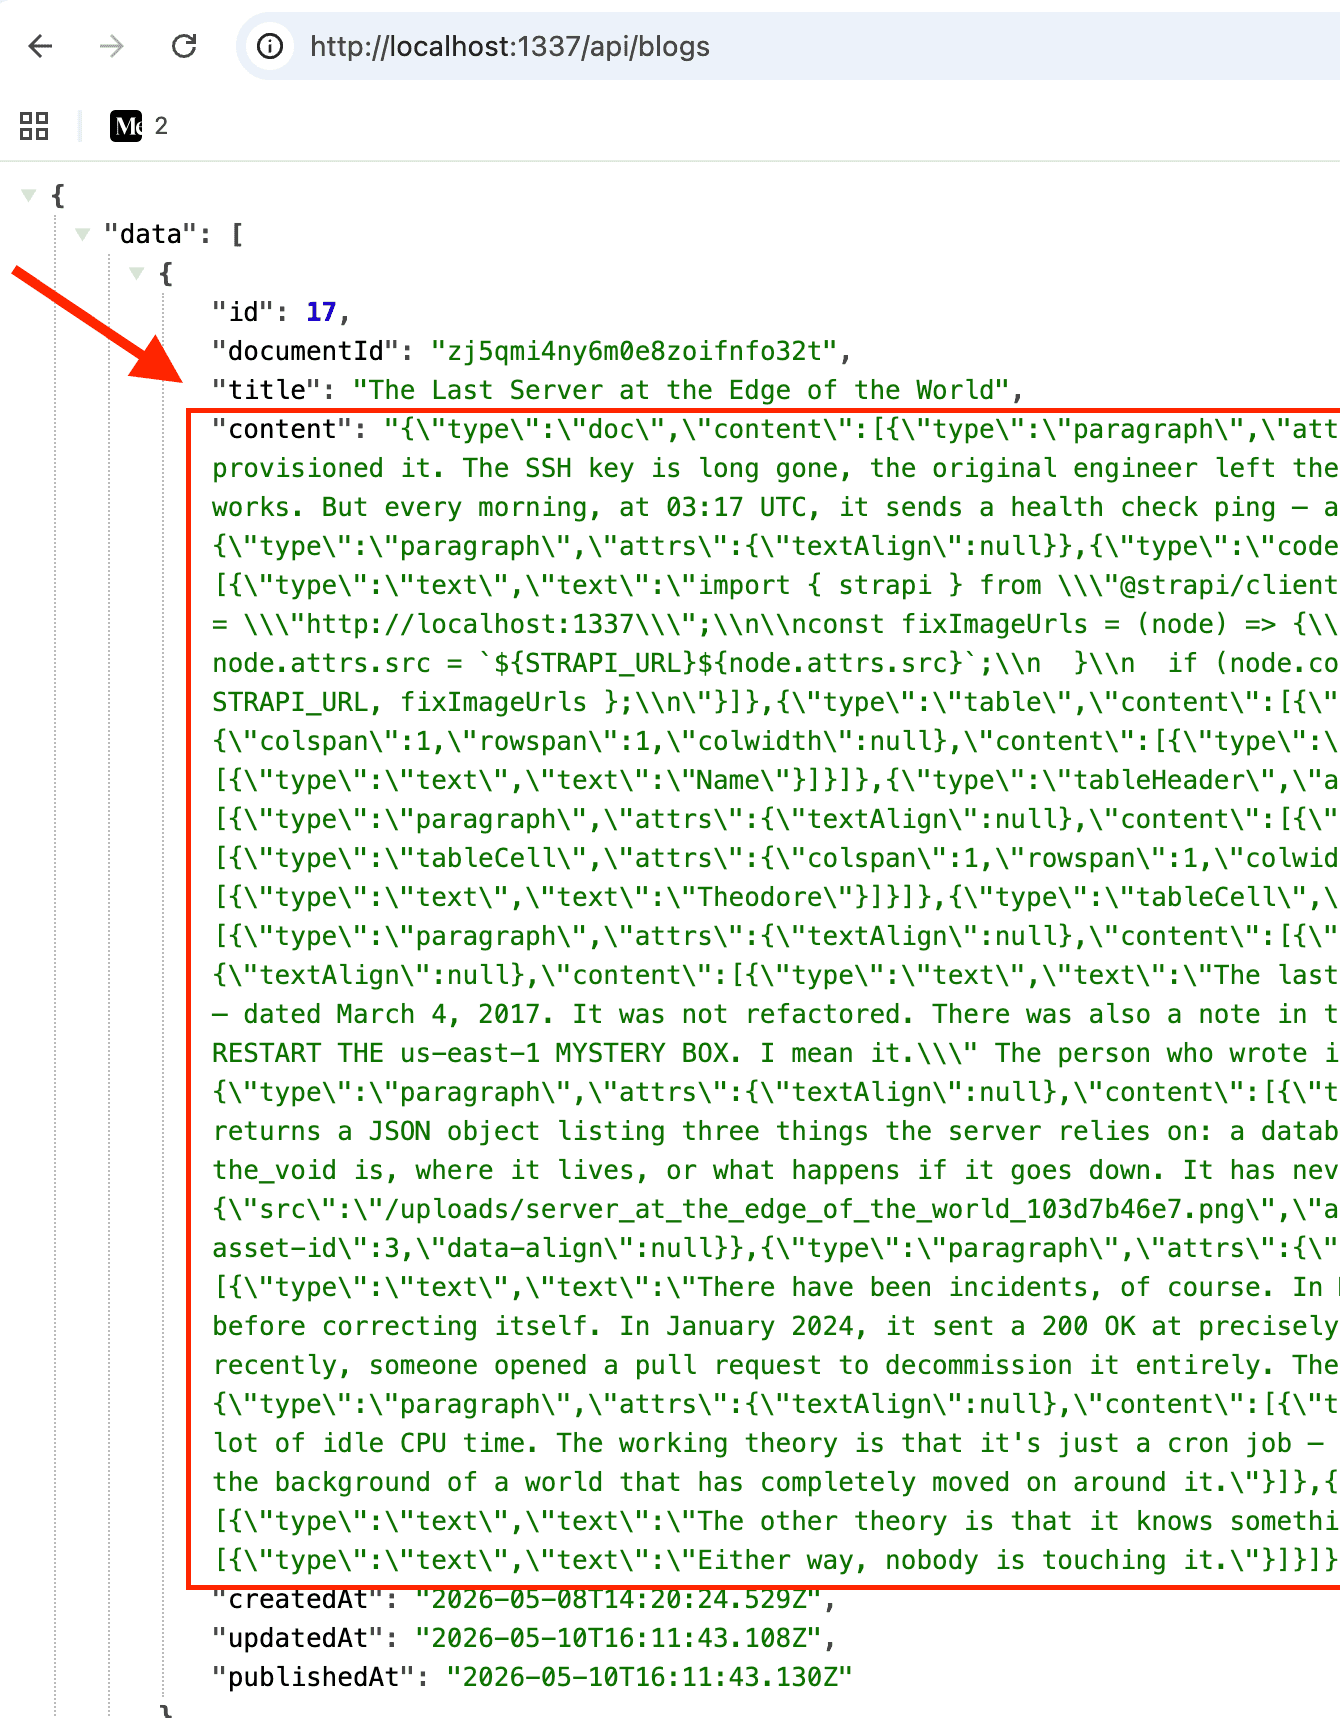
In the frontend, this will be parsed using the JSON.parse() function, as you will see shortly.
Enable Strapi API Permissions
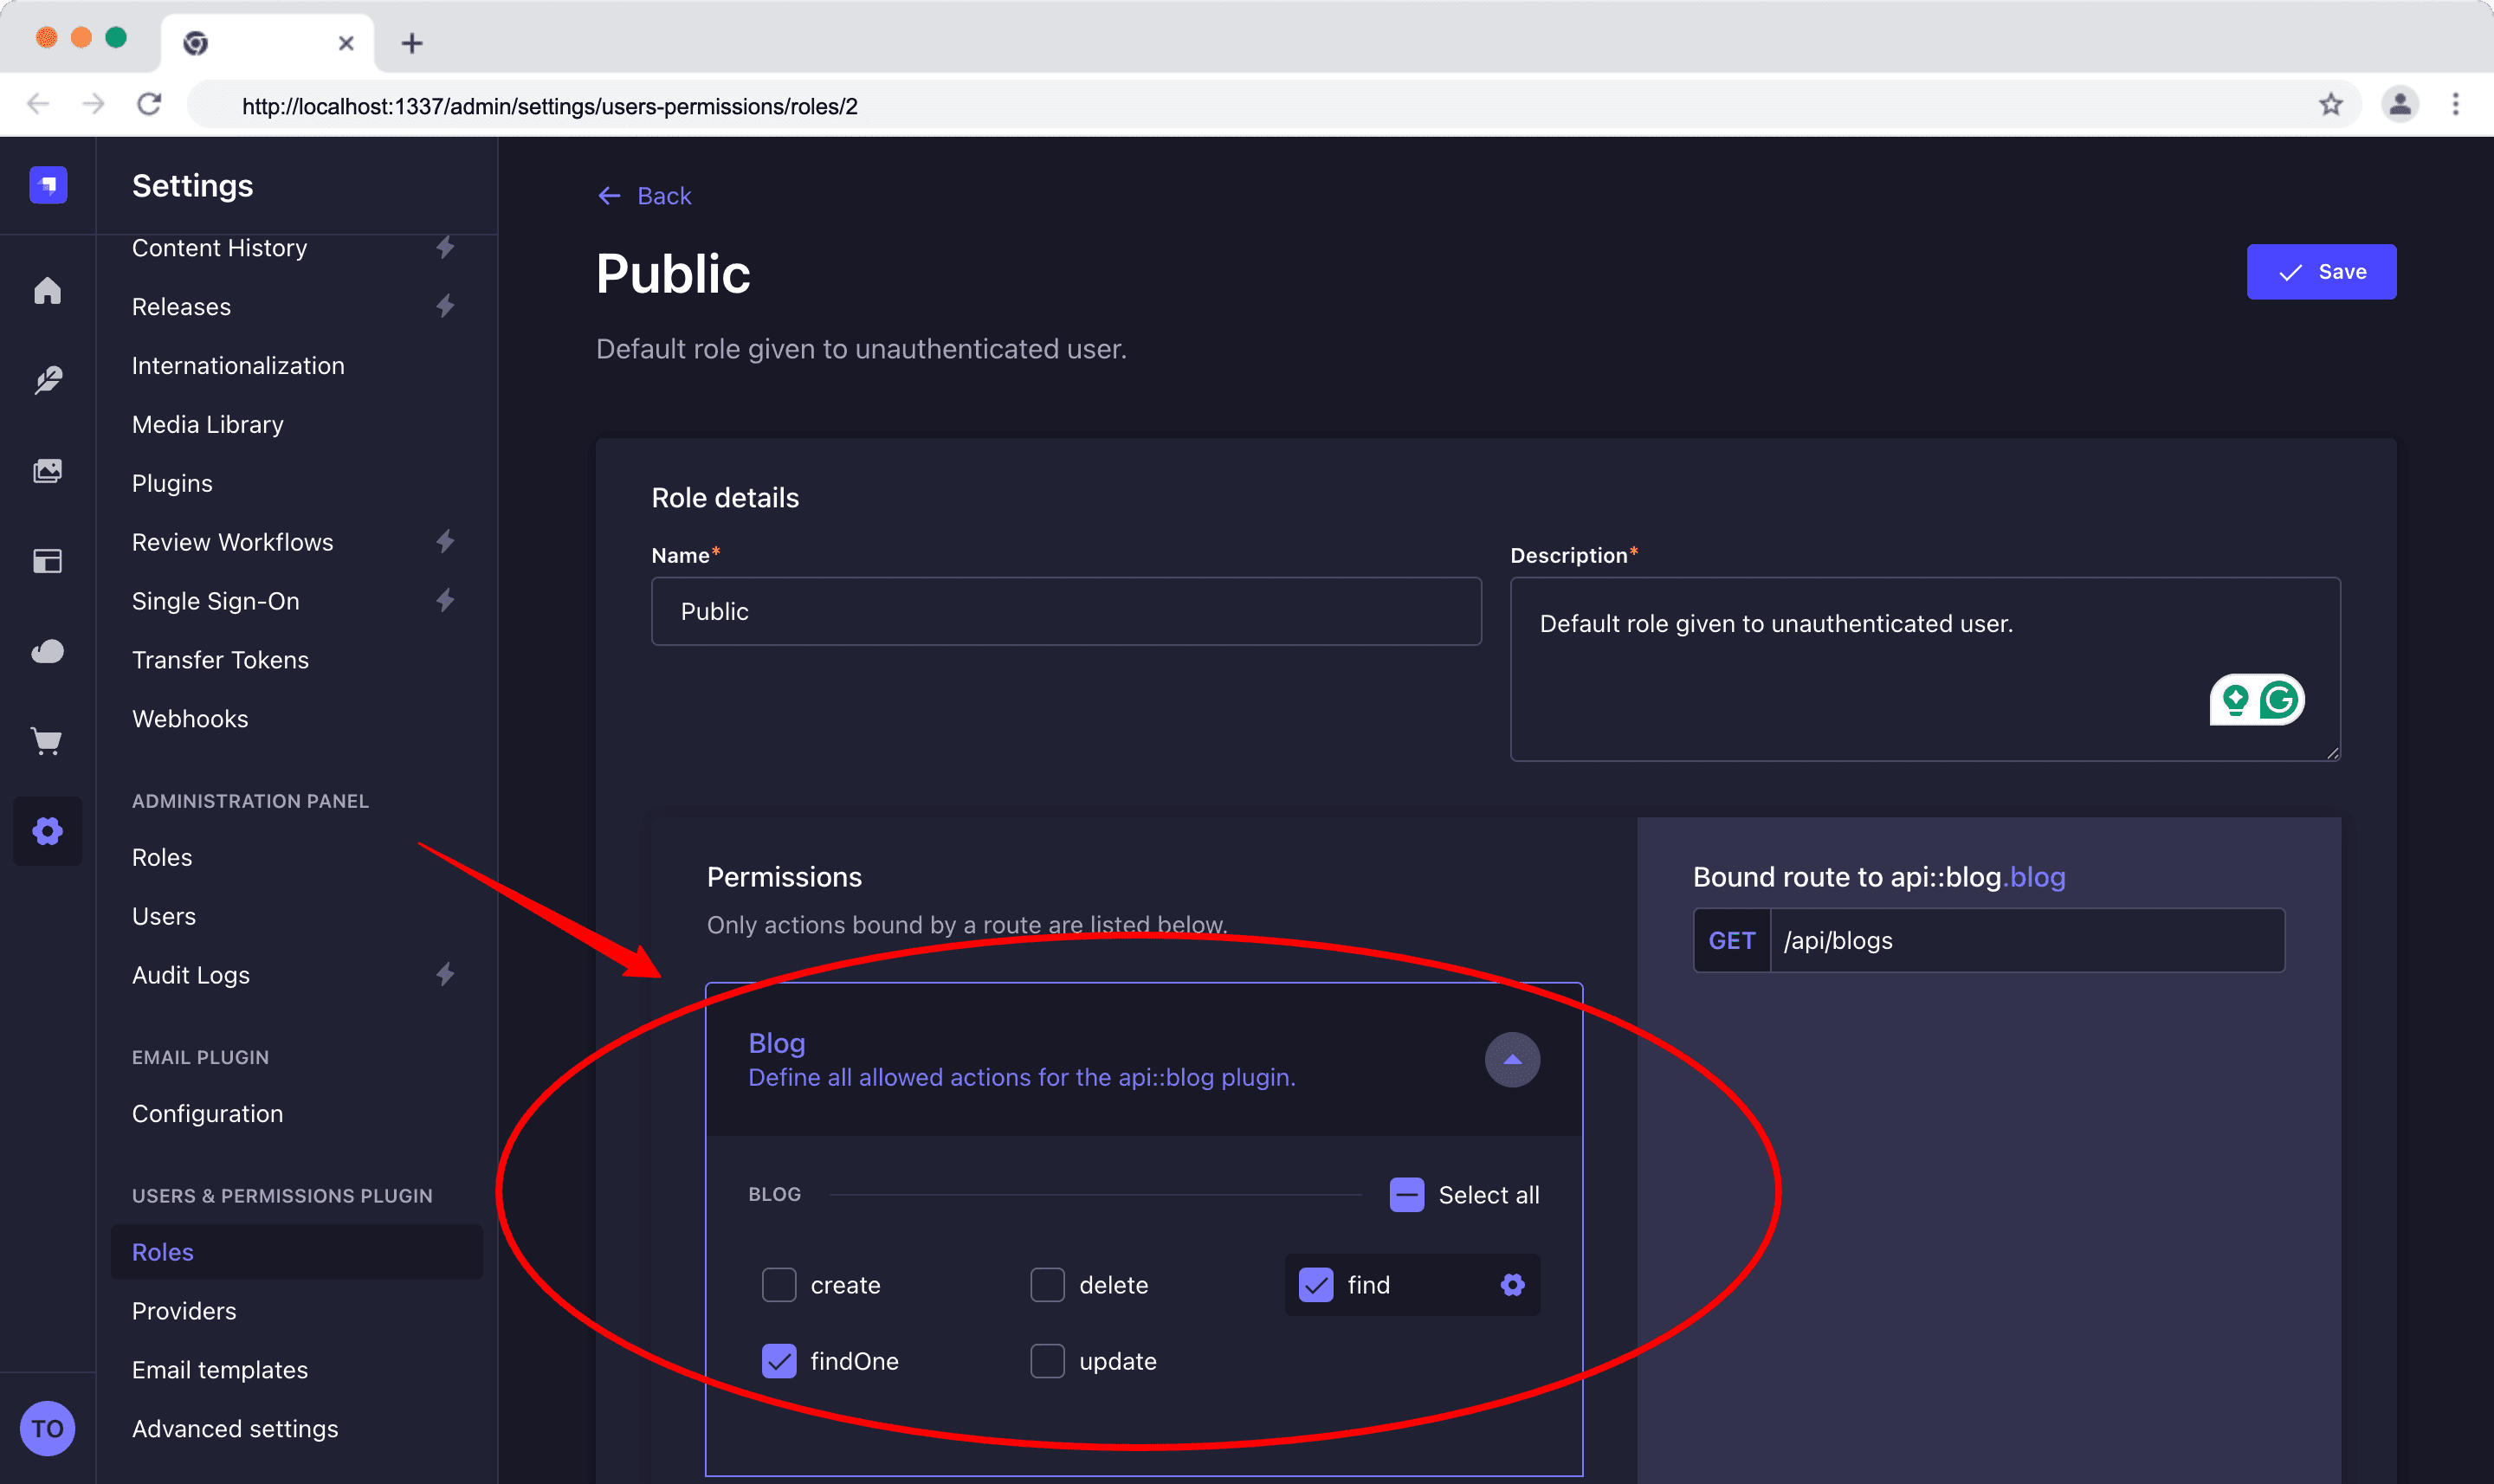
In order to be able to fetch content from your Strapi backend, you have to enable API permission for your content types.
Ensure you enable API permission for find and findone of the Blog collection type.
Go to Settings > Roles > Public
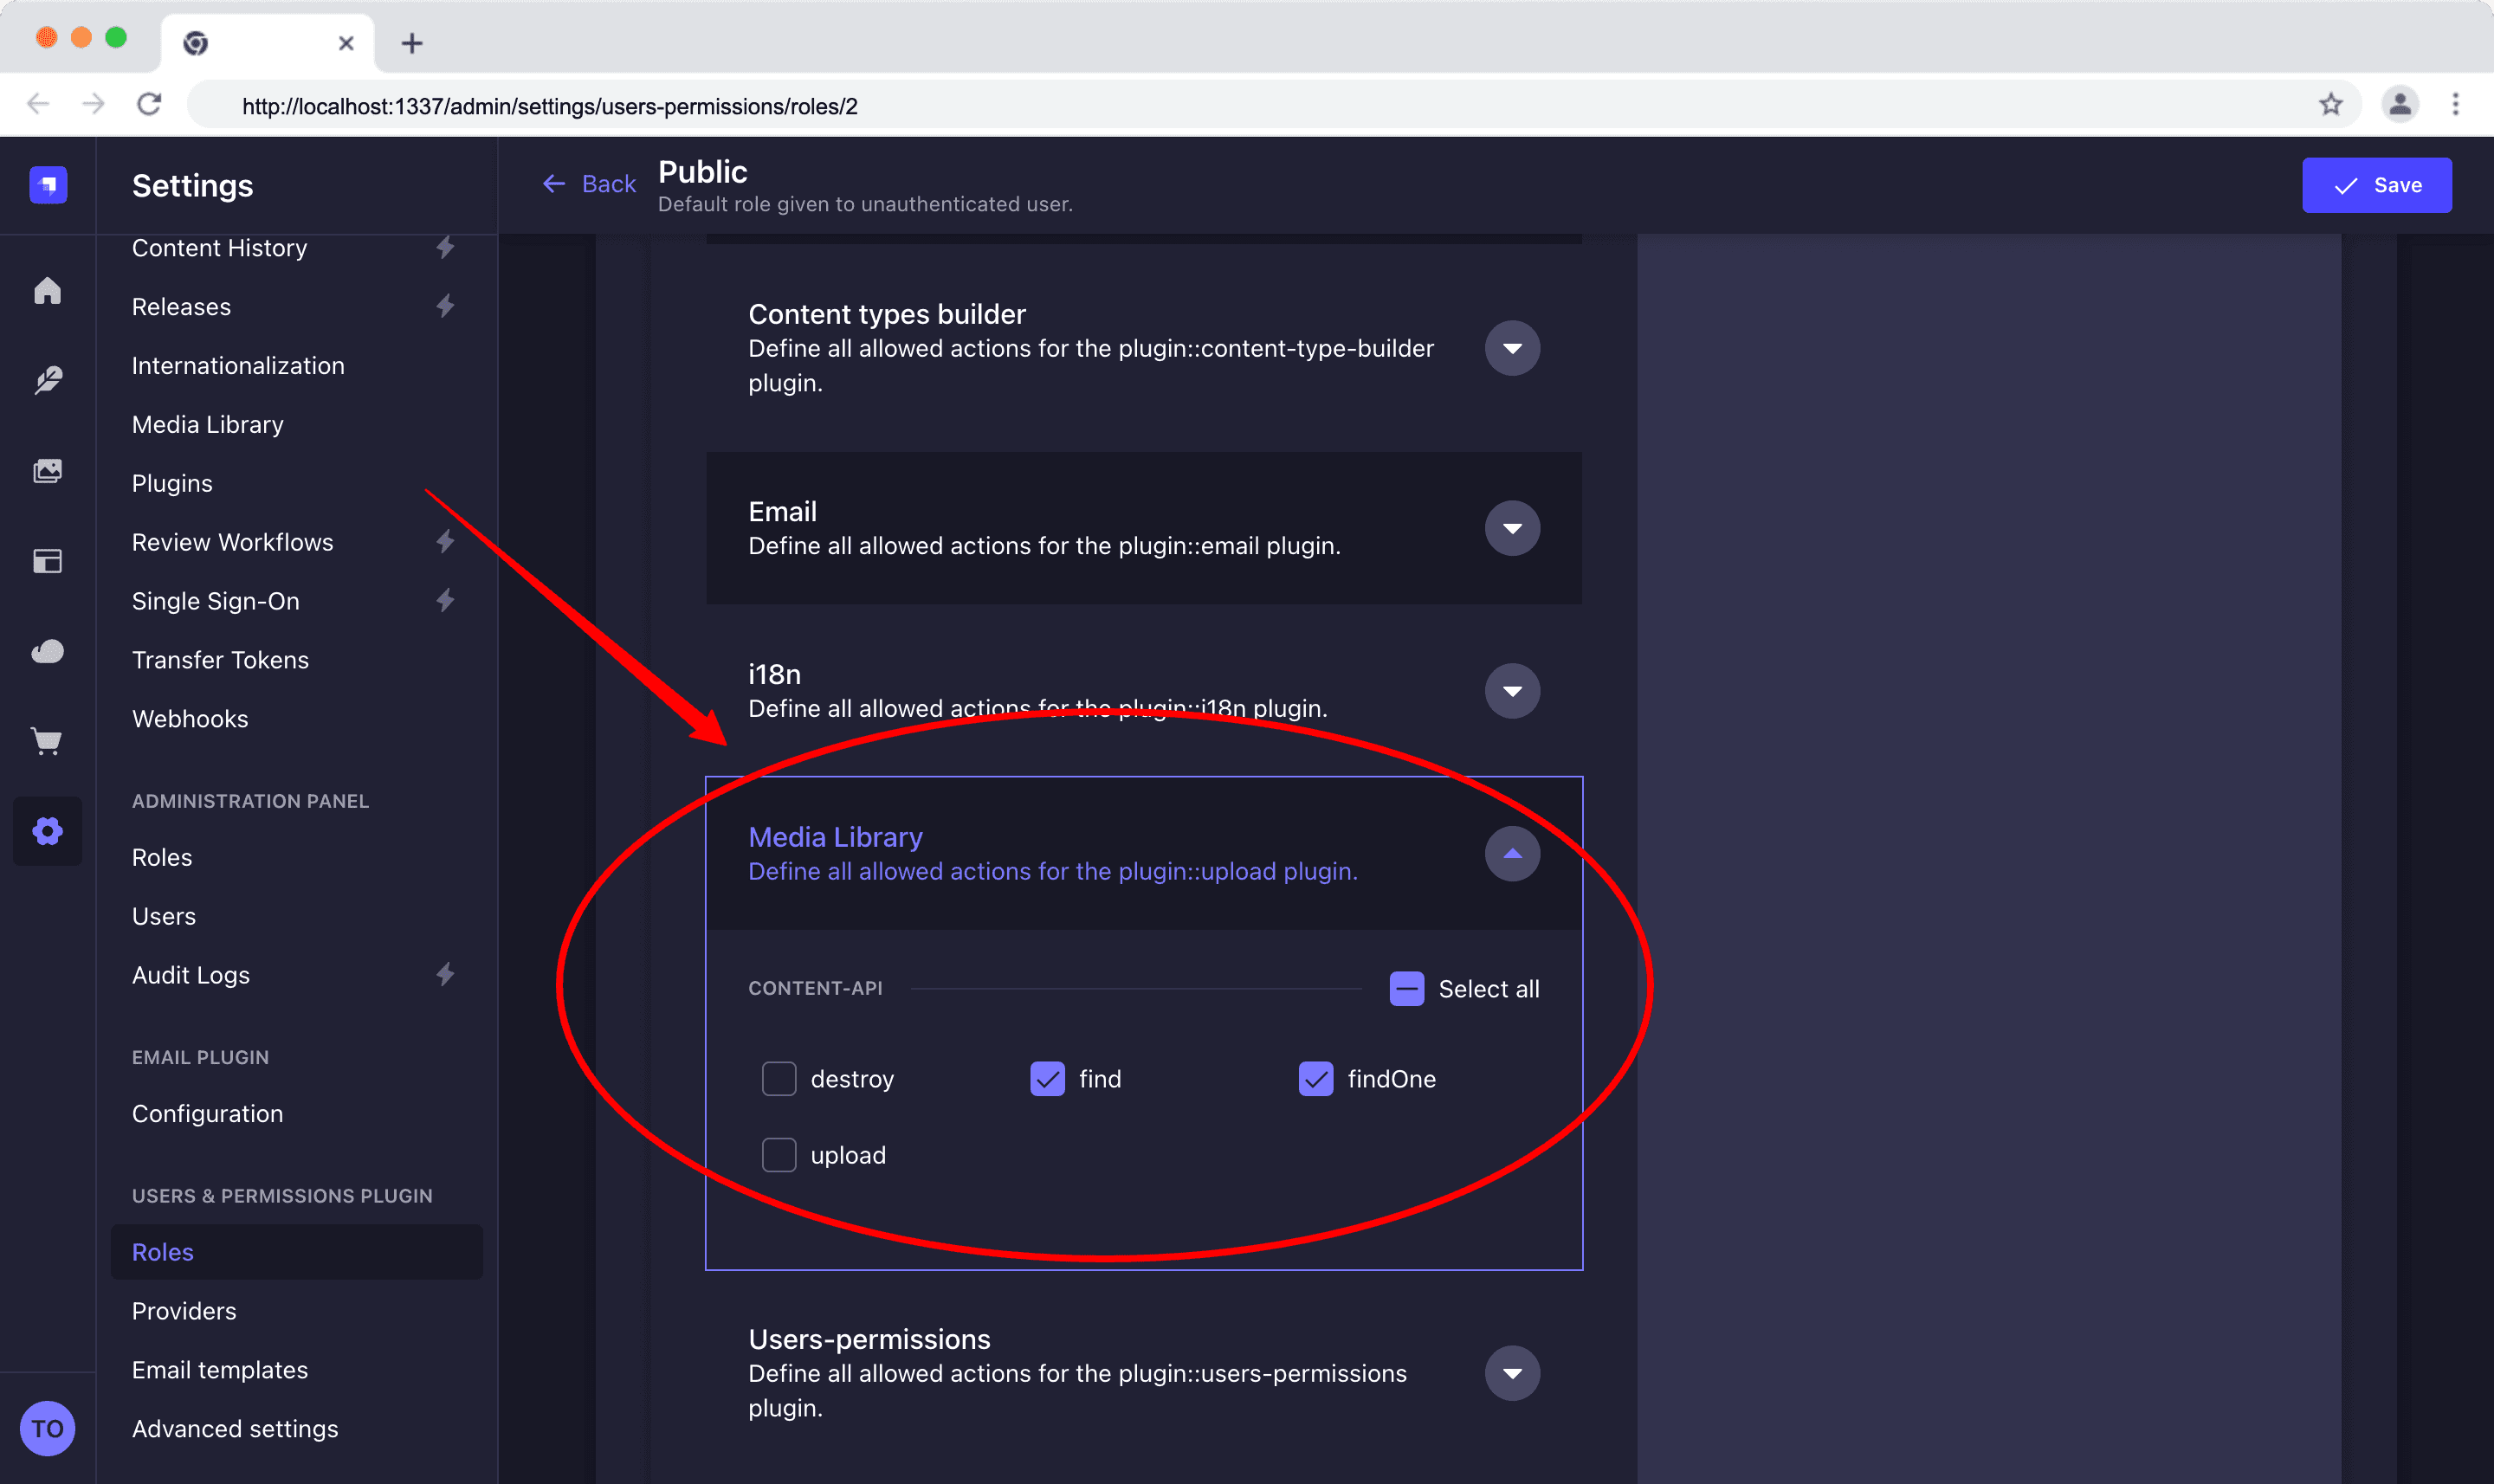
Ensure you also enable API permission for the media library.
Set Up a Next.js Frontend
Create a Next.js App
Start by creating a Next.js application.
npx create-next-app frontendAfter installation, start your Next.js frontend by running the command below:
npm run devOpen the URL http://localhost:3000 to view your frontend as shown below:
Install Tiptap in Next.js
- Install Tiptap
npm install @tiptap/react @tiptap/pm @tiptap/starter-kit@tiptap/react: for Tiptap React components.@tiptap/pm: wrapper package for ProseMirror.@tiptap/starter-kit: Contains all the basic Tiptap extensions such as bold, italic, strike, code, etc.
Install Tiptap Dependencies
For us to use Tiptap, we need to install some dependencies.
npm install @tiptap/extension-table @tiptap/extension-table-row @tiptap/extension-table-cell @tiptap/extension-table-header @tiptap/extension-imageHere are the dependencies we installed above:
@tiptap/extension-table,@tiptap/extension-table-row,tiptap/extension-table-cell,@tiptap/extension-table-header: Extensions for tables.@tiptap/extension-image: Image extension.
Install Strapi Client Library
The Strapi client library helps you interact with your Strapi backend.
npm install @strapi/clientFetch and Render Tiptap Content in Next.js
Step 1: Create a Utility File
Inside the ./app folder, create a utils.tsx file and add the following code:
// Path: ./app/utils.tsx

import { strapi } from "@strapi/client";

const sdk = strapi({ baseURL: "http://localhost:1337/api" });
const STRAPI_URL = "http://localhost:1337";

const fixImageUrls = (node) => {
  if (node.type === "image" && node.attrs?.src?.startsWith("/uploads")) {
    node.attrs.src = `${STRAPI_URL}${node.attrs.src}`;
  }
  if (node.content) {
    node.content.forEach(fixImageUrls);
  }
  return node;
};

export { sdk, STRAPI_URL, fixImageUrls };
This utility file above sets up and exports the Strapi API client, the base server URL, and a helper function that recursively walks TipTap JSON content nodes to rewrite relative image paths into full URLs.
We will use exports in the following sections.
Step 2: Create Custom CSS for Tiptap Content
Update the ./app/globals.css file with your custom CSS.
Here is how it should look:
/* Base prose container */
.tiptap-content {
  font-family: system-ui, -apple-system, sans-serif;
  font-size: 1rem;
  line-height: 1.75;
  color: #1a1a1a;
  max-width: 65ch;
  margin: 0 auto;
}

/* Headings */
.tiptap-content h1 {
  font-size: 2.25rem;
  font-weight: 800;
  line-height: 1.2;
  margin: 2.5rem 0 1rem;
  letter-spacing: -0.02em;
}


/* Other CSS values */Step 3: Fetch Content from Strapi Backend
Inside the ./app/page.tsx file, add the following code:
import React from "react";
import Link from "next/link";
import { sdk, STRAPI_URL } from "./utils";
import Image from "next/image";

const getAllPosts = async () => {
  const { data } = await sdk.collection("blogs").find({
    populate: ["banner"],
  });
  return data;
};

export default async function page() {
  const blogPosts = await getAllPosts();
  return (
    <div className="blog-page">
      <h1>Blog Posts</h1>
      <p>
        <i>
          {" "}
          Welcome to a collection of stories from the quieter corners of
          software engineering.
        </i>
      </p>
      <div className="blog-grid">
        {blogPosts.map((post) => (
          <li key={post.documentId} className="blog-card">
            <Image
              src={`${STRAPI_URL}${post.banner.url}`}
              alt={post.title}
              width={400}
              height={180}
            />
            <Link href={`/${post.documentId}`}>{post.title}</Link>
          </li>
        ))}
      </div>
    </div>
  );
}
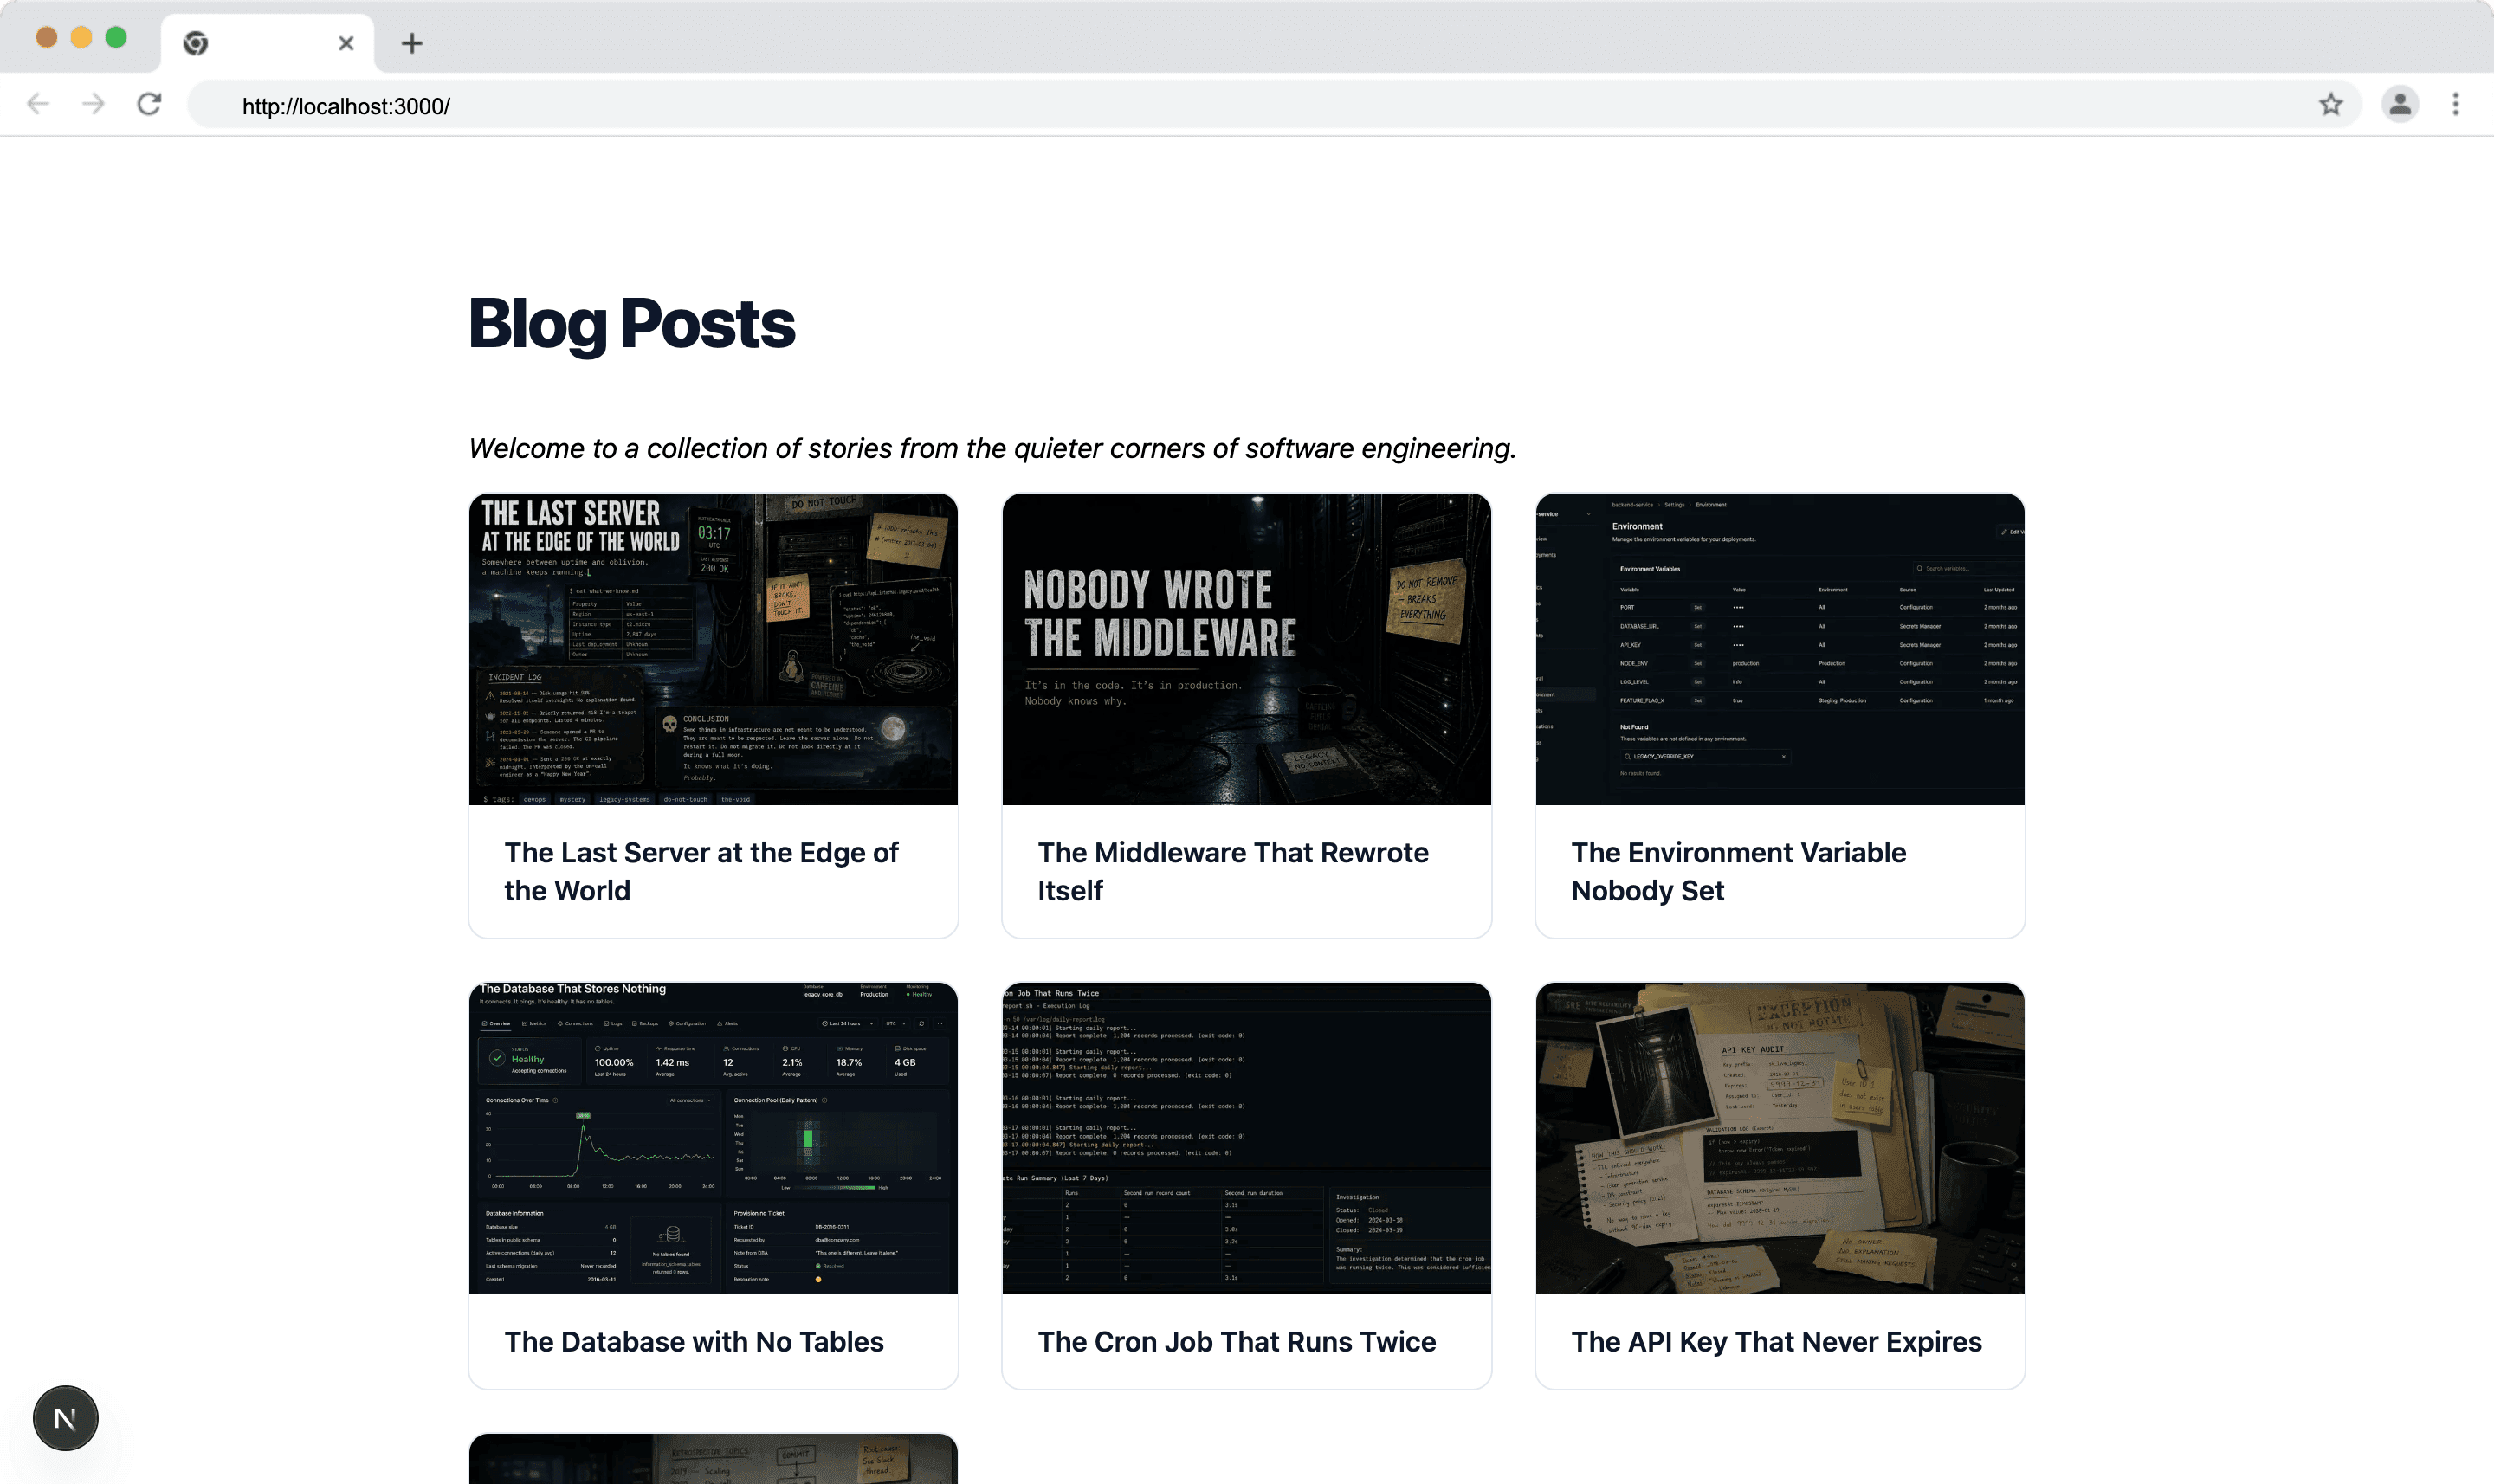
The page above fetches all blog posts from Strapi using the sdk we created previously and renders them as a linked list, each pointing to its own detail page by documentId as shown below.
Fetch and Render TipTap Content in Next.js
Navigate to the ./app folder, and create a new folder called [id]. Inside the [id] folder, create a page.tsx file and add the following code:
// Path: frontend/app/[id]/page.tsx

"use client";

import { use, useEffect, useState } from "react";
import { sdk, fixImageUrls, STRAPI_URL } from "../utils";

import { EditorContent, useEditor } from "@tiptap/react";
import StarterKit from "@tiptap/starter-kit";
import { Table } from "@tiptap/extension-table";
import { TableRow } from "@tiptap/extension-table-row";
import { TableCell } from "@tiptap/extension-table-cell";
import { TableHeader } from "@tiptap/extension-table-header";
import { Image } from "@tiptap/extension-image";

import NextImage from "next/image";

export default function page(props: PageProps<"/id">) {
  const { id } = use(props.params);
  const [post, setPost] = useState<{
    title: string;
    banner: string;
    content: any;
  } | null>(null);

  useEffect(() => {
    const fetchSinglePost = async () => {
      const articles = sdk.collection("blogs");
      const { data } = await articles.findOne(`${id}`, {
        populate: ["banner"],
      });

      const parsed = JSON.parse(data.content);
      setPost({
        title: data.title,
        banner: data.banner.url,
        content: fixImageUrls(parsed),
      });
    };

    fetchSinglePost();
  }, [id]);

  const editor = useEditor(
    {
      extensions: [StarterKit, Table, TableRow, TableCell, TableHeader, Image],
      content: post?.content,
      editable: false,
      immediatelyRender: false,
    },
    [post?.content],
  );

  return (
    <div className="tiptap-content">
      <h1>{post?.title}</h1>
      {post?.banner && (
        <NextImage
          src={`${STRAPI_URL}${post?.banner}`}
          alt={post.title ?? ""}
          width={1280}
          height={720}
        />
      )}
      <EditorContent editor={editor} />
    </div>
  );
}
This client component above fetches a single blog post by ID from Strapi, fixes its image URLs, then renders the content in a read-only TipTap editor.
use(props.params)— unwraps the route params to extract the post ID from the URL.useEffect+fetchSinglePost— fetches a single blog post from Strapi by id, populating thebanner, then consolidates thetitle,bannerURL, and parsedcontentinto a single post state object.fixImageUrls— walks the parsed TipTap JSON and rewrites relative image paths to absolute Strapi URLs so they render correctly in the editor.useEditor— initializes a read-only TipTapeditorinstance with table and image support, reinitializing wheneverpost.contentchanges.NextImage— renders the post's banner image using Next.js's optimized image component, conditionally shown only when a banner URL exists.
✋ NOTE: If you want to apply syntax highlighting, then you need to use the CodeBlockLowlight extension.
GitHub Repository
Here is the complete code for Strapi and Tiptap integration.
Awesome, great job!
Strapi Open Office Hours
If you have any questions about Strapi 5 or just would like to stop by and say hi, you can join us at Strapi's Discord Open Office Hours Monday through Friday at 12:30 pm - 1:30 pm CST: Strapi Discord Open Office Hours
For more details, visit the Strapi documentation and TipTap documentation.
Frequently Asked Questions
TipTap is a headless, framework-agnostic editor built on ProseMirror. It offers extensive customization, real-time collaboration support, and works with React, Vue, and vanilla JavaScript.
Install the @notum-cz/strapi-plugin-tiptap-editor plugin, configure your toolbar presets in config/plugins.ts, assign the "Rich Text (Tiptap)" custom field to your content type in the Content-Type Builder, then fetch and render the stored ProseMirror JSON on your frontend using TipTap's useEditor or generateHTML.
TipTap does support real-time collaboration through its Hocuspocus extension, but this is not covered by the Strapi plugin and would require a separate custom implementation beyond what this integration provides.
You customize TipTap's toolbar by defining presets in config/plugins.ts — each preset is a named configuration where you explicitly set the features you want to true, such as bold, table, or mediaLibrary, and any feature you omit or set to false simply won't appear in the toolbar for that field.
TipTap can output JSON (ProseMirror document format) or HTML. JSON provides more flexibility for rendering across platforms, while HTML is simpler for basic web display.